1. Activate akaBot Center
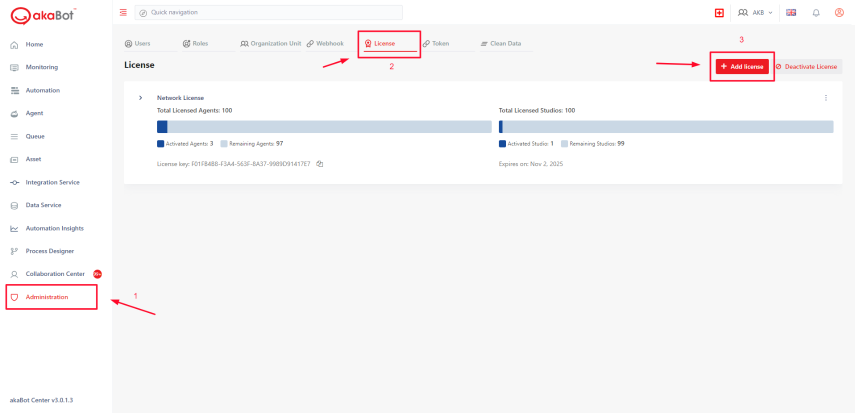
Step 1 - Open your browser. Navigate to akaBot Center using your Center URL or localhost:8080. After successful login, choose Administration on the left menu bar -> Choose License option and click Add License.
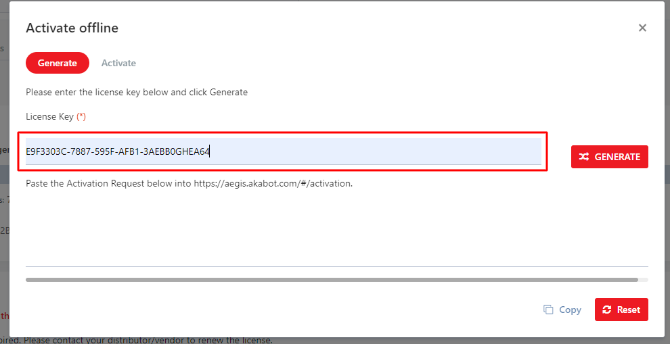
Step 2:
- Fill in the License Key field with the License Key you received from the licensing email.
- Click Generate.
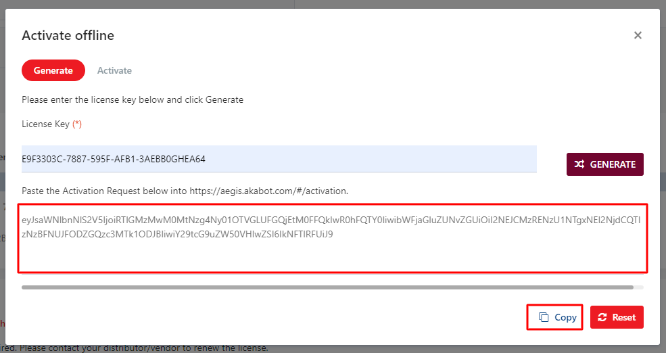
Step 3: Copy the Activation Request below and open the link: https:aegis.akabot.com/#/activation
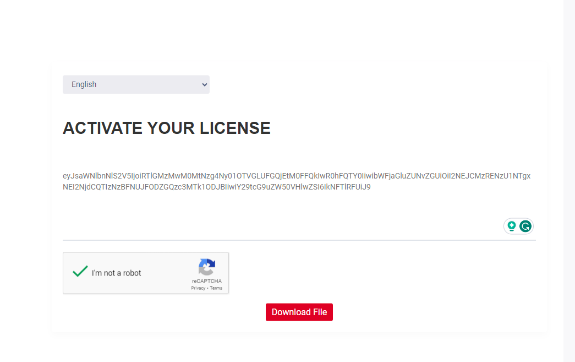
Step 4: Paste it into the box -> Click download file
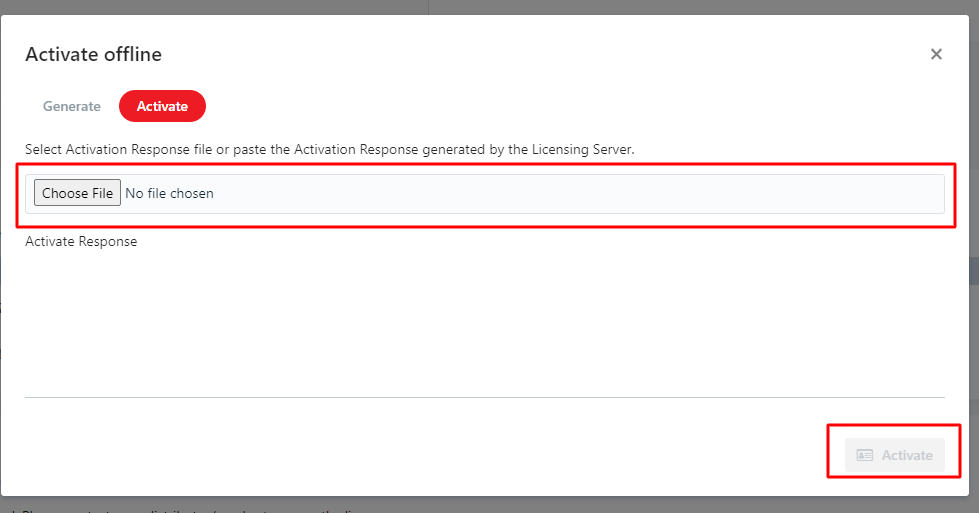
Step 5: Upload the file you've downloaded in the Activate tab in Center -> Click Activate
You have completed all the steps to activate akaBot Center.
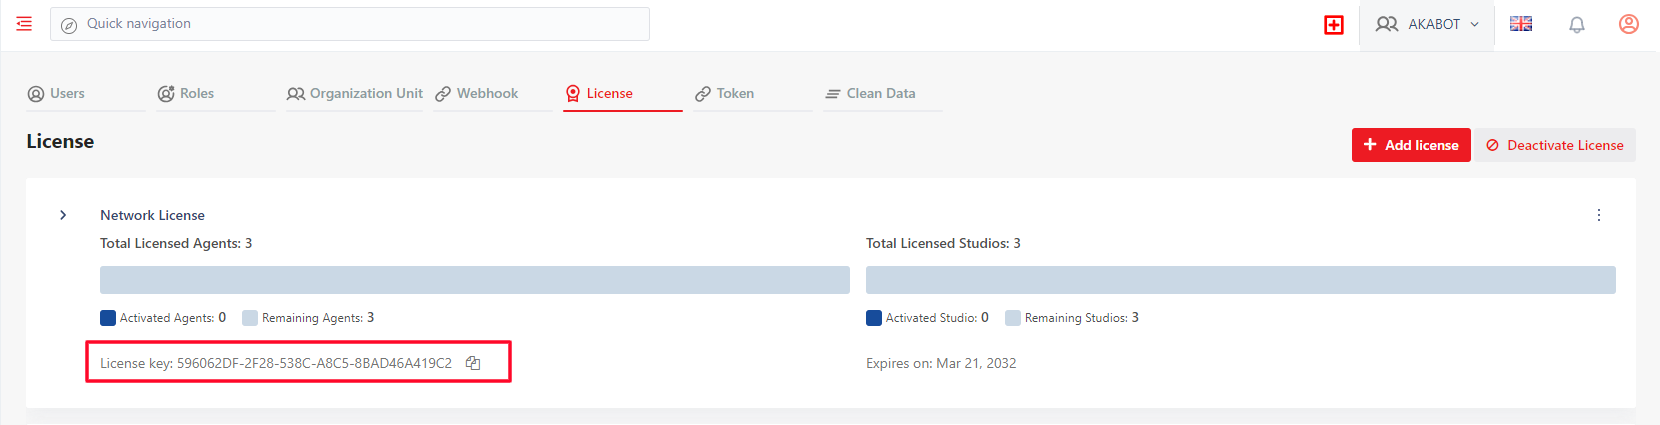
Step 6: After activating akaBot Center successfully, the akaBot Center will automatically generate a key to activate Studio and Agent latter. Please copy this before activating akaBot Studio and Agent.
2. Activate akaBot Studio
If you have your own akaBot Center, please make sure that your akaBot Studio computer has an active connection to your akaBot Center.
If your network requires you to connect to the Internet or akaBot Center through a Proxy server, make sure that you have Proxy information before activation.
After activating your akaBot Center, please follow the steps below to activate your akaBot Studio.
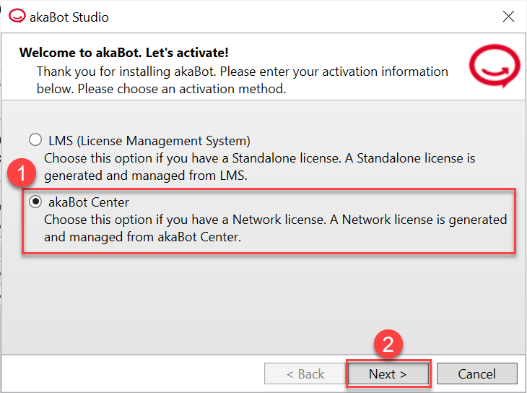
Step 1 - Start the Studio. In installing windows, choose option “akaBot Center” then hit button “Next”.
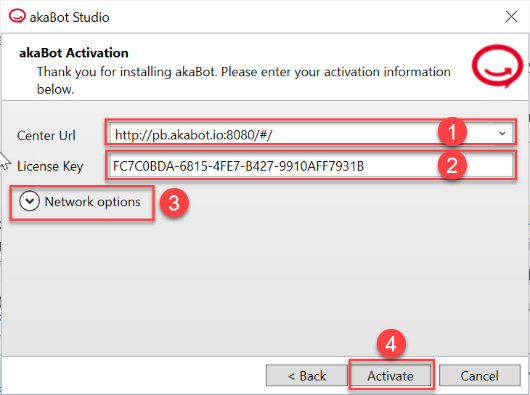
Step 2 – Fill license information:
- Center URL: Your akaBot Center’s URL
- License Key: Please enter the license key automatically generated after activating akaBot Center. (At Step 6, Part 1 - Activate akaBot Center)
- Network Options (Optional): If you use Proxy Server, please fill in the Proxy Info under Network Options.
- Hit button “Activate”
After successful activation, akaBot Studio shows below message:
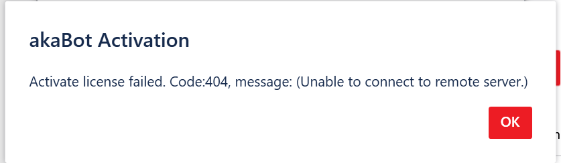
If below error message appears, please check your network connection.

3. Activate akaBot Agent
If you have your own akaBot Center, please make sure that your akaBot Studio computer has an active connection to your akaBot Center.
If your network requires you to connect to the Internet or akaBot Center through a Proxy server, make sure that you have Proxy information before activation.
3.1. Activate akaBot Agent
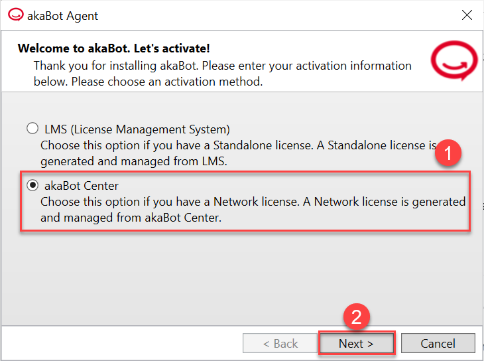
Step 1 - Start the Agent. In installing windows, choose option “akaBot Center” then hit button “Next”.
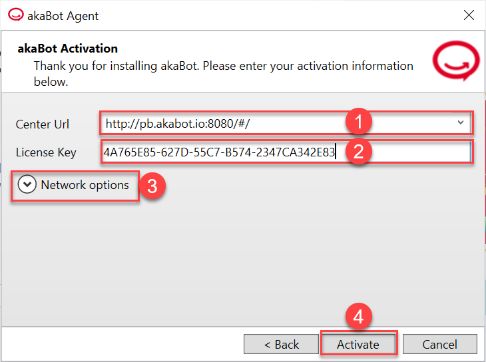
Step 2 – Fill license information:
- Center URL: Your akaBot Center’s URL
- License Key: License Key: Please enter the license key automatically generated after activating akaBot Center. (At Step 6, Part 1 - Activate akaBot Center)
- Network Options (Optional): If you use Proxy Server, please fill in the Proxy Info under Network Options.
- Hit button “Activate”
After successful activation, akaBot Agent shows below message:
If below error message appears, please check your network connection.
3.2. Connect akaBot Agent with akaBot Center
After activation, your akaBot Agents have to be connected with akaBot Center to be all set for action.
After activating your akaBot Agent, please follow the steps below to connect it with akaBot Center
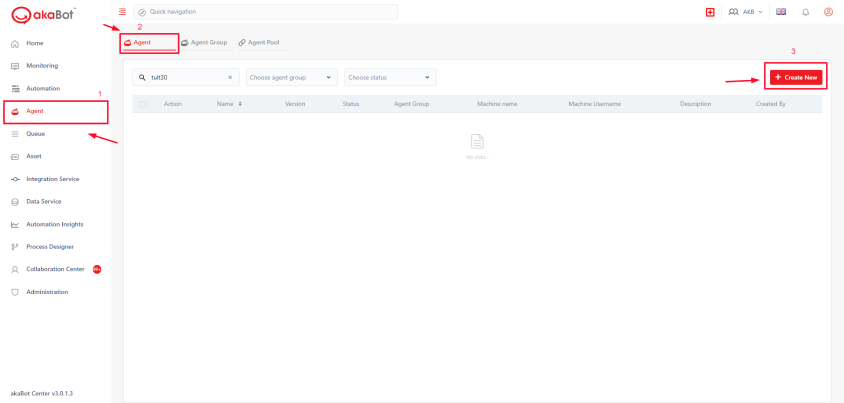
Step 1 - Open your browser. Navigate to akaBot Center using your Center URL or localhost:8080. After successful login, choose Agent on the left menu bar -> Choose Agent option and click Create New.
Step 2: After clicking, the system shows a popup allowing you to fill in properties to create/edit a new Agent. You need to fill in all the necessary info in the form below.
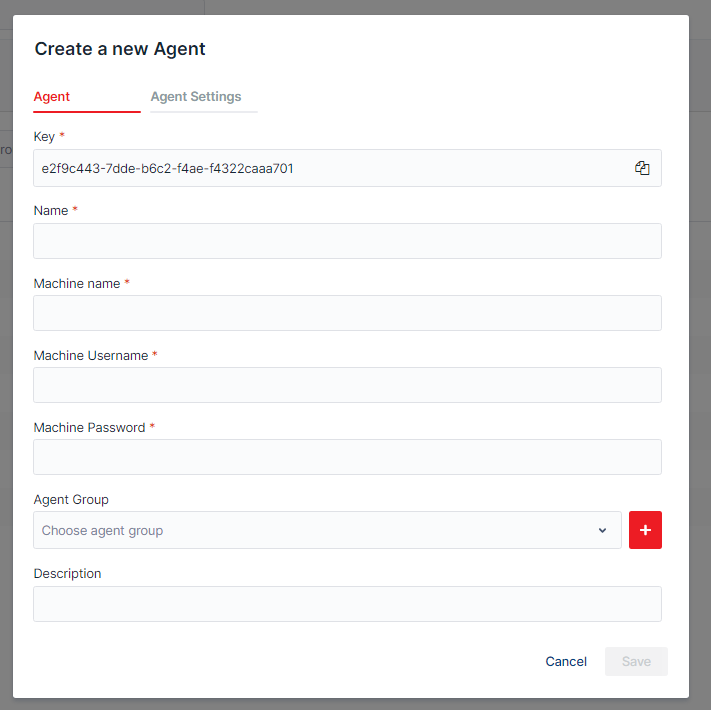
Note: Please Copy the auto-generated key at the top field of this form. You need to use this key right after creating the Agent.
Agent tab
| No | Column /Label | Description | Type | Maximum | Is Mandatory? | Input Requirement |
|---|
| 1 | Key | This is the identification of one agent. You will input this key into the Agent Key field in your local Agent. | String | 50 char | Yes | This field is
auto-generated by the system |
| 2 | Name | Enter the name of the agent you want to create/edit | String | 50 char | Yes | |
| 3 | Machine Name | Enter the name of the computer on which the Agent is deployed | String | 50 char | Yes | |
| 4 | Machine Username | Enter the username used to log in to the computer which is mentioned above | String | 50 char | No | |
| 5 | Machine Password | Enter the password used to log in to the computer which is
mentioned above | String | 255 char | No | |
| 6 | Agent Group | Choose an existing Agent Group by clicking the dropdown list or create a new group for your new Agent by clicking the "+" button | Dropdown list, SingleChoice | | Yes | |
| 7 | Description | Enter the description of
the agent you want to create/edit | String | 500 char | No | |
Agent Settings Tab (Optional)
| No | Column /Label | Description | Type | Maximum | Is Mandatory? | Input Requirement |
|---|
| 1 | Console / RDP | akaBot executes workflow in an interactive Windows session. There are two types of Windows sessions the Robot can start:
Console Session
RDP Session | SingleChoice | | Yes | |
| 2 | Login To Console | This option allows the Agent to connect to a:
Console session Only
available if you chose
RDP | Checkbox | | No | |
| 3 | Font Smoothing | This option enhances text recognition. Only available if you chose RDP | Checkbox | No limit | Optional | |
| 4 | Resolution Width / Height / Depth | This option allows users to set a custom resolution if the
automation process is required. Only available if you
chose rdp | Int32
(Number) | | Optional | Greater than 0 |
| 5 | Others | Other specific parameters for this Agent | String | No limit | Optional | |
After filling out the form, you click the Save button to record the Agent to the system.
Step 3: Open your akaBot Agent again, choose the  button
Step 4: After clicking, the system shows a popup allowing you to fill in properties
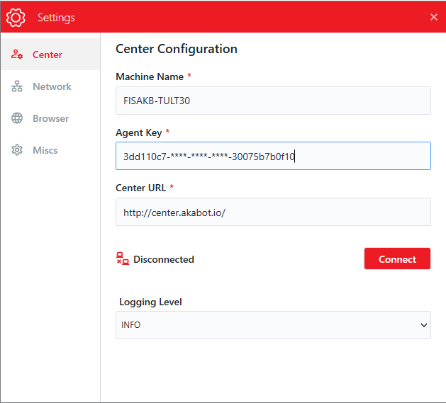
- Machine name: the computer name of the current computer. The machine name is automatically pre-populated for you.
- Agent key: the key was auto-generated on akaBot Center when you created your agent in Step 2 (You've copied it in Step 2, If not copied it yet, don't worry, please open and view your Agent on akaBot Center to copy).
- Center URL: Your akaBot Center URL.
Step 5: –Click Connect to perform the connecting to the akaBot Center.
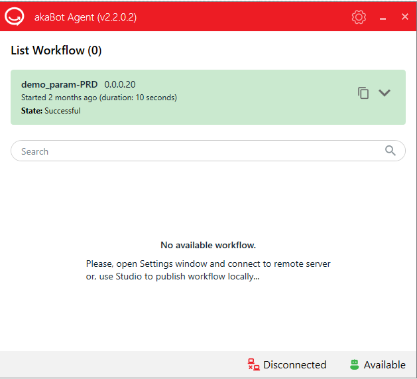
After connecting successfully, the status of akaBot Center turns to be Connected.
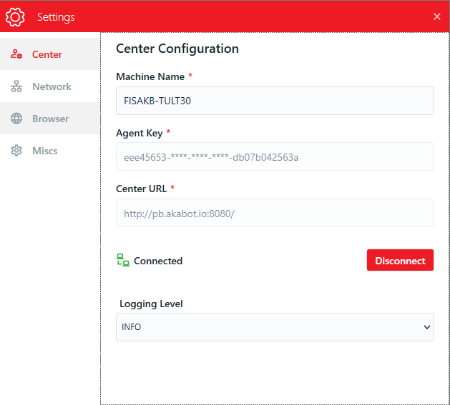
If the bot is already connected to the akaBot Center, you can disconnect at any time by clicking the Disconnect button.