Introduction
I. Purpose
akaBot Studio is one of 3 components of akaBot suite.
akaBot Studio is a solution for application integration, business processes automation. It provides a wide range of activities to model almost of the business processes within one organization – from simple to complex.
The tool pre-builds hundreds of activities to perform the actions of automations on web, on desktop, working with data base, generating the PDF files, sending emails…
This document aims to guide you how to use the akaBot Studio.
II. Audience
This document targets to the developers who will use the akaBot Studio to develop the automating business process.
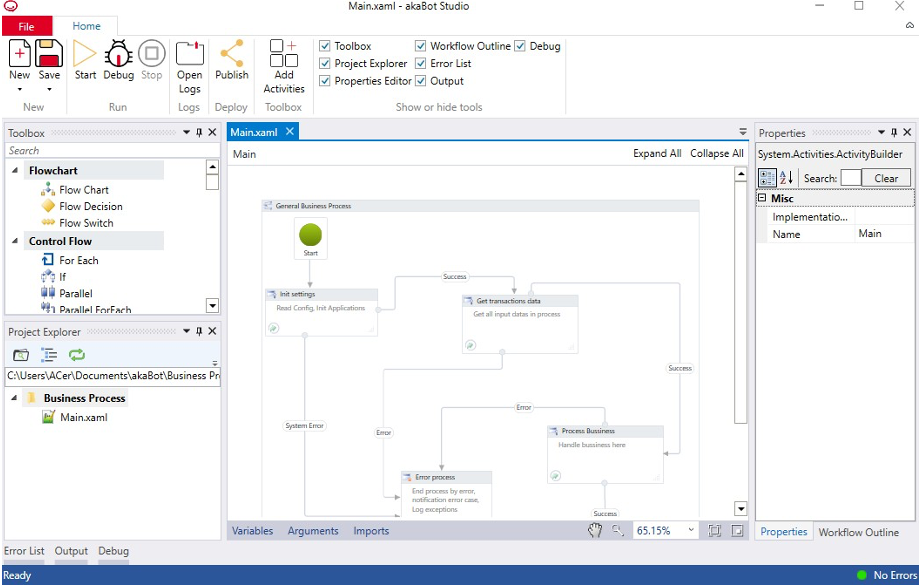
akaBot Studio User Interface
akaBot Studio contains multiple panels which allows you to easily access to specific functionalities as below:
| # | Panel | Description |
|---|---|---|
| 1 | File | Display the functionalities which you can use to operate on the file. |
| 2 | Home | Display the functionalities which you can use to work on the automation projects. |
| 3 | Actitvities | Show all available activities which can be added to your automation projects. The activities are grouped into different categories such as: Excel, XML, ControlFlow, Primitives, Care, HTTP... |
| 4 | Designer | Display you automation projects in a visual manner. It allows you to access, configure the variables, value inside the activities to make them do the automation actions. |
| 5 | Properties | Display the properties of current focused activities, enable you to change the value of properties and automatically save new value when focusing out. |
| 6 | Workflow Outline | Display the project hierarchy of current project. |
| 7 | Error List | Display the error list with error details while running the project. |
| 8 | Output | Display the output of the project. |
| 9 | Debug | Display the variable values and other debugged information. |
I. File Panel
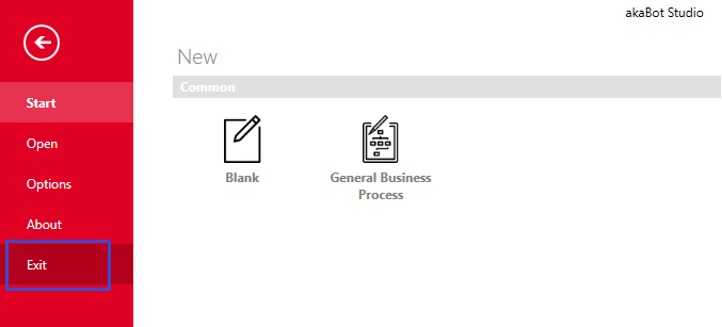
To access the File panel, click File at the top left corner of the screen:
The User Interface of File panel is as below:
The File panel allows you to perform some below actions:
| # | Tab | Description |
|---|---|---|
| 1 | New | Create a new workflow project. Refer to section: 2.2.1 Create a new workflow project for detailed user guide. |
| 2 | Open | Open an existed workflow project. Refer to section: 2.2.2 Open a project for detailed user guide. |
| 3 | Options | Change some configuration parameters related to: Debugging, References Directories. Refer to section: 2.2.3 Change configuration options for detailed user guide. |
| 4 | About | View the version details of akaBot Studio Refer to section: 2.2.4 View version details for detailed user guide. |
| 5 | Exit | Close akaBot Studio Refer to section: 2.2.5 Close akaBot Studio for detailed user guide. |
1. Create a new workflow project.
Each business process may be represented by an akaBot project which enables you to automate rule- based processes, by giving you full control of the execution order and the relationship between a set of predefined activities in akaBot Studio.
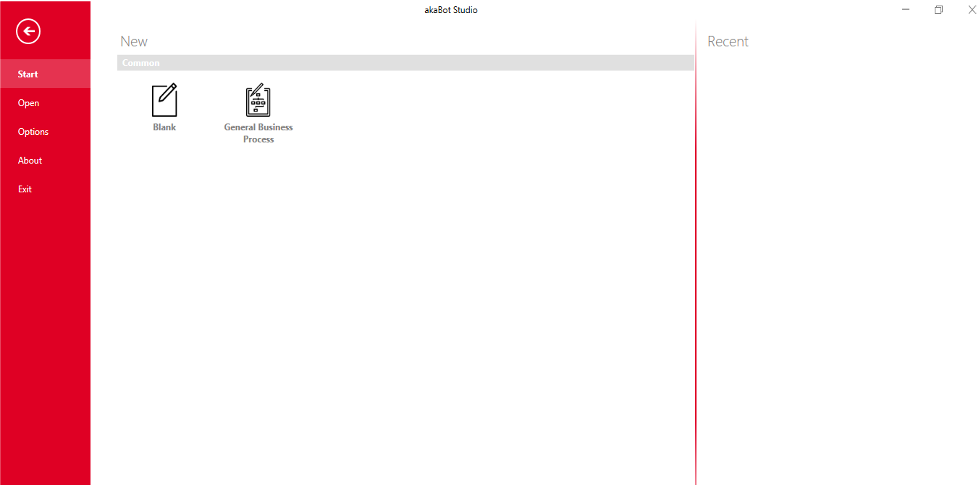
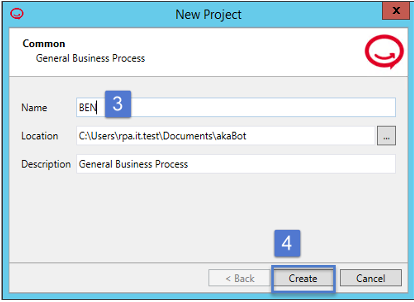
To create a new workflow project, you should follow below actions:
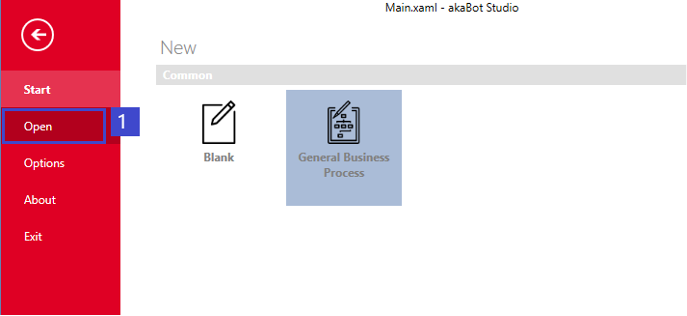
Step 1: Click ‘New’
Step 2: Choose type workflow: Blank or General Business Process
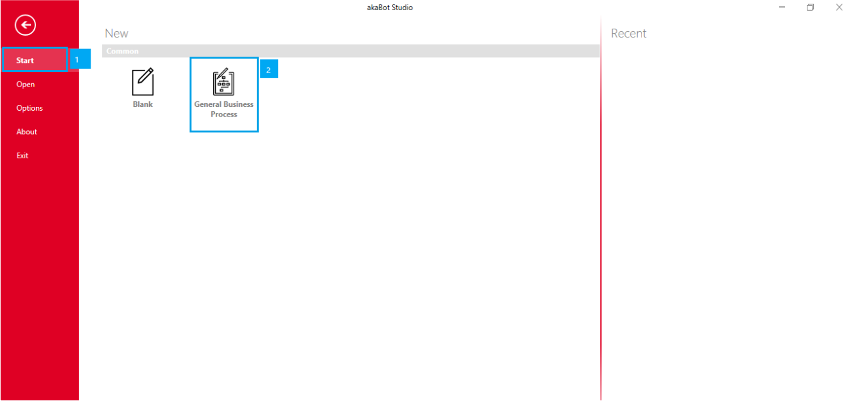
Step 3: Enter name project
Step 4: Click button ‘Create’ to finish.
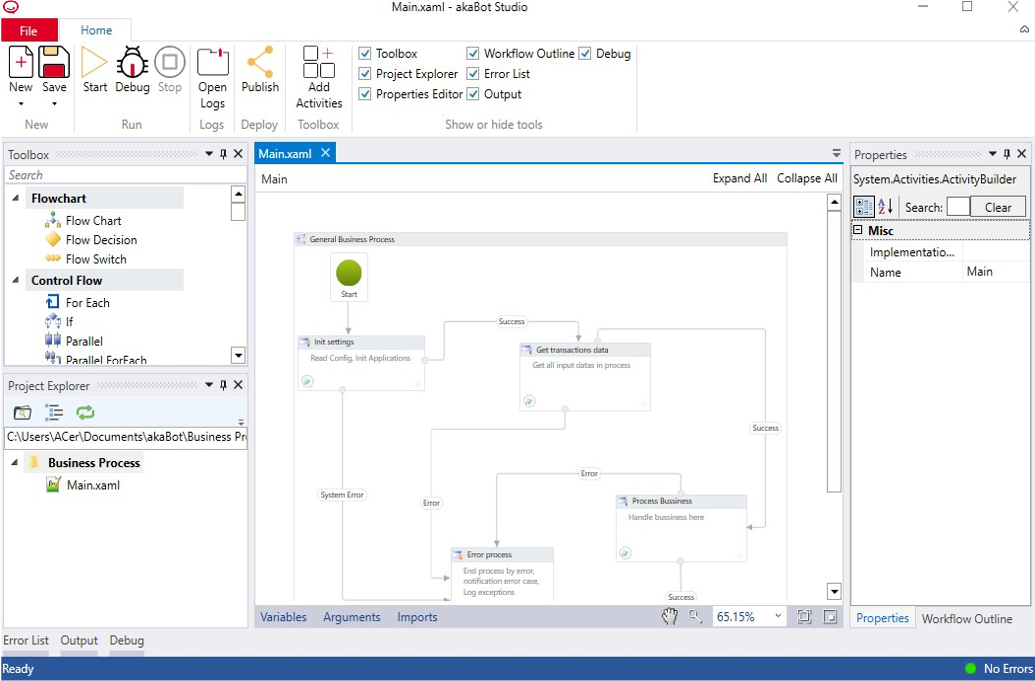
After clicking, by default a sequence activity will be shown up in the Designer panel allowing you to start developing your project.
2. Open a Project
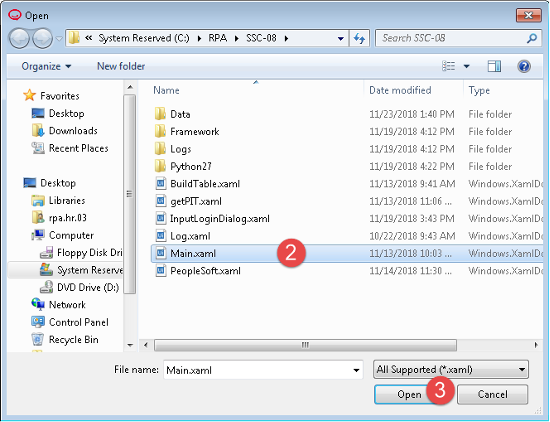
To open an existed workflow project, you can follow below actions:
Step 1: Click Open
Step 2: Choose file with format file is *.xaml
Step 3: Click button ‘Open’
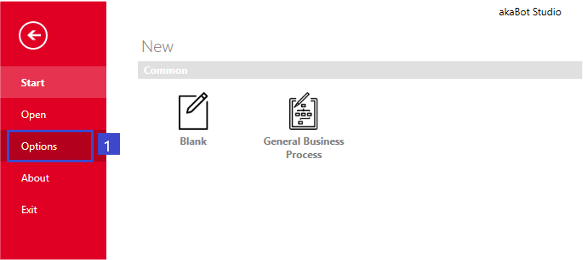
3. Change configuration options
This window to support them setup: Debug mode, and add references Directories
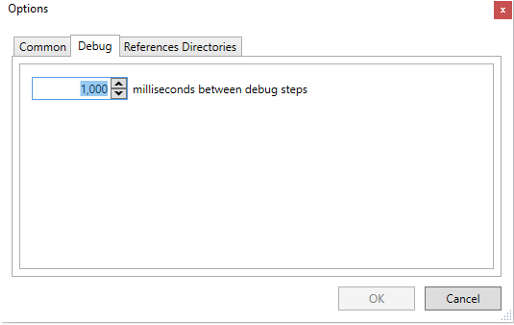
Debug
Step 1: Click ‘Options’
Step 2: Press to up or down size milliseconds between debug ste Step 3: Press button ‘Ok’ to submit the change configuration / ‘Cancel’ to close this window
and cancel this process.
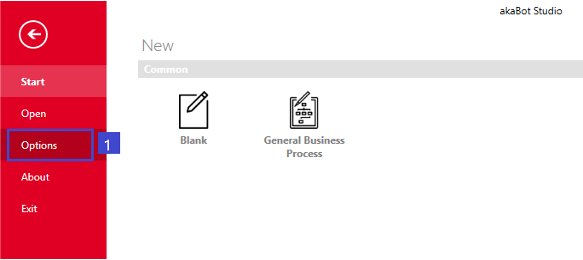
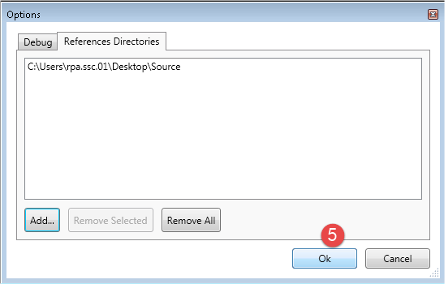
4. References Directories
Step 1: Click ‘Options’
Step 2: Choose tab ‘References Directories’
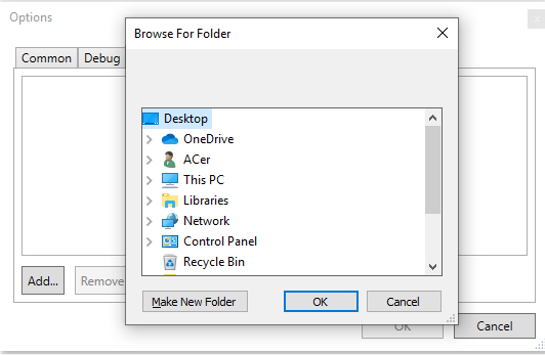
Step 3: Click button ‘Add’
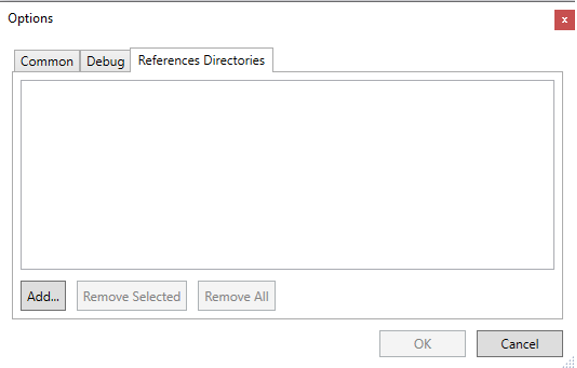
Step 4: Click ‘Ok’ to choose a folder
Step 5: Press button ‘Ok’ to submit the change configuration / ‘Cancel’ to close this window and cancel this process.
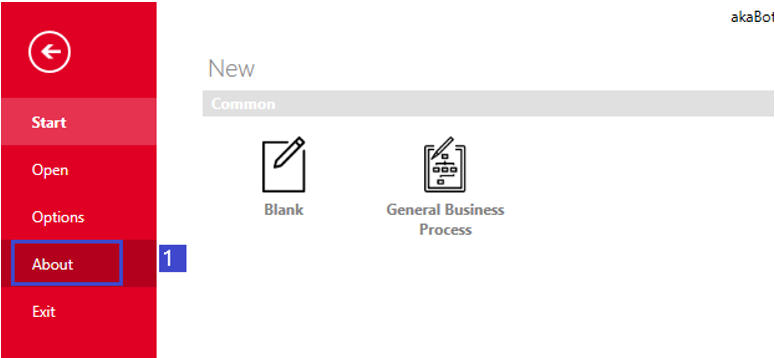
4. View the version details
You can view the version of akaBot Studio by click in tab ‘About’:
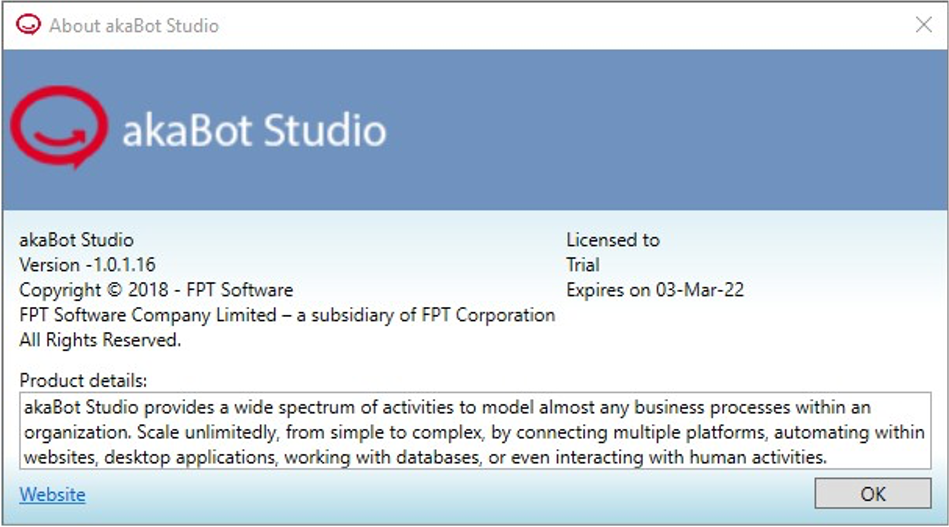
About akaBot Studio screen will be previewed Product details as below:
5. Close akaBot Studio
When click Exit, akaBot Studio will be closed.
II. Home Panel
To access the Home panel, click Home at the top of the screen:
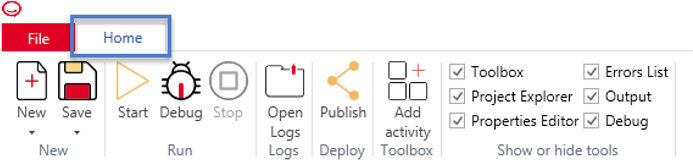
The Home panel allows you to perform some below actions: New, Save, Start, Debug, Stop, Open Logs, Publish, Add activity
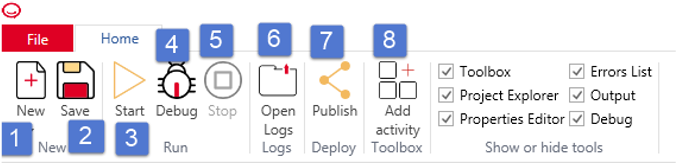
| # | Item | Description | More Details |
|---|---|---|---|
| 1 | New | Create new sequence, flowchart, State Machine | 2.2.1 New |
| 2 | Save | Save project | 2.2.2 Save |
| 3 | Start | Run BOT | 2.2.3 Start |
| 4 | Debug | Debugging is the process of identifying and removing errors from a given project | 2.2.4 Debug |
| 5 | Stop | Stop BOT when it’s running | 2.2.5 Stop |
| 6 | Open Logs | Open folder that have log file | 2.2.6 Open Logs |
| 7 | Publish | Publishing automation project | 2.2.7 Publish |
| 8 | Add activity | Adding a activity | 2.2.8 Add activity |
| 9 | Show or hide tools | Show or hide the functions window | 2.2.9 Show or hide tools |
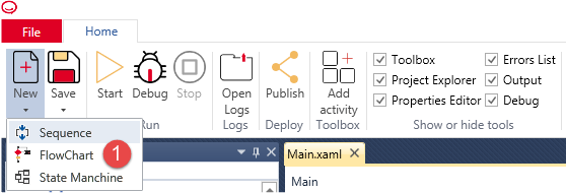
1. New
There are 3 main types of projects:
- Flowcharts - suitable to a complex business logic which needs to integrate decisions and connect activities by using multiple branching logic operators.
- Sequences - suitable to defined linear processes from one activity to another without cluttering your project.
- State Machines – suitable for very large projects which have number of states triggered by a transition condition.
In this item, you can create new these three types
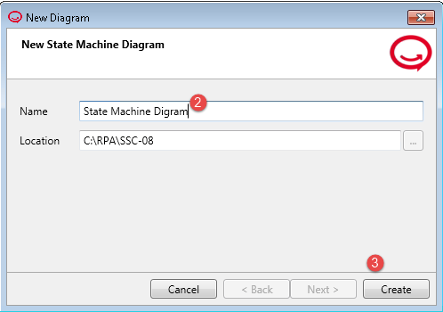
a. State machine diagram
- Step 1: Choose New + State machine diagram
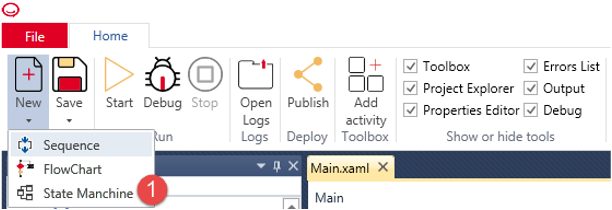
- Step 2: Enter name diagram
- Step 3: Click button ‘Create’
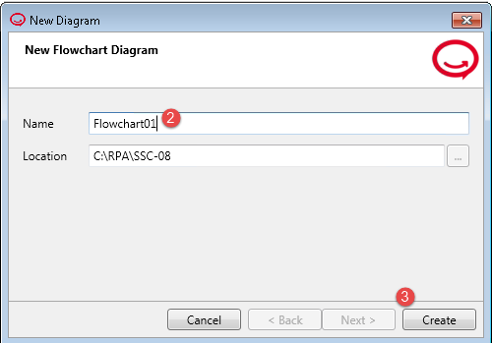
b. Flowchart
- Step 1: Click 'new' > Flow Chart
- Step 2: Enter name flowchart diagram
- Step 3: Click button ‘Create’
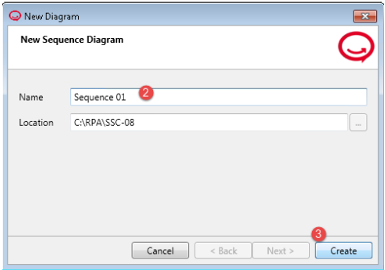
c. Sequence
- Step 1: Click 'new' > Sequence
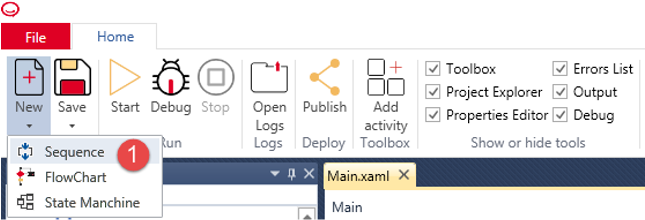
- Step 2: Enter name flowchart diagram
- Step 3: Click button ‘Create’
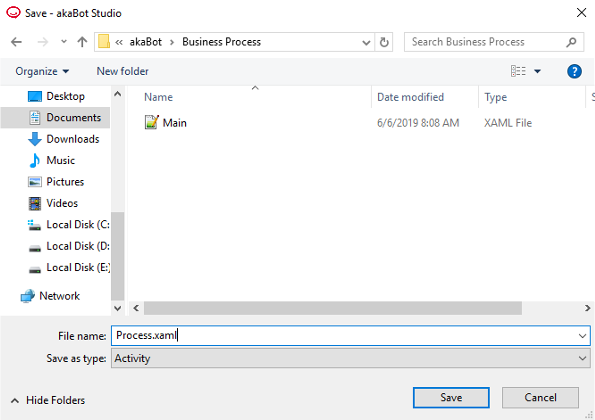
2. Save
- Step 1: Edit activity, control flow,… in project
- Step 2: Click 'Save' > Save if only save changes or Click Save as if save with different *.xaml file.
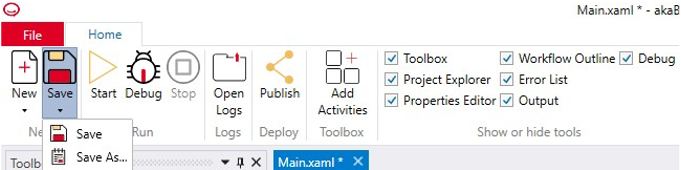
- Step 3: Enter name *.xaml file > click button Save
3. Start
Click button

to run BOT. Wait a few minutes for the BOT to finish and see result in Output Window
4. Debug
Click

to identify and remove errors from a given project. Coupled with logging, it becomes a powerful functionality that offers you information about your project and step-by-step highlighting, so that you can be sure it is error-free.
5. Stop
When starting or debugging the process, you can click

to stop this process.
6. Open Logs
Click

to open folder have log file - display details about what is happening in your project
7. Publish
- To publish an automation project:
- Step 1: Create / Open a new project.
- Step 2: In the Home ribbon tab, click Publish. Theo Publish project window opens
Step 3: In the Publish Location category, set the project to be published to Orchestrator
8. Add Activity
- To add activity
- Step 1: In the akaBot Studio click File menu, chose Options.
- Step 2: In the table Options, click References Directories tab, click Add button and chose directory containing the activity library (.dll Files) to load activities.
- Step 3: In the akaBot Studio click Add Activities. , chose activities from the list and press Add.
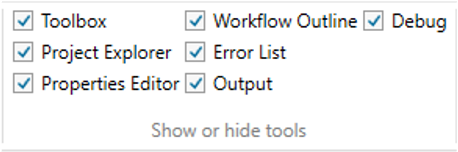
9. Show or hide tools
- Check or uncheck box to show or hide tool in screen of akaBot Studio.
III. Activities
This panel displays all the built-in activities which aid in the creation and the execution of automation projects. These activities enable robots:
- Manipulate the data by adding/extracting/reading information.
- Directly interaction with websites, windows applications…to simulate the human actions.

The activities are grouped in different categories such as: Flow chart, Control Flow, Primitives, Core, Excel, XML, Browser…
You may quickly add an activity into the project workflow by searching by activity name and drag the activity in the Designer panel.
Please refer to section III. akaBot Studio Activities for details of each activity.
IV. Designer
The Designer panel allows you to design your automation projects by designing the workflow, defining logic, creating variables/arguments or importing the namespaces.
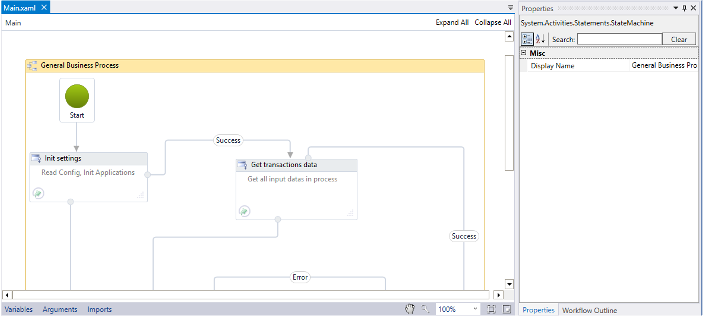
You may design the workflow or defining business logic of the workflow by using activities in Activities panel then connect these activities by the arrow.
To connect activity A to activity B, you need to click to activity A, hold the mouse and drag to the activity B to create a link (represented by an arrow) between these 2 activities.
You may set what activities will be the starting point by connecting Start activity to selected one.
Depending on the activity, you may place an activity inside another activity such as: Parallel, If, Flowchart, Sequence…
1. Create a variable
To create a variable, follow below steps:
- Step 1 - Click Variables tab.
- Step 2 – Fill variable properties.
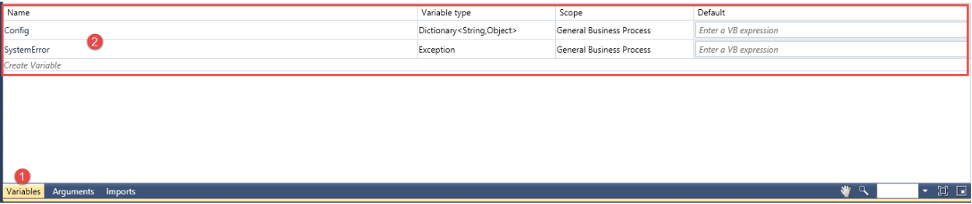
Variable Properties:
| # | Property | Desrciption |
|---|---|---|
| 1 | Name | Variable name |
| 2 | Variable Type | The type of variable: String, Int32, Boolean… |
| 3 | Scope | Scope of variable defines where the variable works in. |
| 4 | Default Value | Default value of variable. |
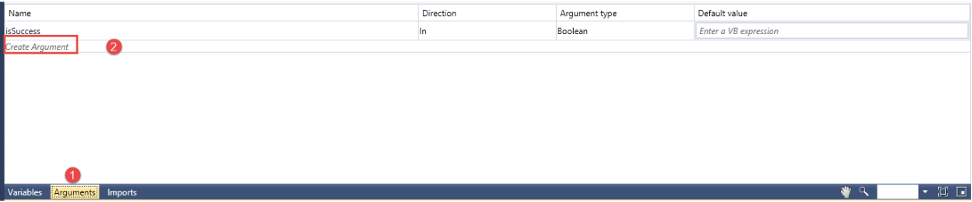
2. Create an argument
To create an argument, please follow below steps:
- Step 1 – Click Arguments tab
- Step 2 – Click Create Argument option.
The new argument will be displayed with all default values. You may customize these values for the created argument.
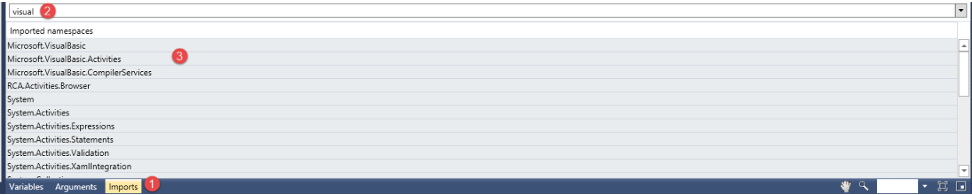
3. Import a namespace
To import a namespace, please follow below steps:
- Step 1 – Click Imports tab
- Step 2 – Find the namespace you want to import
- Step 3 – Double click the namespace to import.
V. Properties
This panel is contextual and enables you to view and change the properties of a selected activity.
- Step 1: Double click an activity in Designer panel.
Properties of that activity will be showed in Properties panel.
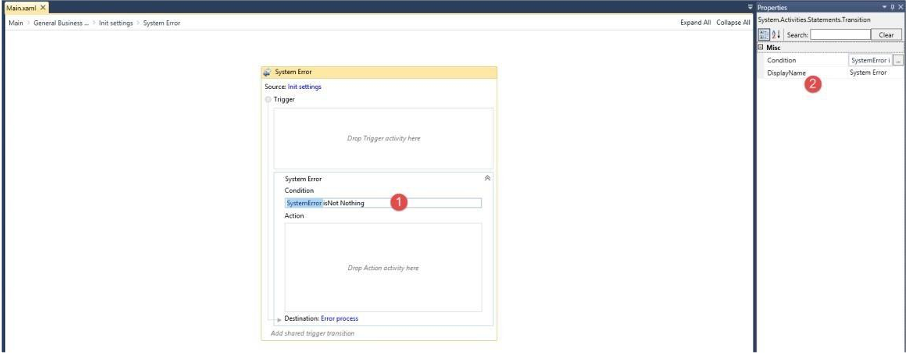
- Step 2: Change the properties
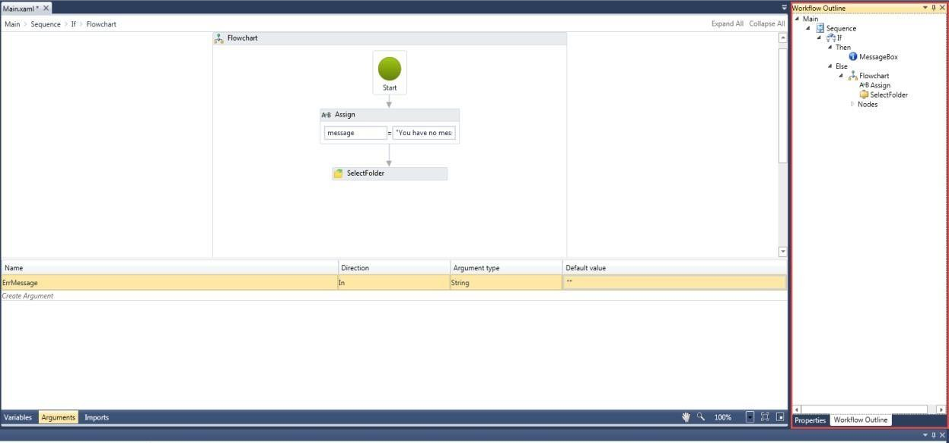
VI. Workflow Outline
This panel display the hierarchy of the workflow listing all the used activities and their connection.
You can double click on an activity to quickly open it.
VI. Verify output, error, debug
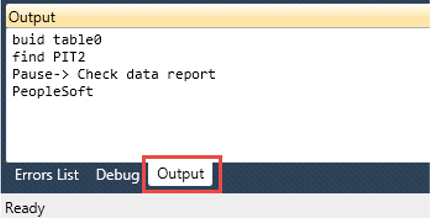
1. Verify output
When run akaBot Studio, you can see result in each step.
- Step 1: Click 'Start' to run akaBot Studio
- Step 2: Click the “Output” button at bottom left to see.
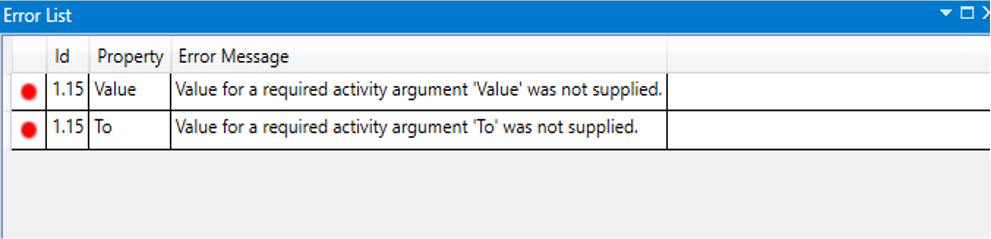
2. Verify error
Click the “Error List” button at bottom left
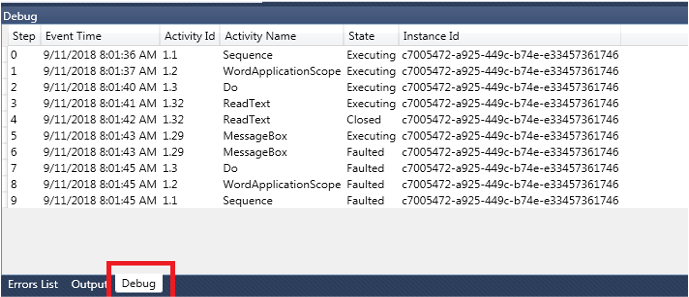
3. View debugging information
- Step 1: Choose “Debug” when running
- Step 2: Check the debugging information in the Debug tab as below:
Akabot Studio Activities
Please access the Activities section to view details about the current activities, packages and how to use them.
Publish package
After finishing developing the bot, you should publish it to local or center, this provides better version control, centralized management, easier collaboration, optimized deployment, scheduling, and monitoring capabilities for your RPA projects.
Here are the steps to publish the source code:
Prerequisite: Make sure you have akaBot Studio and akaBot Agent that are connected to the Center and your user account has appropriate permissions. You also need a project containing your source code in your local workspace.
Step 1. Open your source code project in the akaBot Studio application.
Step 2. Check your source code and ensure it meets your requirements and is free of errors.
Step 3. Once you're satisfied with your source code, click on the "Publish" button in the top-right corner of the akaBot Studio window. This will bring up the "Publish" window.

Step 4. In the "Publish" window, choose the publish location: either "Center" or "Local".
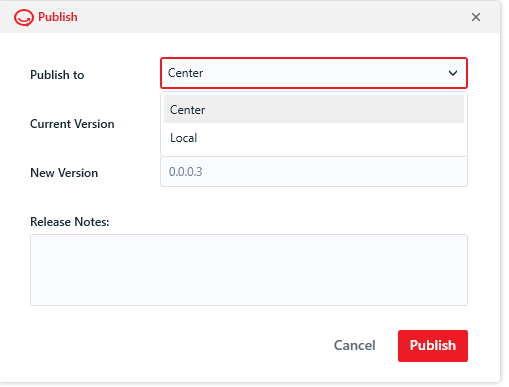
a. If you choose "Center", follow these steps:
- i. If required, add a Release Notes for your project in the appropriate fields. The version will be auto-generated you can edit it by click to the New Version field. This will help you keep track of the different versions of your project.
ii. Once you have provided all the necessary inputs, click the "Publish" button. Your project will be published to the Center.
- i. If required, add a Release Notes for your project in the appropriate fields. The version will be auto-generated you can edit it by click to the New Version field. This will help you keep track of the different versions of your project.
iii. You can check the result in Center or in "C:\Users\your user\AppData\Local\akaBot\Projects\Central" folder
b. If you choose "Local", follow these steps:
i. If required, add a Release Notes for your project in the appropriate fields. The version will be auto-generated you can edit it by click to the New Version field. This will help you keep track of the different versions of your project.
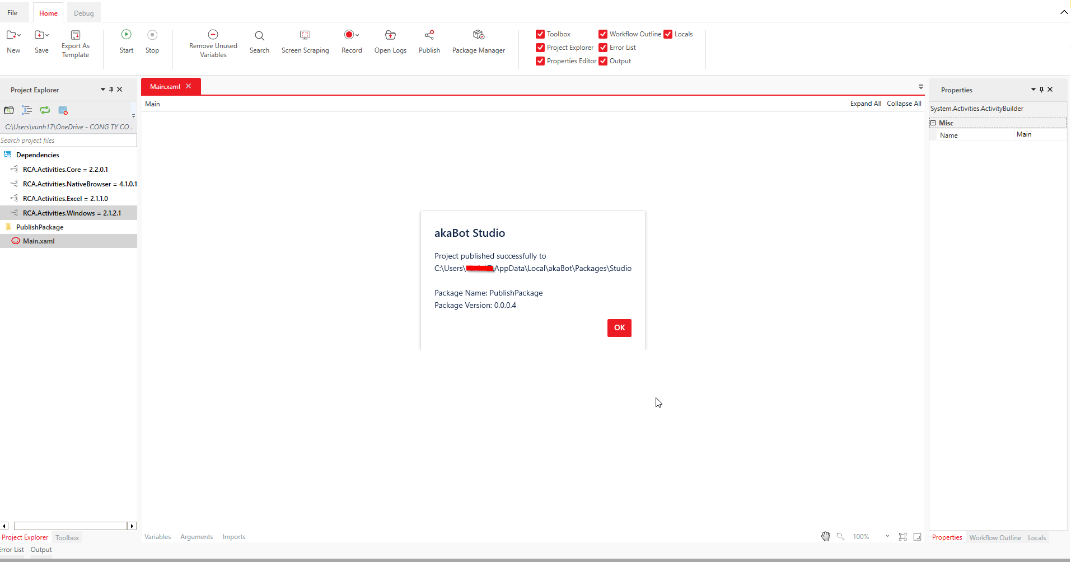
ii. After entering the necessary information, click the "Publish" button. Your project will be published to the local directory: "C:\Users\your user\AppData\Local\akaBot\Packages\Studio".
Step 5. Here is the successful publishing window:
Center:
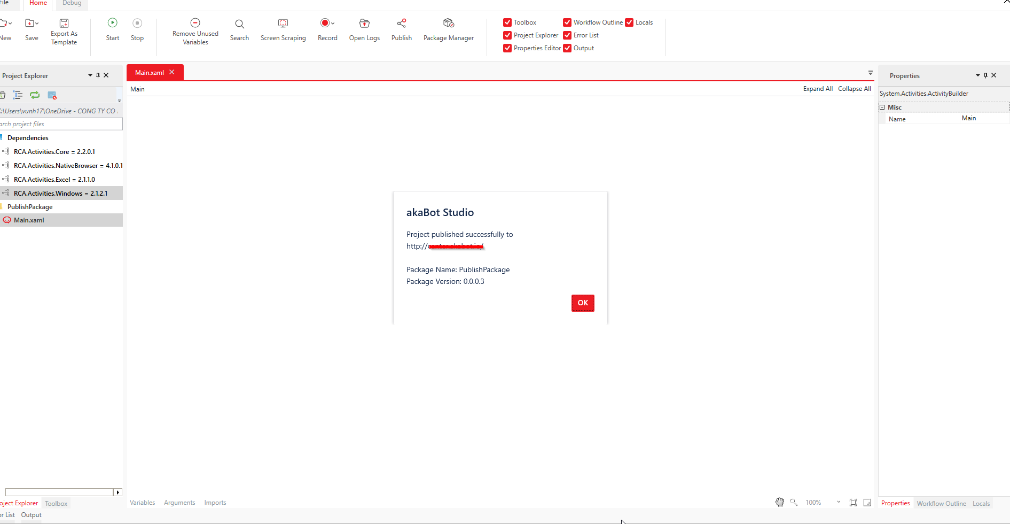
Local: