1. Introduction
This document will guide you on how to enable HTTPS Mode for Center and Data Service.
2. Prerequisite
2.1. System requirement
- Your akaBot Center and Data Service have been installed and running normally in HTTP mode by using below components:
- Web server Apache Tomcat 8.5
- Database MySQL or MSSQL or Oracle
- JDK 11
- ActiveMQ
- In your Center & Data Service machine, JAVA_HOME environment variables must be defined.
2.2. File requirement
We highly recommend you to use the globally certificates which are issued by your IT department to be accepted by other machines in your organization.
In this case, please contact IT department to get 2 below files:
- Your organization security certificate file. Ex: fpt.local.cer
- Your personal information exchange file. Ex: fpt.pfx
If not this case, please ignore this file requirement.
2.3. Information Requirement
You need to have below information:
- Data Service installation directory path. Ex: C:\akaBot\DataService\*
- Tomcat installation directory path, called TOMCAT_PATH. Ex: %TOMCAT_PATH% = “C:\Program Files\Apache Software Foundation\Tomcat 8.5”
3. Prepare & Trust akaBot Security Certificate
You need to prepare firstly an akaBot security certificate then trust it in your machine.
3.1. Prepare akaBot security certificate.
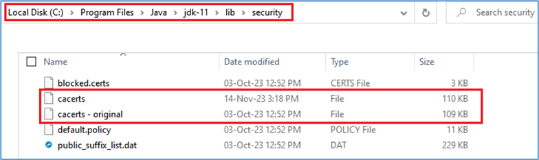
Step 1: Open Java Security folder.
Folder path: “C:\Program Files\Java\jdk-11\security”
Step 2: Backup java system cacerts and cacerts - original files to another folder to roll back if any errors.
Step 3: Prepare the commands
Case 1: If you use existing organization certificates from IT department, update in below commands:
- Your password
- Your organization security certificate file from IT department. Ex: fpt.local.cer
- Your personal information exchange file from IT department. Ex: fpt.pfx
set ALIAS=akabot set PASSWORD=YOURPASSWORD REM import to java Key keytool -importcert -alias %ALIAS% -keystore "%JAVA_HOME%\lib\security\cacerts" -storepass changeit -file fpt.local.cer REM generate file JKS for JAVA keytool -importkeystore -destkeystore akabot.p12 -deststoretype pkcs12 -alias %ALIAS% -srckeystore fpt.pfx -deststorepass %PASSWORD% keytool -importkeystore -srckeystore akabot.p12 -srcstoretype pkcs12 -srcalias akabot -destkeystore akabot.jks -deststoretype jks -deststorepass %PASSWORD% -destalias %ALIAS% keytool -importkeystore -srckeystore akabot.jks -destkeystore akabot.jks -deststoretype pkcs12 |
Case 2: If you generate a self-signed certificate, update in below commands:
- Your domain
- Your password
- Your organization name
set DOMAIN=YOURDOMAIN.COM set ALIAS=akabot set PASSWORD=YOURPASSWORD set ORGANIZATION_NAME=YOUR ORGANIZATION NAME REM Generate keypair: jks file "%JAVA_HOME%\bin\keytool.exe" -genkeypair -alias %ALIAS% -keyalg RSA -keysize 2048 -keystore akabot.jks -storepass %PASSWORD% -keypass %PASSWORD% -dname "CN=%DOMAIN%, OU=Unknown, O=% ORGANIZATION_NAME%, L=Ho Chi Minh, ST=Ho Chi Minh, C=VN" REM Convert to *.p12 file "%JAVA_HOME%\bin\keytool.exe" -importkeystore -srckeystore akabot.jks -srcstoretype JKS -srcstorepass %PASSWORD% -destkeystore akabot.p12 -deststoretype PKCS12 -storepass %PASSWORD% REM Export to *.cer file "%JAVA_HOME%\bin\keytool.exe" -export -alias %ALIAS% -keystore akabot.p12 -storetype PKCS12 -storepass %PASSWORD% -rfc -file akabot.cer REM Import and trust globally REM The default password for the 'cacerts' truststore is usually 'changeit' "%JAVA_HOME%\bin\keytool.exe" -importcert -alias %ALIAS% -keystore "%JAVA_HOME%\lib\security\cacerts" -storepass changeit -file akabot.cer |
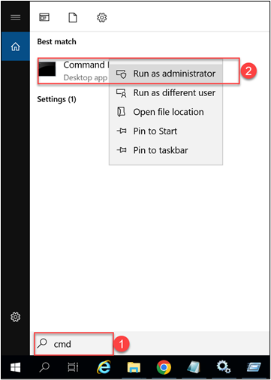
Step 4: Open Command Prompt program and run prepared commands in step 3.
Note: In case of use existing certificates, remember to locate to folder containing these files before running the commands.
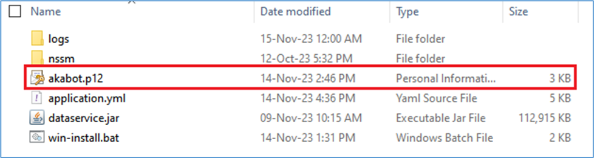
Once the commands are executed, the cacerts file name will be changed to akabot.cer and 2 new files akabot.jks, akabot.p12 will be generated. These files will be used to trust in step Trust Certificate.

3.2. Trust Certificate
You can trust the certificate manually or automatically by following below guidance.
3.2.1. Manual (Machine Scope)
When trusting manually, the certificate will be only effective in trusted Center & Data Service machine.
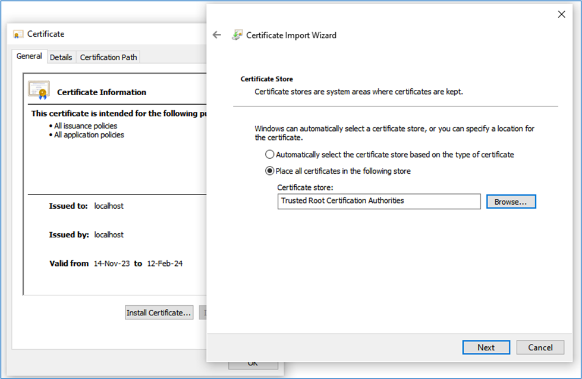
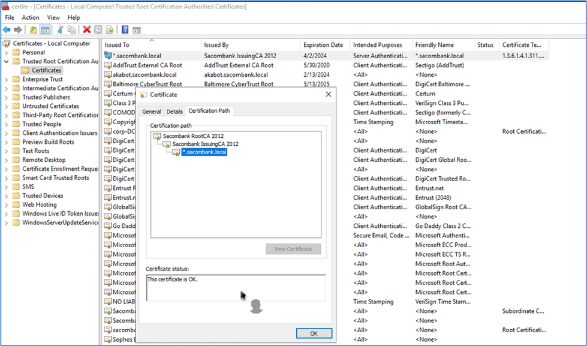
Step 1: In the Center and Data Service machine, double click to file “akabot.cer” to install this certificate to Local Machine > Trusted Root.

Step 2: Once certificate is installed, you can check the result in “Manage computer certificates > Trusted Root Certification Authorities”.
Please copy file “akabot.cer” to ALL Agent machines and repeat above step 1 and 2 to trust it in each machine.
3.2.2. Automatically (Organization Scope)
In an organization, all the machines are connected to an Active Directory server. They will fetch all certificates and policies from this server to apply to local machine. We can use this way to automatically trust the above certificate to Center & Data Service machine and all Agent machines by sending akabot.cer file to your IT department. They will add it to Trusted Root of their Active Directory server.
4. Configure Data Service
Step 1: Copy file “akabot.p12” to the installation directory path of Data Service. Ex: “C:\akaBot\DataService”
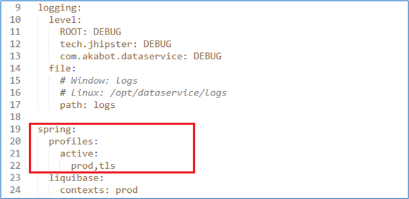
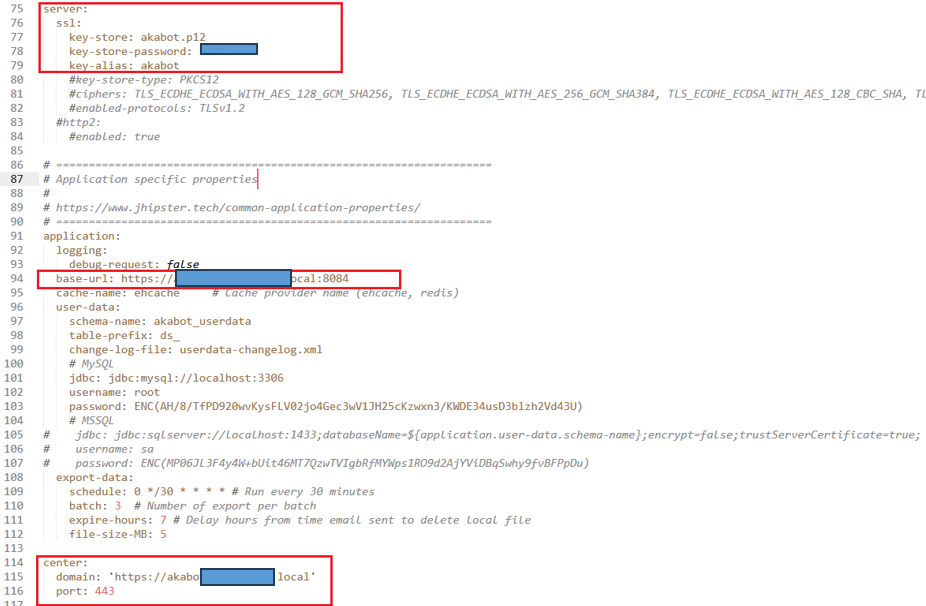
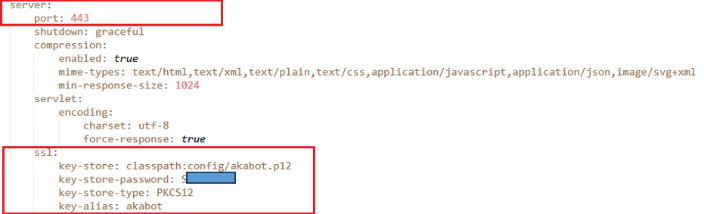
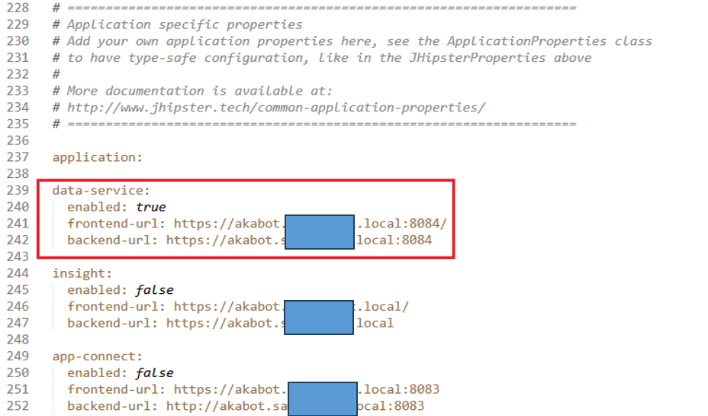
Step 2: Open file application.yml in the installation directory of Data Service and configure it as below.
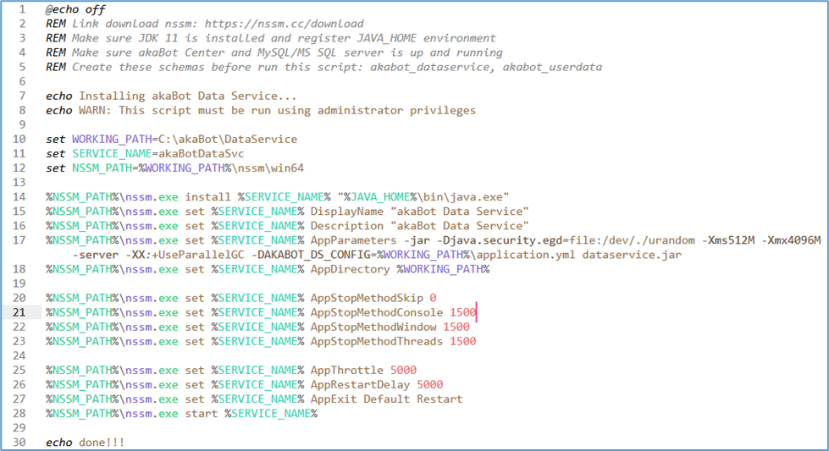
Step 3: Make sure that the file win-install.bat has content below.
5. Configure akaBot Center
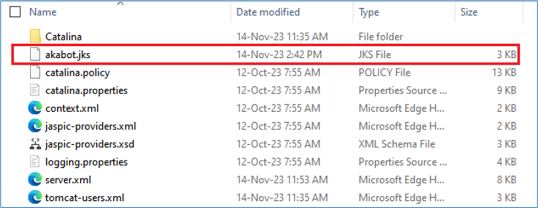
Step 1: Copy file “akabot.jks” to %TOMCAT_PATH%\conf
Step 2: Make sure that file server.xml in this directory has content looks like this.
<Connector port="443" protocol="org.apache.coyote.http11.Http11NioProtocol" maxThreads="200" SSLEnabled="true" scheme="https" secure="true" maxParameterCount="1000" clientAuth="false" sslProtocol="TLS" keystoreFile="conf/akabot.jks" keystorePass="YOURPASSWORD" keyAlias="akabot"> </Connector> |
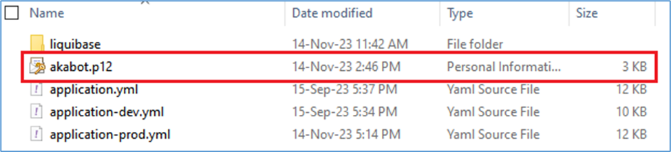
Step 3: Copy file “akabot.p12” to %TOMCAT_PATH%\webapps\ROOT\WEB-INF\classes\config
Step 4: Make sure that the file application-prod.xml in this directory has content as below.
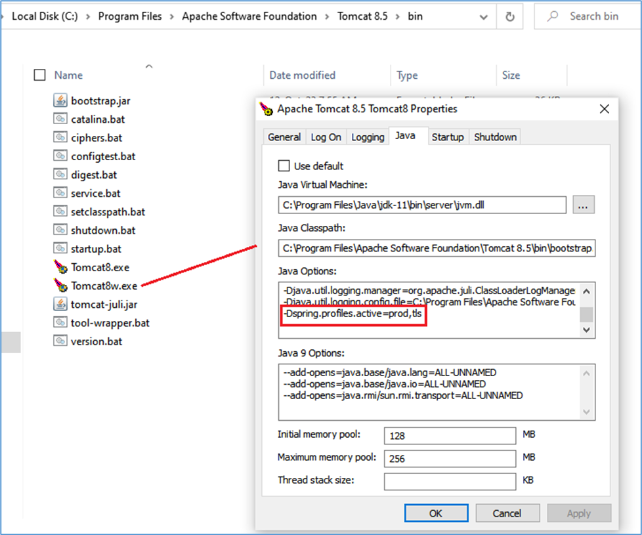
Step 5: Run Tomcat configure application and append below code into Java Options to make sure that akaBot Center will use profile “prod,tls”:
-Dspring.profiles.active=prod,tls
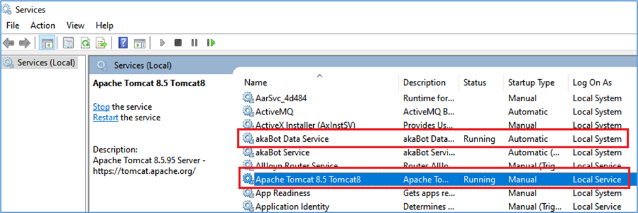
6. Run Applications
Step 1: To install and start akaBot Data Service, run file “win-install.bat” using administrative privileges.
Step 2: Start to run akaBot Data Service and Tomcat Service by using Windows Services.