1. Prerequisites
Note: Please read this section carefully before installation.
1.1. Installation Model
This guide provides instructions for installing akaBot Center in the installation model described below. For other installation models, please find in other pages or send an email to [email protected] for assistance.
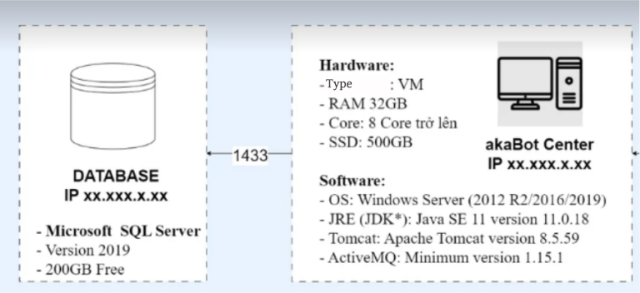
1.2. Machine Configuration Requirements
To install and use akaBot Center on Windows server, please prepare your computer with the following requirements:
| Configuration | Requirements |
| Hardware | Virtual Machine RAM: 32GB or higher Core: 8 CPUs or higher SSD: 500GB |
| Software | Operating System: Windows Server 2012 R2/2016/2019 Browser: The latest version of Chrome |
1.3. Installation Privilege Requirements
The account performing the installation needs to have Admin (Root) privileges on the installation machine.
1.4. MSSQL Database Connection Requirements
- The installation machine must have network connectivity to the pre-established MSSQL database.
- The required configuration information for Center to connect to the database includes:
| # | Information | Description |
| 1 | DB-SERVER | IP address of the MSSQL Database |
| 2 | DB-USER | Connection account |
| 3 | DB-PASSWORD | Connection password |
| 4 | DB-PORT | MSSQL database connection port |
| 5 | DB-NAME | Name of the MSSQL database |
- If you are installing Collaboration Center, please prepare a separate database for Collaboration Center and have the connection information ready, similar to the database setup for Center. (For more information about what Collaboration Center is, please read further at Human-Bot Collaboration).
1.5. Prepare the Installation Package
You need to prepare the installation package according to the following list.
Note:
- If the computer where you're installing Center does not have an internet connection, please download the installation package externally and copy it to the machine.
- To avoid errors during installation with command line execution, please use a dedicated folder for akaBot Center installation and name the installation package directory without any spaces. For example: C:\akaBot
| # | Name | File Name | Version | Mô tả | Link |
| 1 | akaBot Center | akaBot-center- 3.x.x.x.war | Newest version | - akaBot Center installation package | akaBot provides through email after the customer makes a purchase. |
| 2 | akaBot Collaboration Center | akaBot-cc-x.x.x.zip | Newest version | - Collaboration Center installation package - Not required |
| 3 | JDK/JRE | jdk- 11.0.18_windows- x64_bin.exe | 11.0.18 | JDK 11.0.18 | Download |
| 4 | Apache tomcat | apache-tomcat- 8.5.89.exe | 8.5.59 | Web server apache Tomcat | Download |
| 5 | ActiveMQ | apache-activemq- 5.15.1-bin.zip | 5.15.1 | ActiveMQ for Queue functionality in akaBot Center | Download |
| 6 | Elasticsearch 7 | elasticsearch- 7.17.10-windows- x86_64.zip | 7.17.10 | Elastic search 7 | Download |
| 7 | NSSM | nssm-2.24.zip | 2.24 | Service Manager Not required (only used when installing Collaboration Center). | Download |
1.6. Guide to Some key Operations
In this document, some basic operations are repeated, and the writer will provide guidance in this section. Please read the instructions for those operations as follows.
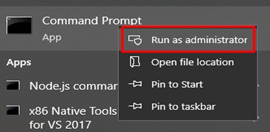
1.6.1. Open the Command Prompt (cmd) and enter the installation command
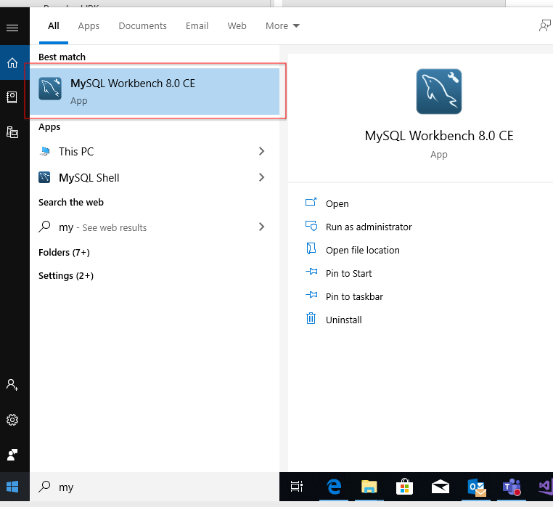
- Type "cmd" into the Windows search bar.
- Right-click on the Command Prompt function and select "Run as Administrator."
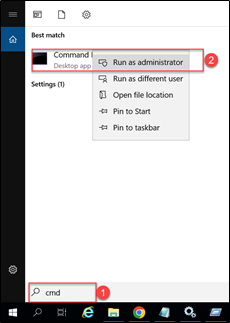
- The Command Prompt window opens, and you can enter any service installation command.

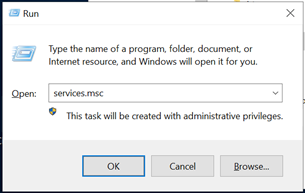
1.6.2. Start/Stop/Restart a Service
- Press the Windows key + R.
- Enter "services.msc" to access the Services function containing all services on the computer.
- Press Enter.
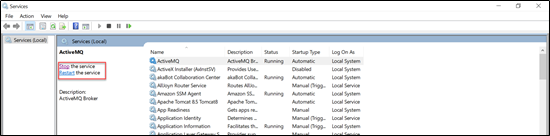
- In the Services window:
- To start a service, select "Start."
- To stop a service, select "Stop."
- To restart a service, select "Restart."

2. Java JDK 11 Installation
Step 1 - Kindly download Java JDK 11 at JAVA JDK 11
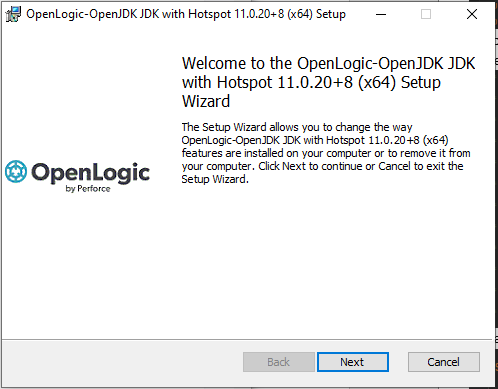
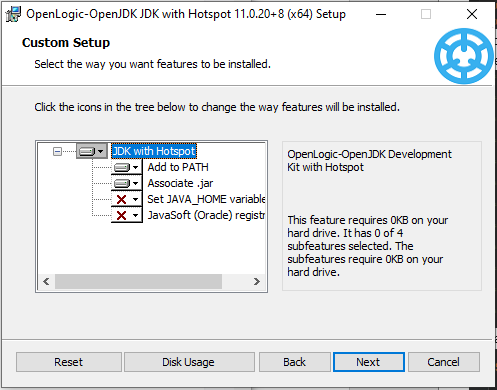
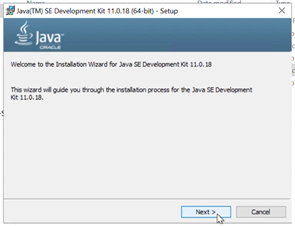
Step 2- Run the installer you have downloaded. After that, click "Next" to proceed.
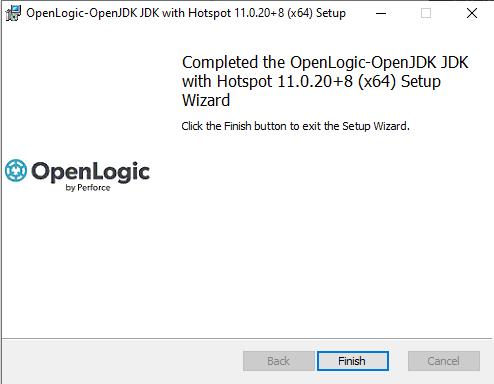
- After Installation is complete, you will see the Complete Notification below. Simply click “Finish”. You have successfully installed JDK.
Note: Make sure that JAVA_HOME presents in your environment variables by typing command echo %JAVA_HOME%, the output should be a path that point to jdk 11 ex: C:\Program Files\Java\jdk-11.0.12
3. MySQL installation
3.1. Install MySQL
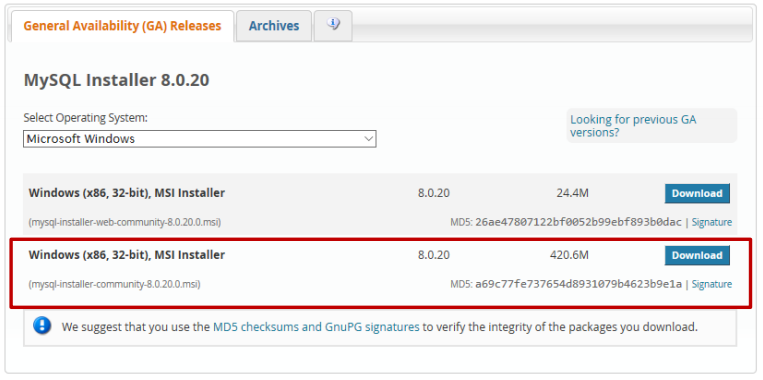
Step 1 - Kindly download MySQL 8.0
Step 2 - Run the installer and choose Custom option.
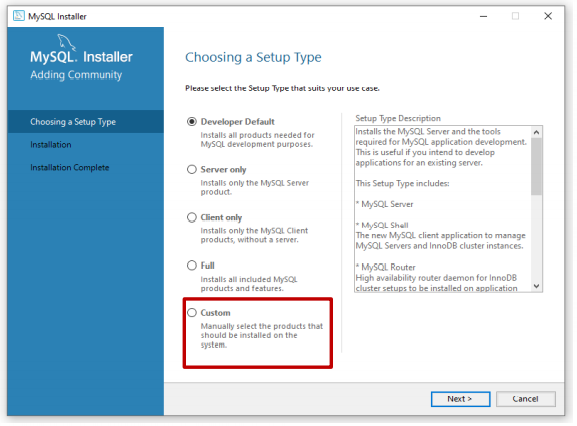
- To run akaBot Center, you will need MySQL Server and MySQL Workbench.
- Under:
+ MySQL Servers > MySQL Server, choose the newest for MySQL Server.
+ Application > MySQL Workbench, choose the newest version for MySQL Workbench.
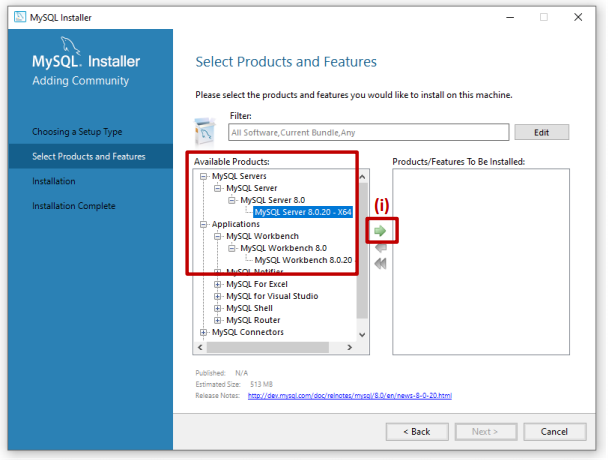
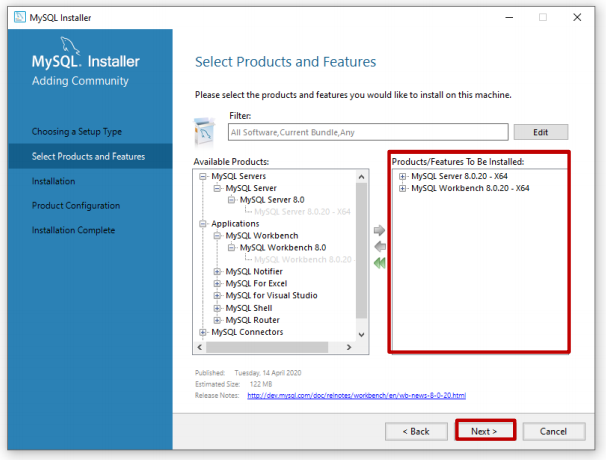
- After that, kindly click Execute and hit Next,...
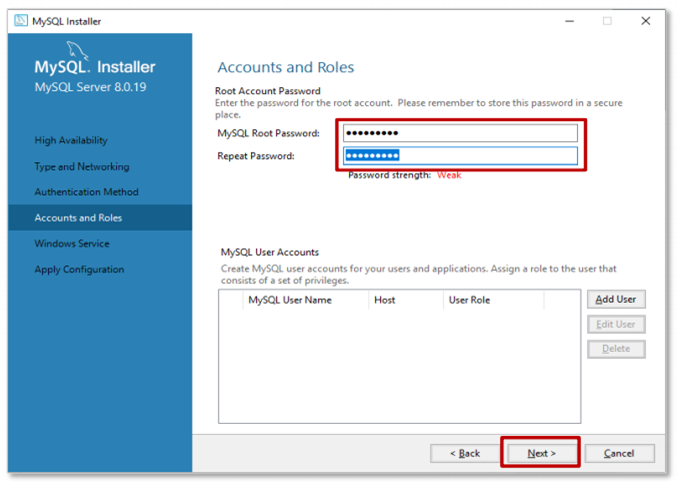
- When you at the Accounts and Roles page, it is recommended you set it to the default password ”sis@12345” to avoid having to update the Config file later. Click “Next"
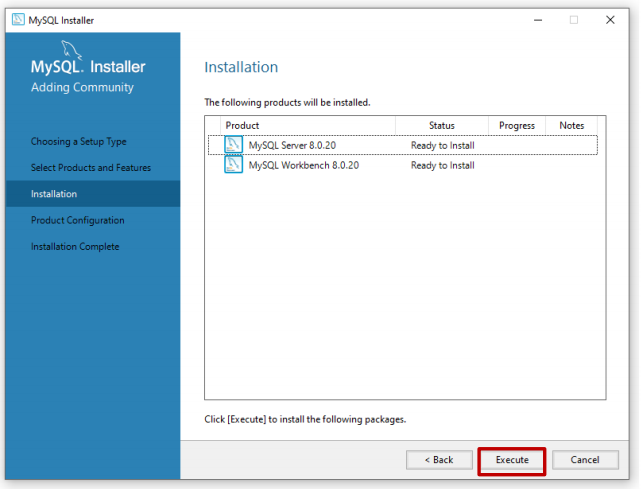
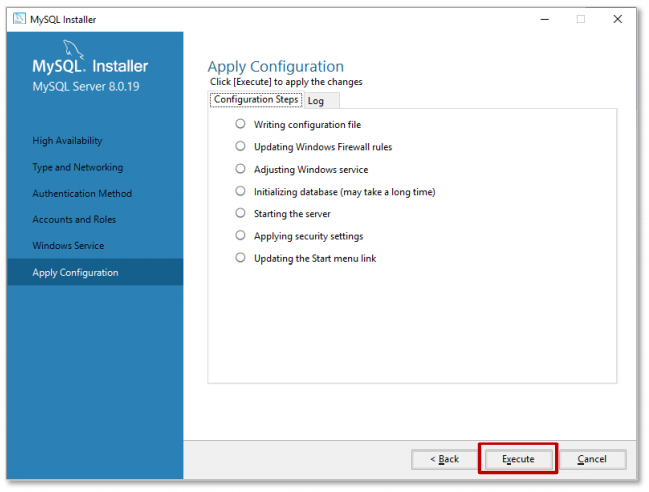
- Click "Execute" and wait till everything is finished. Click “Finish”.
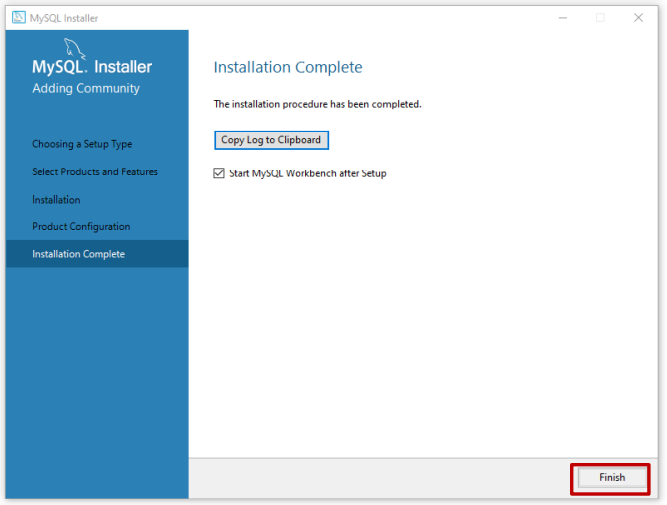
- If you see this prompt, we have successfully finished the installation. Click “Finish”.
3.2. Setup MYSQL account to enable remote connection
Follow these steps to know how to setup remote connection with MYSQL. This will help to install MYSQL and CENTER in separated systems.
3.2.1. Create a MYSQL account and grant access to specific database (Center in this document )
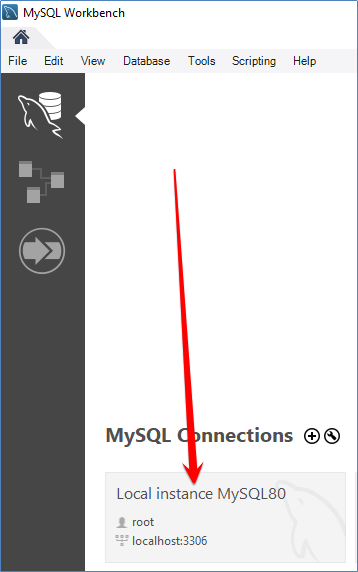
- Open MySQL Workbench and go to Local instance with root account as bellowed
- Access “Users and Privileges” function in the left panel (1)
- Then click “Add Account” (2)
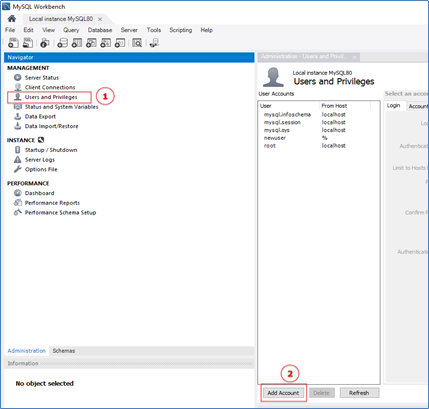
- Enter data for Login tab including: Login Name, Password as bellowed, leave authentication Type and Limit to hosts Matching with default values. “%” in “Limit to Host Matching” means that the host does not include “localhost” so it can access from other remote computer, remote IPs.

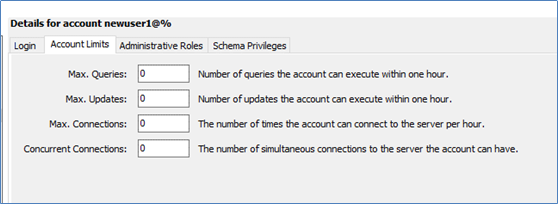
- Leave “Account Limits” as default.
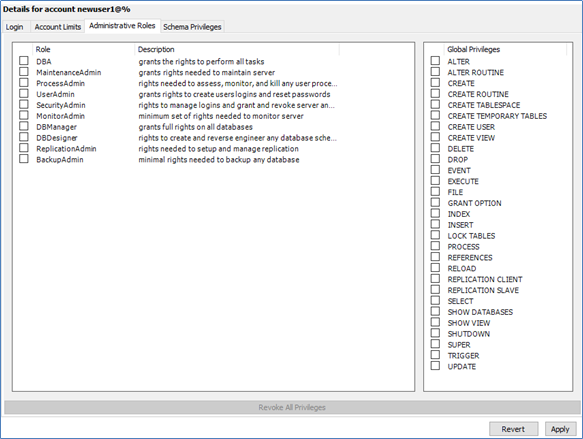
- You can grant any roles for this account by check to designed roles item in the left panel. In this scenario, we only want to grant this account to specific database with normal user permission (not admin at all) so we leave it with default values (do not check anything).
- “Schema Privileges” tab helps to grant specific permission to one or more schema like CENTER Database.
- Click to “Add Entry” to begin setup
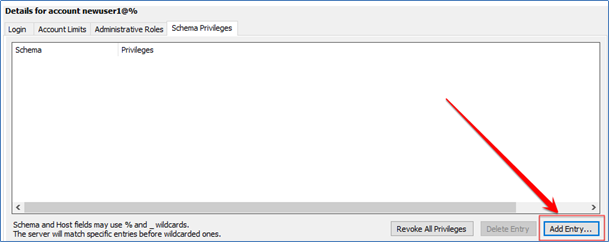
- then select database that designed for this user ( in this case we select database of CENTER application )
- if database has not been created yet , you can create it first by following 3.3. Create MySQL Database for CENTER
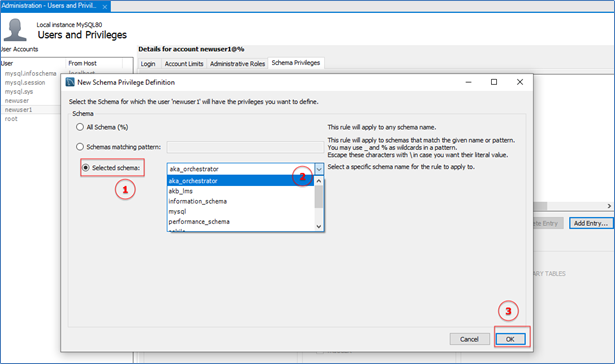
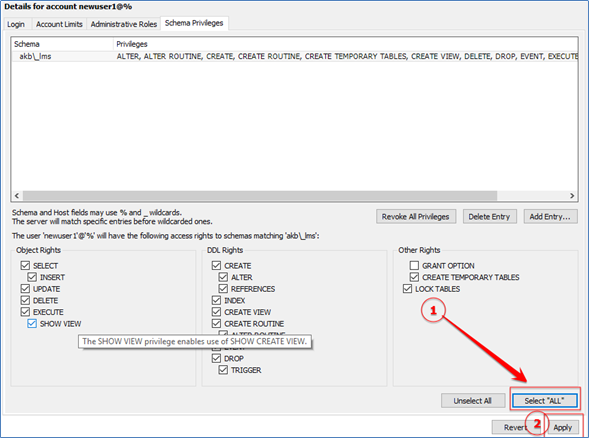
- Apply suitable access rights to this schema, we select all access rights for specific data base in this scenario,
- Object Rights are right to work with any records, DDL Rights are right to work with data base definition type…
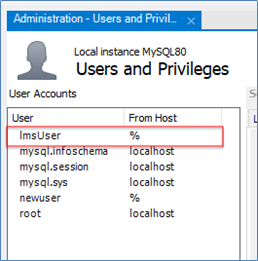
- After click “Apply”, you will see new user named “lmsUser” in user accounts list. You can click “refresh” button to force MYSQLWORKBENCH update the list for you. Note that: “%” in column “From Host” means that this account can be access remotely.
3.2.2. Test your MySQL from remote client using MySQL Workbench
- Open MySQL Workbench in other computer, click to the add connection button (see picture bellowed) to open “Setup New Connection” window.

-Input IP address of MySQL that you want to test, explorer in “HostName”, input MySQL UserName that you create in previous step then click to “Test Connection” button”
- After dialog “Connect to MySQL Server” appears, you enter password for this account then hit ok to test this connection
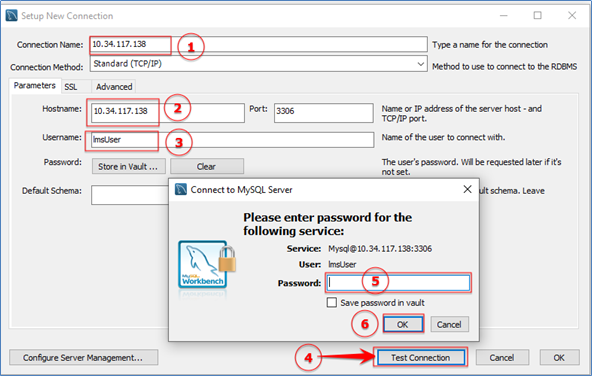
- You will see this dialog if everything is OK.
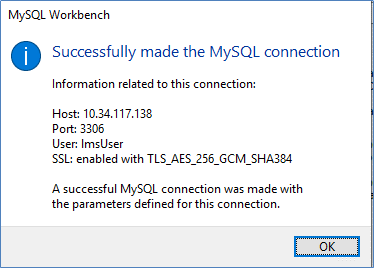
- After connect successful, you can browse remote database in details using MySQL Workbench
3.3.Create MySQL Database for CENTER
- For the new/first-time installation, you must create a new database for your CENTER.
- Follow these steps to create a database with the name “aka_orchestrator” in a machine that is designed to install MYSQL Database for CENTER.
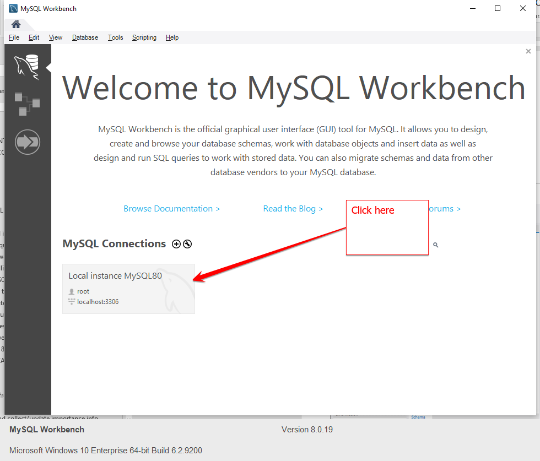
Step1: Open MySQL Workbench in the machine you want to create a MySQL Database
- Open MySQL Workbench, access local instance
Step 2 : Click to (1) to open “Create new database dialog” then input (2) (3) (4) as bellowed (schema name=” aka_orchestrator” è the database name of CENTER , Charset =”utf8 ,utf8_general_ci”.
- Hit “Apply” after you finish all (1) (2) (3) (4).
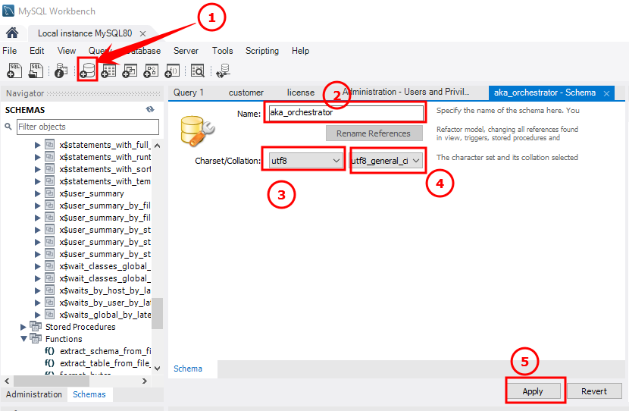
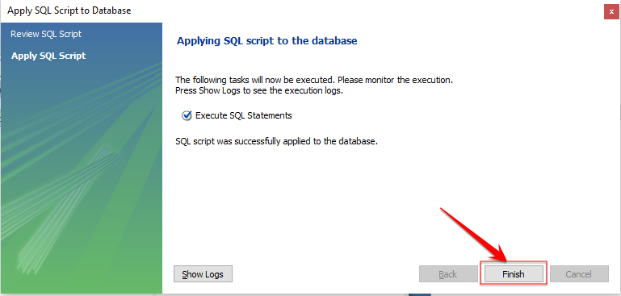
Step 3: Hit “Apply” to create our LMS Database
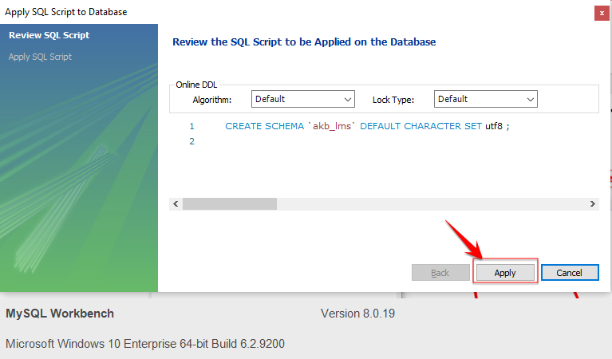
Hit “Finish”
4. JDK/ JRE installation
4.1. Install JDK/ JRE
Double-click the file "jdk-11.0.18_windows-x64_bin.exe" to install JDK/JRE. Please follow the instructions in the installer to proceed.
4.2. Check the Installation Result
Open the Command Prompt and enter the command "java -version" to check if the JDK/JRE installation was successful.

5. Apache Tomcat installation
5.1. Install Apache Tomcat
Double-click the file "apache-tomcat-8.5.89.exe" to install Apache Tomcat. Please follow the instructions in the installer.
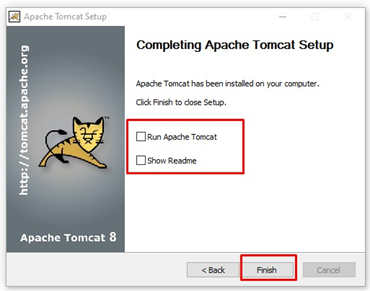
Note: In the final step of the Apache Tomcat installation:
- Uncheck "Run Apache Tomcat"
- Uncheck "Show Readme"
- Click the "Finish" button to complete the installation.
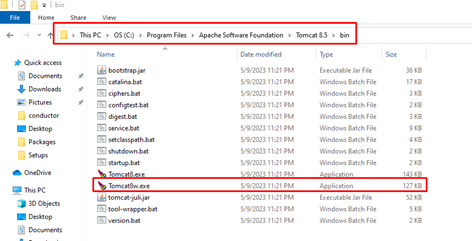
The installation path for Apache Tomcat: %TOMCAT_PATH% = “C:\Program Files\Apache Software Foundation\Tomcat 8.5”
5.2. Apache Tomcat Configuration
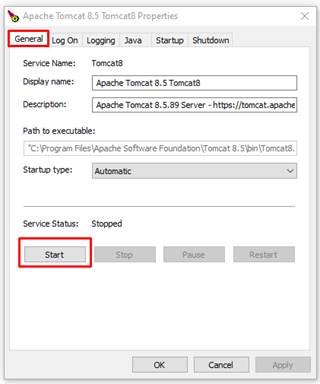
Step 1: Navigate to the path %TOMCAT_PATH%\bin and double-click the file Tomcat8w.exe to open the Apache Tomcat Service configuration.
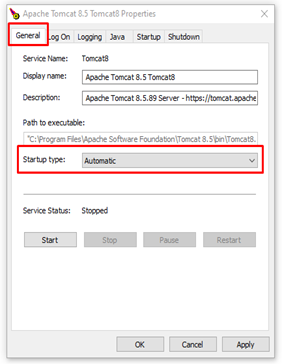
Step 2: On the General tab
- Select Startup type: Automatic
- Choose Apply to apply the configuration changes.
Step 3: On the Logging tab
(1) Log prefix: Remove "commons-daemon"
(2) Redirect Stdout: Remove "auto"
(3) Redirect Stderror: Remove "auto"
(4) Choose Apply to apply the configuration changes.

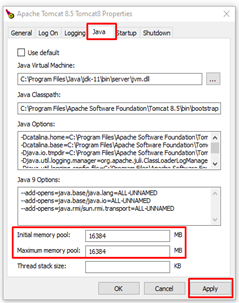
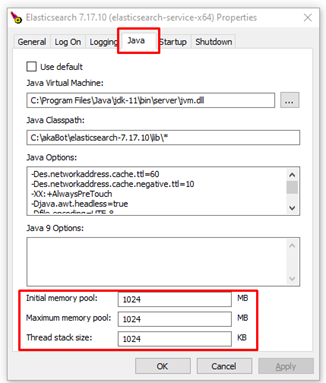
Step 4: On the Java tab
a. Adjust the Java Heap configuration:
- Initial memory pool: Enter a value <= 1/4 of the server's RAM.
Example: Server RAM = 32 GB -> Initial memory pool should be <= 1/4 * 16 * 1024 MB
- Maximum memory pool: Enter a value <= ½ of the server's RAM.
Example: Server RAM = 32 GB -> Maximum memory pool should be <= ½ * 16 * 1024 MB
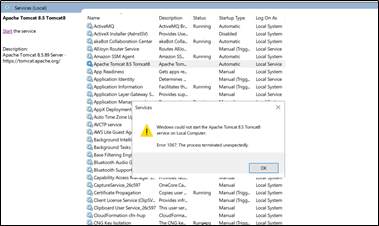
Note: If you enter a value that is too large, it may prevent Apache Tomcat service from starting and result in errors.
b. Choose Apply to apply the configuration changes.
Step 5: Start the Tomcat Service
On the General tab, select Start to initiate the Apache Tomcat service.
5.3. Check Apache Tomcat Installation
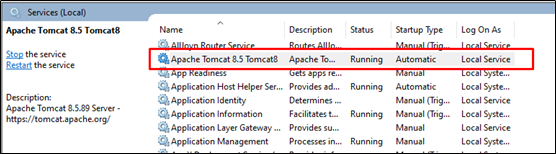
Step 1: After installation and configuration, go to the Services screen and check the status of the Apache Tomcat service.
- If the Status is not Running, start the Apache Tomcat service.
- If the Status is Running, proceed to step 2.
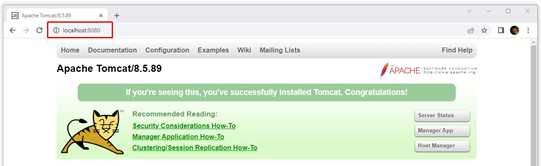
Step 2: Access the URL http://localhost:8080 in Chrome to verify the successful installation of Apache Tomcat:
6. ACTIVEMQ installation
6.1. Install ActiveMQ
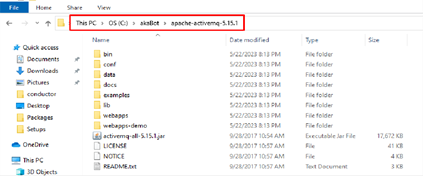
Step 1: Extract the file "apache-activemq-5.15.1-bin.zip" to the desired installation path.
For example: ACTIVEMQ_PATH = C:\akaBot\apache-activemq-5.15.1
Note: The installation path should not contain any spaces.
Step 2: Open Command Prompt with Administrator privileges.
Step 3: Run the file %ACTIVEMQ_PATH%\bin\win64\InstallService.bat to install the ActiveMQ service.

Step 4: Start the ActiveMQ service.

6.2. Java Heap Configuration
Step 1: Stop service ActiveMQ

Step 2: Open the file %ACTIVEMQ_PATH%\bin\win64\wrapper.conf and configure the parameters:
- wrapper.java.initmemory: Enter the initial value for the Java Heap memory.
For example, if the server has 32 GB of RAM, you can enter 1024.
- wrapper.java.maxmemory: Enter the maximum value for the Java Heap memory.
For example, with a server having 32 GB of RAM, you can enter 4096.
Step 3: Start ActiveMQ Service

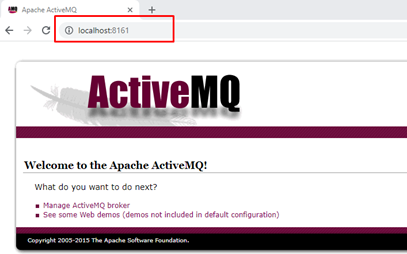
6.3. Check ActiveMQ Installation
Step 1: Check the Running status of the ActiveMQ service. If it is not running, start the service.

Step 2: Access the URL http://localhost:8161 to verify the successful installation of ActiveMQ.
7. ELASTICSEARCH installation
Note: If you use Collaboration Center, you have to install ElasticSearch. If not, this is not required.
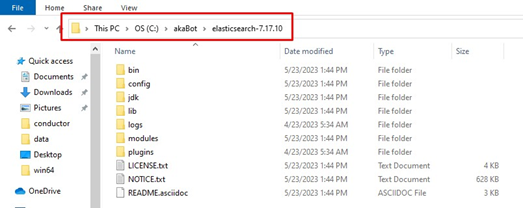
7.1. Install ElasticSearch
Step 1: Extract the file "elasticsearch-7.17.10-windows-x86_64.zip" to the desired installation path.
For example, ES_PATH: C:\akaBot\elasticsearch-7.17.10.
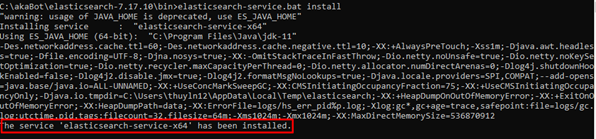
Step 2: Install the Elasticsearch service
Open the Command Prompt with "Run as administrator" and run the command:
%ES_PATH%\bin\elasticsearch-service.bat install
Step 3: Start the Elasticsearch service using the command:
%ES_PATH%\bin\elasticsearch-service.bat start

7.2. ElasticSearch Configuration
7.2.1. Securuty Configuration
Step 1: Stop the Elasticsearch service.
Step 2: Open the file %ES_PATH%\config\elasticsearch.yml and add the following configuration at the beginning of the file:
xpack.security.enabled: true
Step 3: Start the Elasticsearch service again.
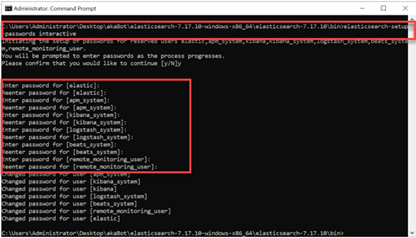
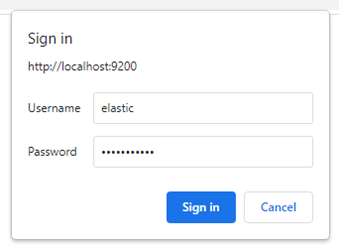
Step 4: Open the Command Prompt and run %ES_PATH%\bin\elasticsearch-setup-passwords interactive
Enter passwords for all the built-in users of Elasticsearch.
7.2.2. Other configuration
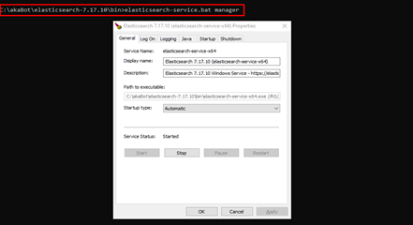
Step 1: Open Command Prompt with "Run as administrator" and run the file %ES_PATH%\bin\elasticsearch-service.bat manager to open the configuration management interface for Elasticsearch service.
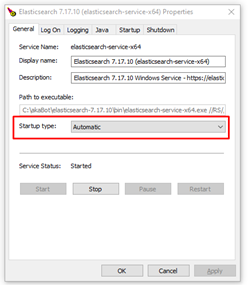
Step 2: On the General tab, select "Startup Type" and set it to "Automatic."
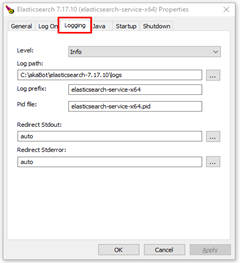
Step 3: On the Logging tab
Step 4: On the Java tab
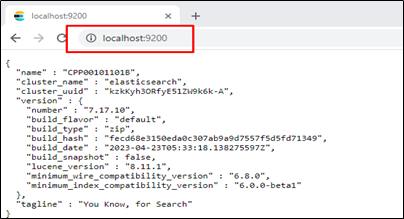
7.3. Check ElasticSearch Installation
Check the Running status of the ActiveMQ service.

Access the URL http://localhost:9200/ to verify the successful installation of Elasticsearch.
8. akaBot Center Installation
8.1. Copy and extract war file
Step 1: Stop Apache Tomcat service

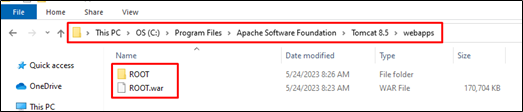
Step 2: Delete all folders in %TOMCAT_PATH%/webapps.
Step 3: Copy the file akaBot-center-x.x.x.x.war to the %TOMCAT_PATH%/webapps/ directory and rename it to ROOT.war.

Step 4: Restart the Apache Tomcat service and wait for the ROOT.war to be extracted into the ROOT directory.
Step 5: Stop the Apache Tomcat service.

8.2. akaBot Center configuration
8.2.1. Config quartz.properties
Step 1: Stop the Apache Tomcat service (if the Apache Tomcat service is currently running).
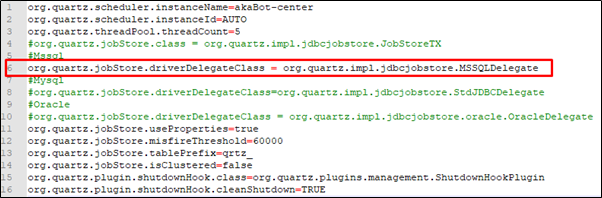
Step 2: Modify the configuration in the file %TOMCAT_PATH%/webapps/ROOT/WEB-INF/classes/quartz.properties as follows:
- Comment out the jobstore configuration for MySQL.
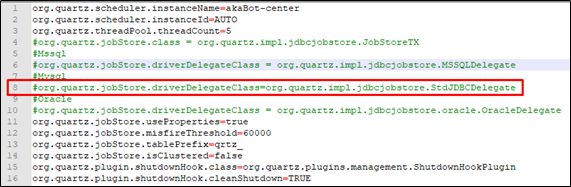
- Remove the "#" character at the beginning of the line for the jobstore configuration for MSSQL to uncomment it.
8.2.2. Configure the MSSQL Database Connection
Step 1: Navigate to the path %TOMCAT_PATH%/webapps/ROOT/WEB-INF/classes/config/
Step 2: Modify the configuration in both files:
- application-dev.yml
- application-prod.yml
- Comment out the MySQL datasource and JPA configurations.
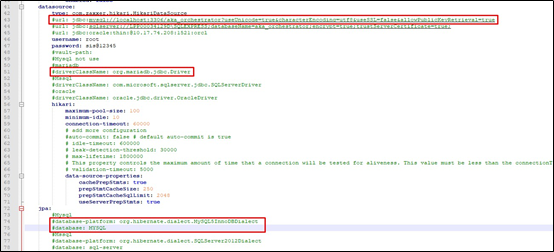
2. Remove the "#" character at the beginning of the lines to uncomment the following lines.
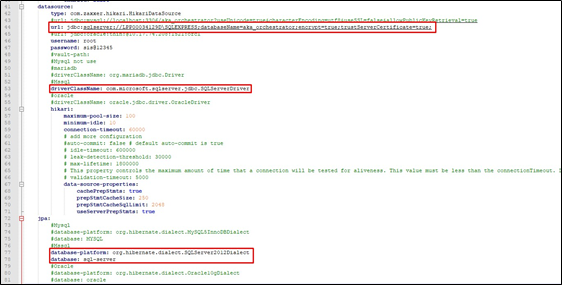
3. Change the lines to:
- url: jdbc:sqlserver://DB-SERVER:DB-PORT;databaseName=DB-NAME;encrypt=true;trustServerCertificate=true;
- username: DB-USER
- password: DB-PASSWORD
Step 3: Start the Apache Tomcat service and access http://localhost:8080/ to verify the installation of akaBot Center.

8.2.3. Configuring SSL (https)
Configure SSL for akaBot Center following the instructions provided here
9. Install akaBot Collaboration Center (Optional)
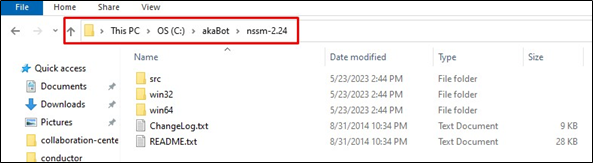
9.1. Install nssm
Extract the file nssm-2.24.zip to the desired installation path. For example: NSSM_PATH: C:\akaBot\nssm-2.24
9.2. Install akaBot Collaboration Center
Step 1: Copy and extract the akaBot-cc-3.14.0.zip file to the desired installation path. For example: AKABOT_CC_PATH: C:\akaBot\akaBot-cc-3.14.0
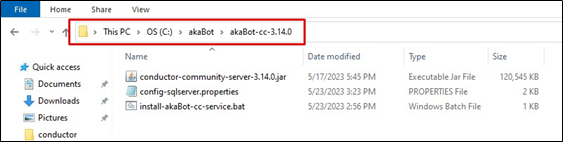
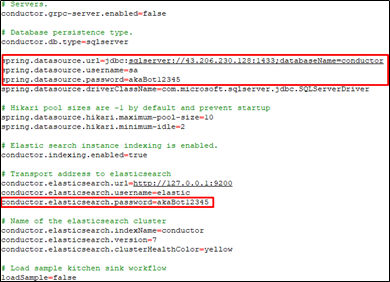
Step 2: Configure the config-sqlserver.properties file Open the config-sqlserver.properties file and edit it as follows:
- Configure the MSSQL database connection:
- spring.datasource.url=jdbc:sqlserver://DB-SERVER:DB-PORT;databaseName=DB-NAME
- spring.datasource.username=DB-USER
- spring.datasource.password=DB-PASSWORD
- Configure the ElasticSearch connection:
- conductor.elasticsearch.password=Set password
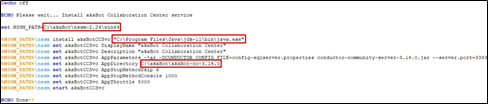
Step 3: Configure akaBotCCSvc service
Open and edit the file %AKABOT_CC_PATH%\install-akaBot-cc-service.bat
- Update NSSM_PATH: %NSSM_PATH%\win64. Example: C:\akaBot\nssm-2.24\win64
- Update the Java path: %NSSM_PATH%\nssm install akaBotCCSvc “%JAVA_HOME%\bin\java.exe” . Example: “C:\Program Files\Java\jdk-11\bin\java.exe”
- Update the App Directory path: %NSSM_PATH%\nssm set akaBotCCSvc AppDirectory %AKABOT_CC_PATH%. Example: C:\akaBot\akaBot-cc-3.14.0
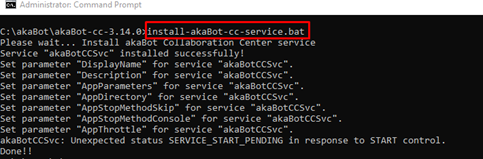
Step 4: Install the akaBotCCSvc service
Open the Command Prompt with "Run as administrator" and run the file %AKABOT_CC_PATH%\install-akaBot-cc-service.bat to install the akaBotCCSvc service.
9.3. Check akaBot Collaboration Center Installation
Step 1: Check the Running status of the akaBotCCSvc service.

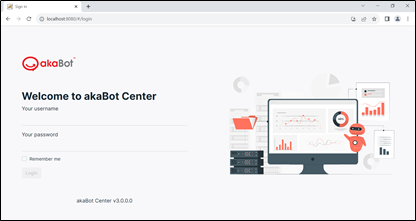
Step 2: Access the URL http://localhost:3393 to verify the successful installation of akaBot Collaboration Center.

Step 1: Stop the Apache Tomcat service (if the Apache Tomcat service is currently running).
Step 2: Configure the file %TOMCAT_PATH%/webapps/ROOT/WEB-INF/classes/config/application.yml:
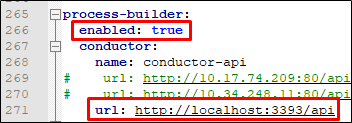
Step 3: Configure the file %TOMCAT_PATH%/webapps/ROOT/WEB-INF/classes/config/application-prod.yml:
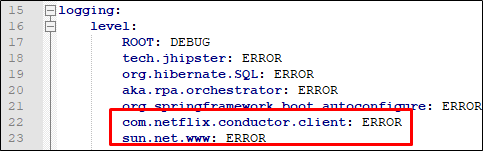
- Configure log level
- com.netflix.conductor.client: ERROR
- sun.net.www: ERROR
Step 4: Start the Apache Tomcat service again and access http://localhost:8080/ to verify the akaBot Center installation.
10. Troubleshooting
10.1. ActiveMQ
10.1.1. Unable to execute Java command

- Open the file %ACTIVEMQ_PATH%\bin\win64\wrapper.conf and configure the parameter:
wrapper.java.command=%JAVA_HOME%/bin/java.exe
10.1.2. Other Errors
Please check the error details in the log file of ActiveMQ: %ACTIVEMQ_PATH%\logs\data\wrapper.log
11. Backup for disaster recovery
Information to be backed up for disaster recovery scenarios:
| No | Name | Path | Description |
| 1 | akaBot Center | Database | Database (MSSQL) of akaBot Center |
| %TOMCAT_PATH%/filestorage | Folder containing .nupkg files from akaBot Studio published to akaBot Center |
%TOMCAT_PATH%\webapps\webapps\ROOT\WEB- INF\classes\config\application.yml %TOMCAT_PATH%\webapps\webapps\ROOT\WEB- INF\classes\config\application-dev.yml %TOMCAT_PATH%\webapps\webapps\ROOT\WEB- INF\classes\config\application-prod.yml %TOMCAT_PATH%\webapps\webapps\ROOT\WEB- INF\classes\config\quartz.properties | Configuration files for akaBot Center |
| 2 | activeMQ | %ACTIVEMQ_PATH%\data | activeMQ data directory |
| 3 | akaBot Collaboration Center | Database | Database (MSSQL) of akaBot Collaboration Center |