Assets usually represent shared variables or credentials that can be used in different automation projects. They allow you to store specific information so that the Robots can easily have access to it.
Additionally, an extra level of security is provided, as all credentials stored here are encrypted with the AES 256 algorithm. They can be invoked by RPA developers when designing a process, but their values can be hidden from them. The Assets page enables you to create new assets. It also displays all previously created assets, which can
be edited or deleted.
To access the Asset page, you click Assets tab in the left menu. After clicking, the system opens an Asset Listing where all the Assets are located.
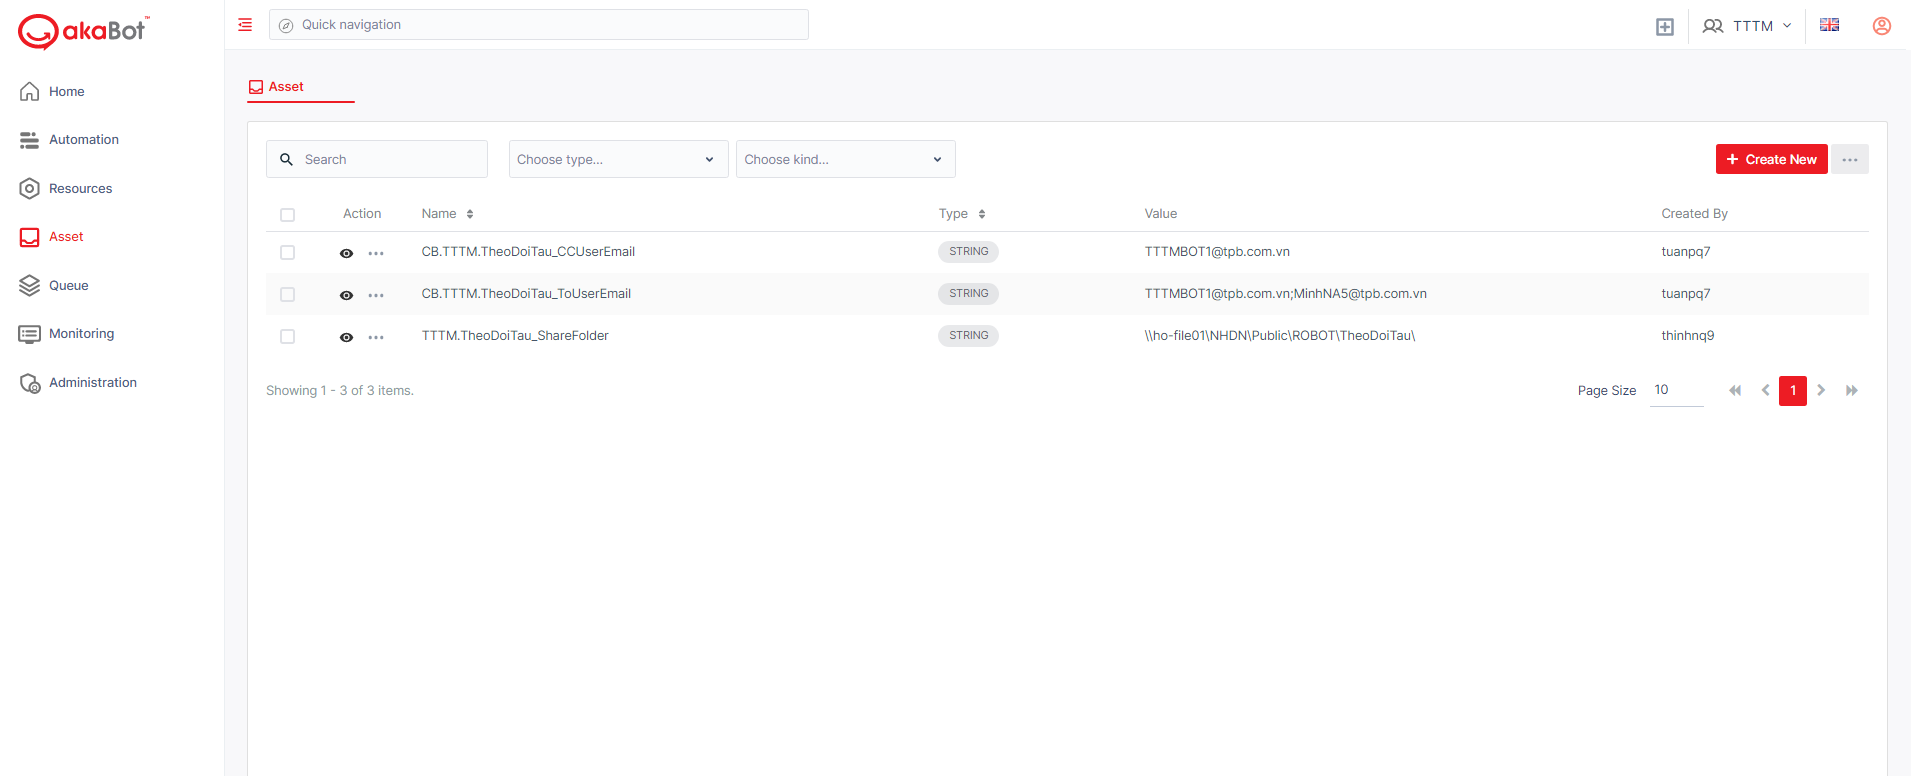
| No | Column | Description |
|---|---|---|
| 1 | Action | Available actions to manage the Assets. Includes: Edit: allows you to edit the details of each Assets Delete: allows you to delete selected Asset By selecting the Checkbox corresponding to each Asset, the delete option will appear beside the Filter option and allow you to delete the Asset from the Center ! Selecting the Checkbox next to Action will select all Assets in display and allow you to bulk delete selected them |
| 2 | Name | The name of the assets |
| 3 | Type | Mandatory. The following options are available: Text - assets that can store string values. This is the default option. Bool - assets that can store a true or false value. If you select this option, the Value field displays two radio buttons (True, False). Integer - assets that can store integers. Credential - assets that can store credentials. If you select this option the Value field is replaced by two others: Username and Password. |
| 4 | Value | The value assigned to an asset: Common Value - the default value received by every agent, unless a specific value is assigned to an agent. Value Per Agent - a value received only by the specified agent. If Common Value is disabled, at least one agent value must be provided |
| 5 | Created by | The user who created the Assets. |
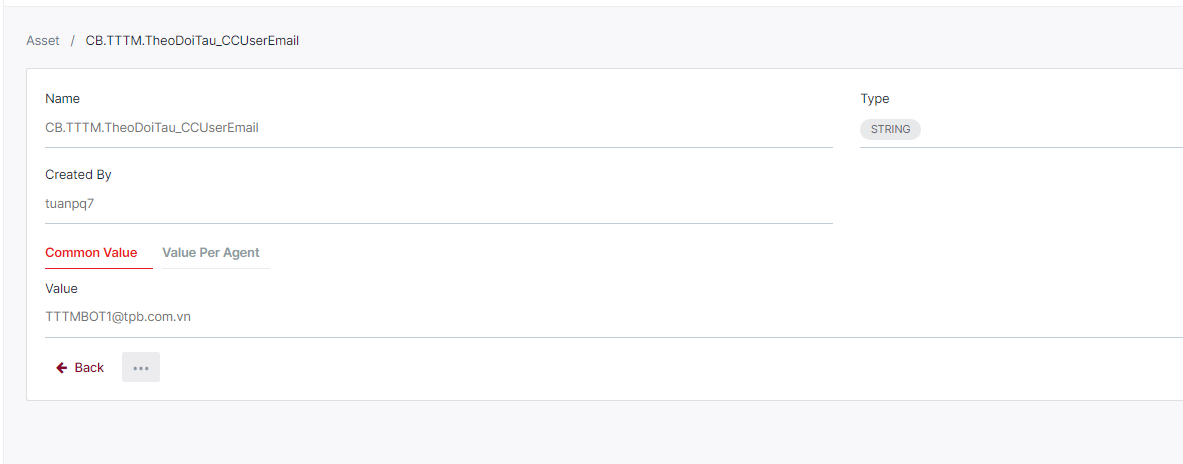
a. View an Asset
To view an Asset, you click Eye button:

The system shows the details of workflow as below:
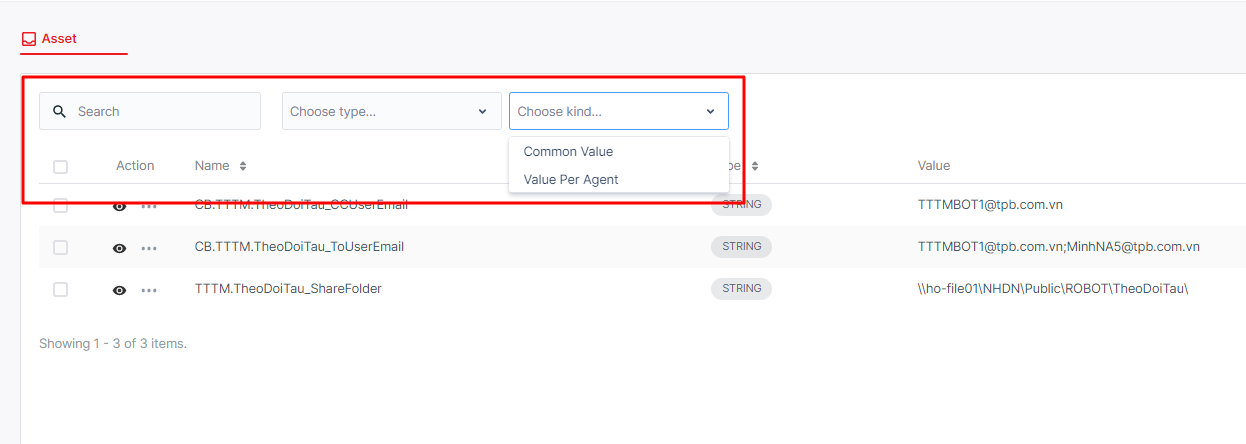
b. Search Asset
This option allows you to search Asset by name, or select Asset type, kind of Asset:
| No | Column /Label | Description | Type | Maximum | Input Requirement |
|---|---|---|---|---|---|
| 1 | Search box | Enter the name of the asset you want to search | String | ||
| 2 | Type | Select the type of the asset you want to search | Dropdown list | ||
| 3 | Kind | Select the kind of the asset you want to search | Dropdown list |
c. Create/Edit an Asset
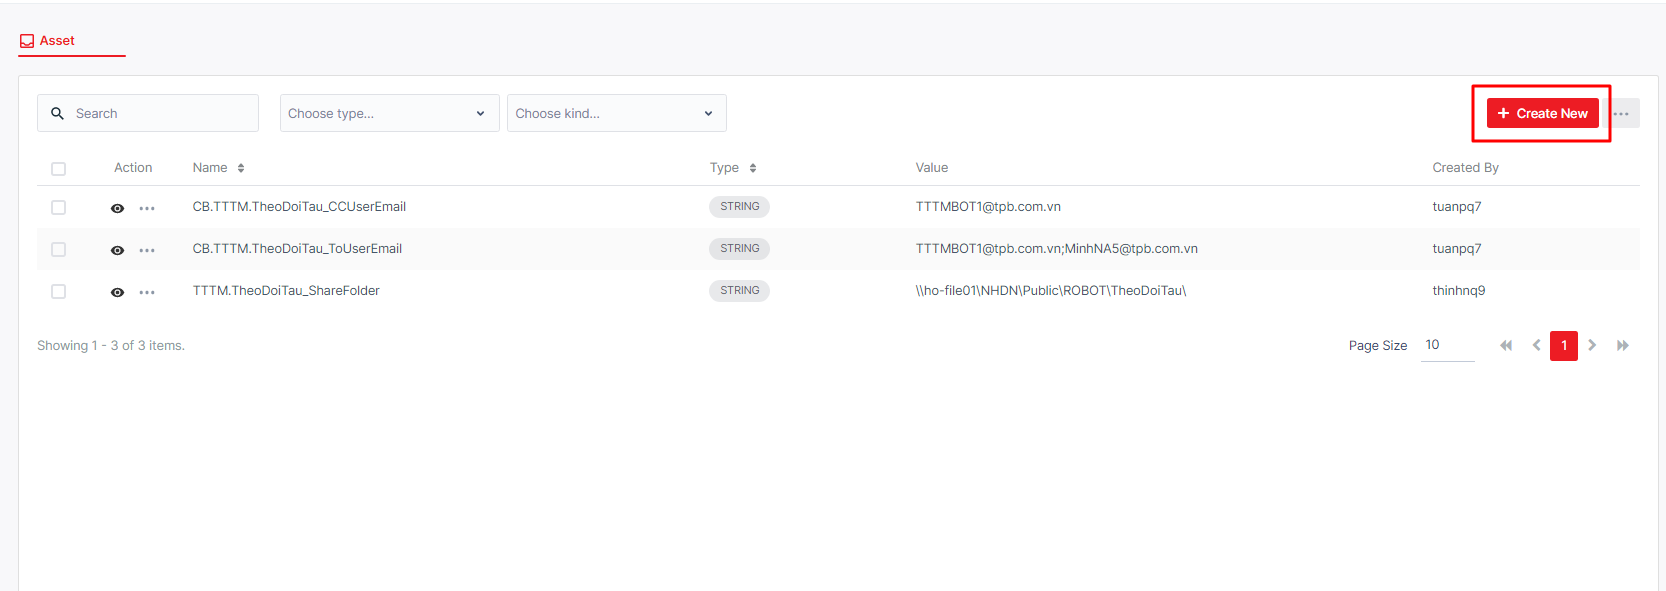
In order to create an Asset, on the Assets page, click Create new.
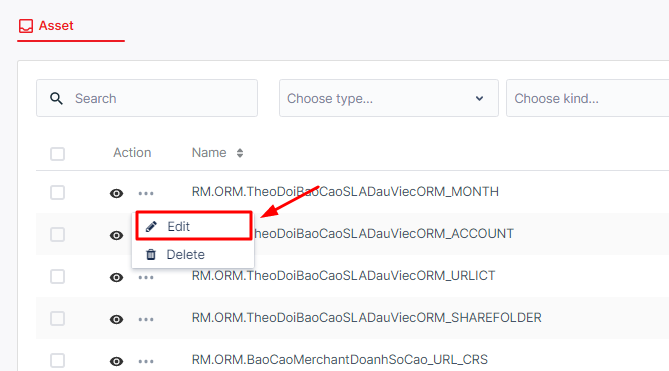
When you want to edit an existing Asset, click the Edit button as below:
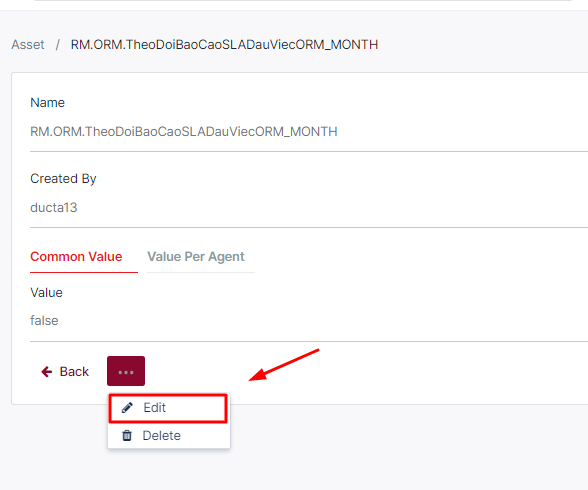
Alternatively, you can access the Details page of said Asset and select the Edit button.
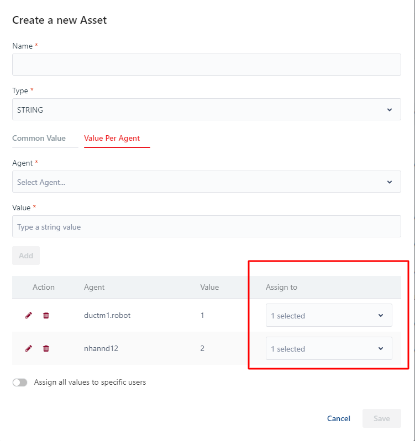
The system will display the form for you to create/ Edit an Asset:

| No | Column/ Label | Description | Type | Maximum | Is Mandatory? | Input Requirement |
|---|---|---|---|---|---|---|
| 1 | Name | Enter the name of the asset you want to create/edit | String | 255 char | Yes | |
| 2 | Type | Select the type of the asset you want to create/edit | Dropdown list | Yes | ||
| 3 | Common Value | This means every agent can access the asset you are creating/editing | ||||
| 4 | Value | Depending on the type you chose Enter/select the value of the asset | String | 500 char | Yes | |
| Bool | Yes | By default, True is selected. | ||||
| Int32 | 500 char | Yes | ||||
| Credentials | Yes | Both User and Password needed to be filled | ||||
| 5 | Value Per Agent | This means only agents that are chosen by you can access the asset you are creating/editing | You can add multiple choices, but you can only add one by one | |||
| 6 | Agent | Select the agent you want to give rights to access the asset you are creating/editing | Input searching | No limit | Yes | |
| 7 | Value | Depends on the type you chose Enter/select the value of the asset you are creating/editing | String | 500 char | Yes | |
| Bool, SingleChoice | Yes | |||||
| Int32 | 500 char | Yes | ||||
| Credentials | Yes | Both User and Password needed to be filled |
d. Delete an Asset
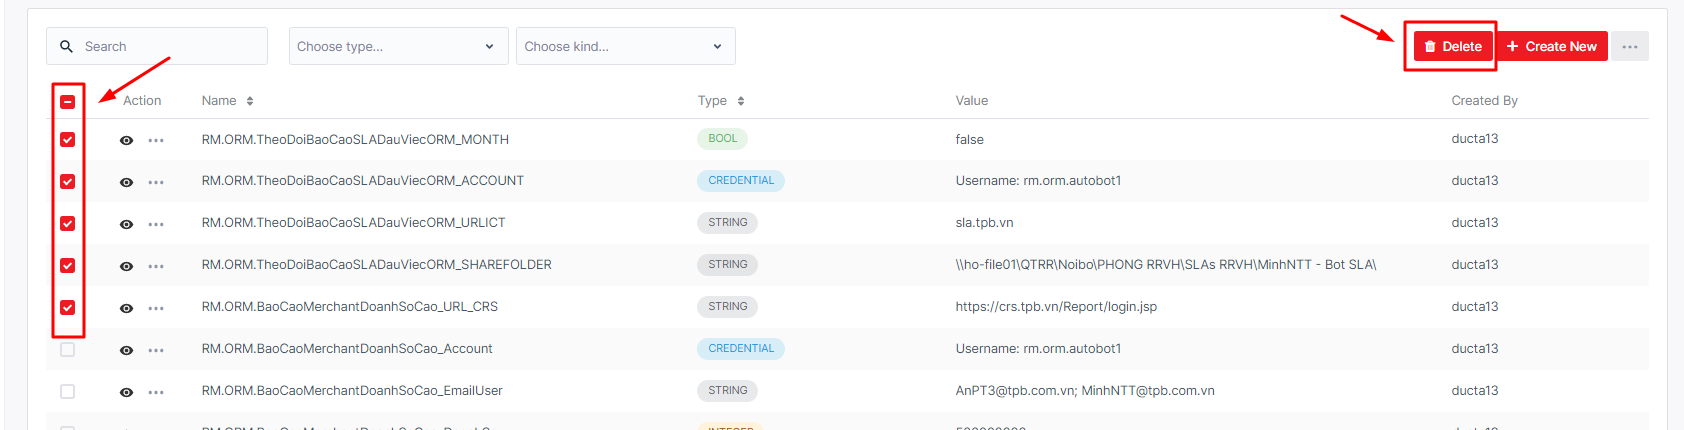
To delete a task, you click the Delete button of the corresponding Asset.
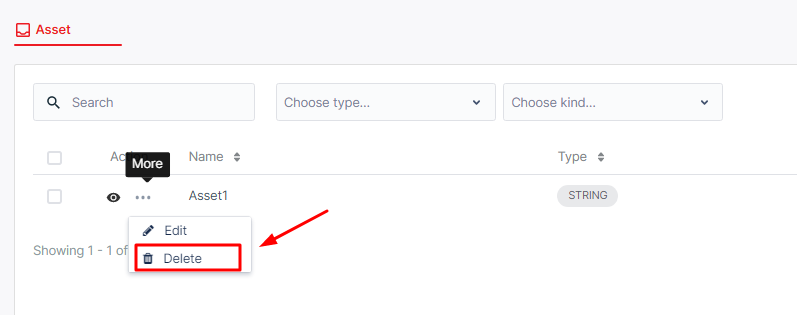
Alternatively, you can select the checkbox before each Asset and the Delete button will show up next to the Filter button. Tick the Checkbox next to Action will allow users to select all displayed Assets for bulk delete.
e. 2-level asset management
This feature allows the admin to manage assets with 2 levels.
Level 1: The admin can assign all values in an asset to an individual or a group of individuals. Only the assigned person or group can view and edit it.
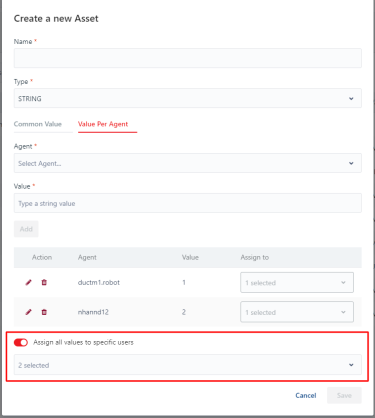
Level 2: The admin can assign a specific value within the asset set to an individual or a group of individuals. Only the assigned person or group can view and edit the value.