akaBot incorporates a role and permission-based access-control framework. Roles are sets of permission, which means that the permissions required to access and control specific Center resources are assigned to roles. In other words, Users were not given permission to certain resources but will get the permit through a role. Depending on their roles, users have access to the resources listed below:
| No | Resource |
|---|---|
| 1 | ADMIN RESOURCE |
| 2 | ENVIRONMENT RESOURCE |
| 3 | ROBOT RESOURCE |
| 4 | PACKAGE RESOURCE |
| 5 | WORKFLOW RESOURCE |
| 6 | JOB RESOURCE |
| 7 | SCHEDULE RESOURCE |
| 8 | ORGANIZATION UNIT RESOURCE |
| 9 | ASSET RESOURCE |
| 10 | QUEUE RESOURCE |
| 11 | LOG RESOURCE |
| Permissions | Category |
|---|---|
| None | Users won’t see the resource in the Center interface. |
| View | Users can see the resources but can’t interact with it. |
| Edit | Users can see and edit the resources. |
| Create | Users can see and create new resources. |
| Delete | Users can delete the resources. |
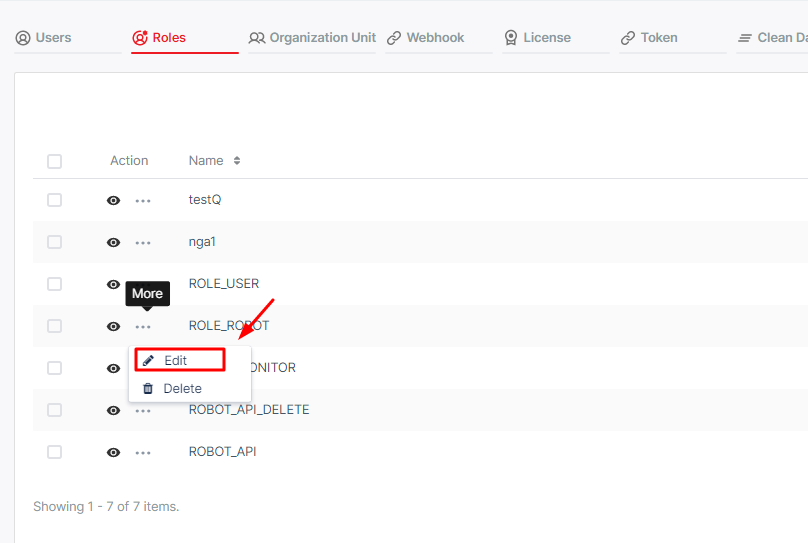
This Role Management page displays all available roles and allows admin to add or delete, as well as update roles’ information. After selecting the Role Management tab, the system displays the following page:
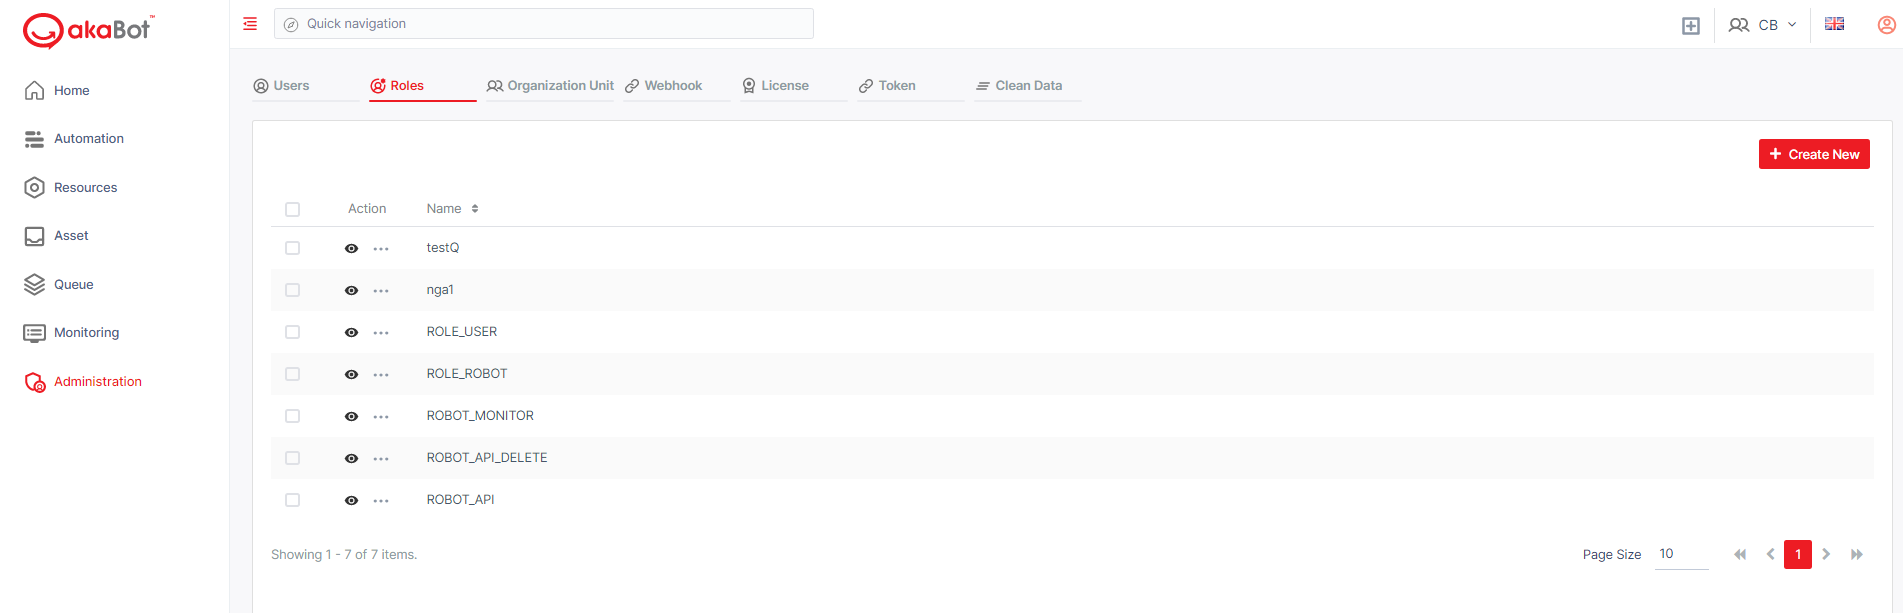
| No | Column | Description |
|---|---|---|
| 1 | Action | Available actions to manage the User. Includes: Edit: allows users to view the details of the Roles. Delete: allows users to delete selected role |
| 2 | Name | The title of the role |
- Default Roles
In akaBot Center, there are 3 default roles:
- ROLE_ADMIN
- ROLE_USER
- ROLE_ROBOT
ROLE_ADMIN
By default, the role has all the rights to all resources and this cannot be changed.
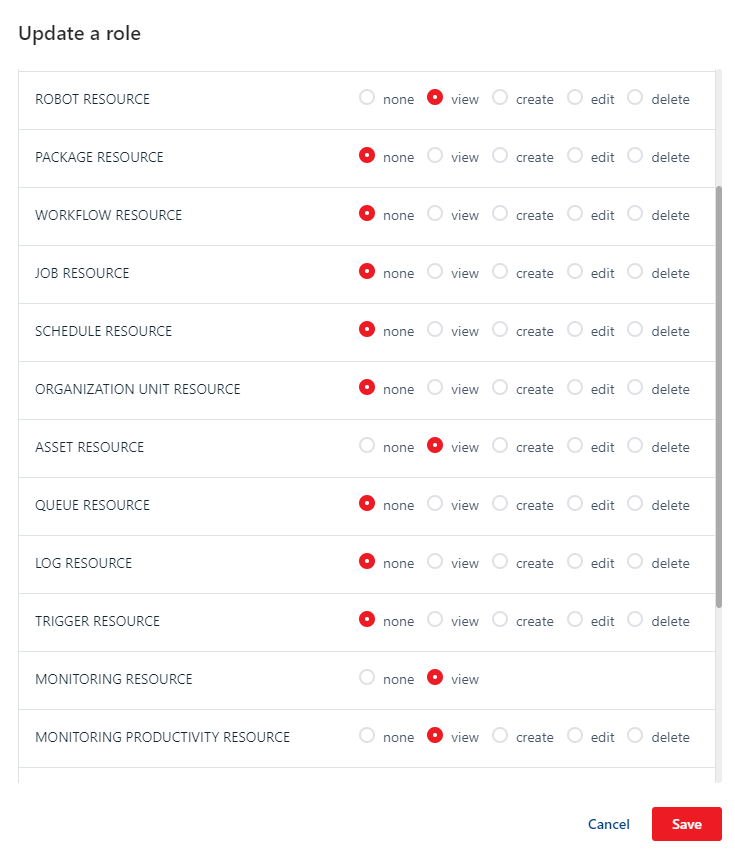
ROLE_USER
By default, the role has the following rights, but they can be edited.
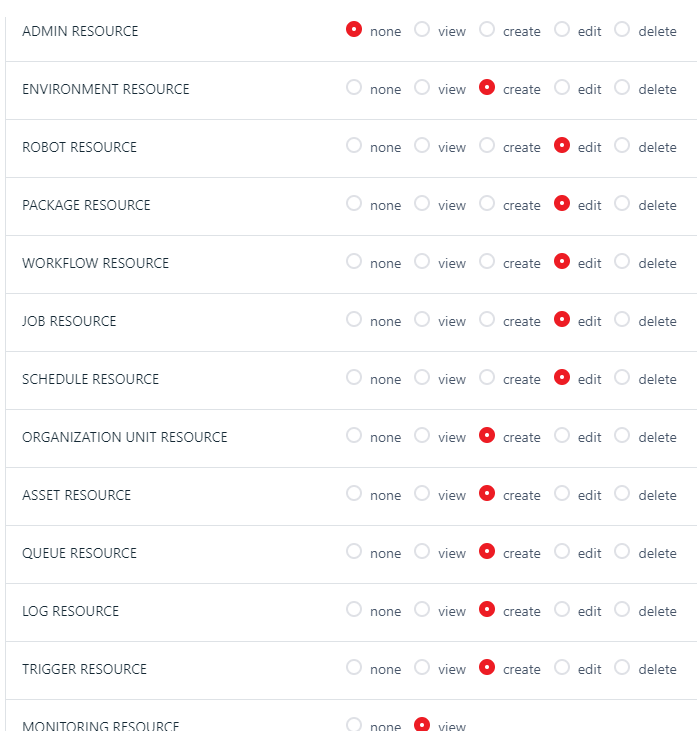
ROLE_ROBOT
By default, the role has the following rights, but they can be edited:
a. Create/Edit a Role
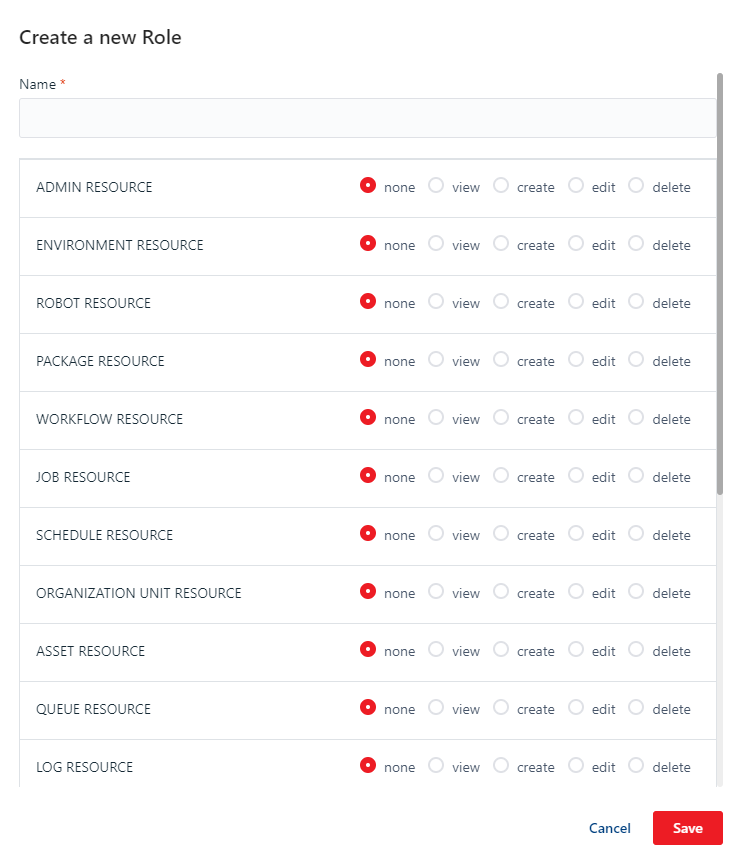
To create a new Role for your Center, click the Create New button at the top of the page:
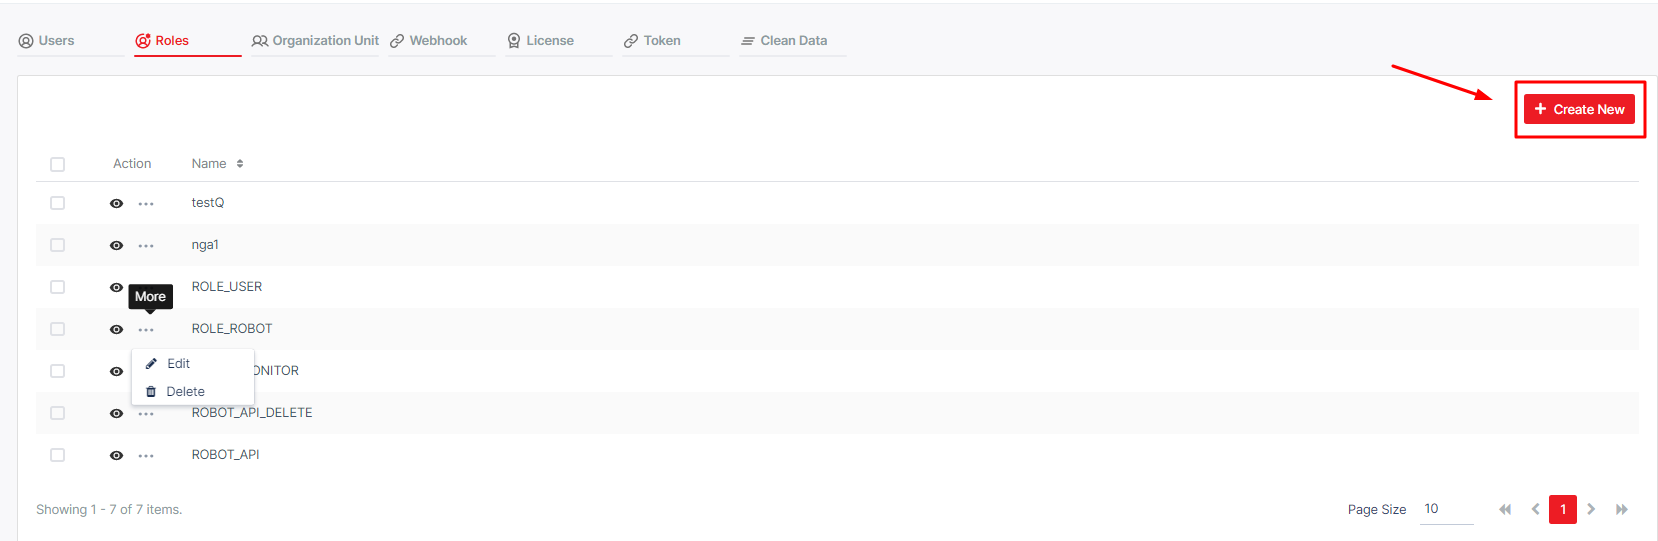
To edit an existing Role, click the Edit button corresponding to the Role in the Action column.
When you click on Create New/Edit button, the system will show a form for you to fill in. Details in the table below
| No | Column /Label | Description | Type | Maximum | Is Mandatory? | Input Requirement |
|---|---|---|---|---|---|---|
| 1 | Name | Enter the role name | String | 100 char | Yes | |
| 2 | Resources | You can only choose one option for each row Select the rights for the role | SingleChoice | Yes |
b. Delete a role
To delete a role, you click the Delete button of the corresponding role.
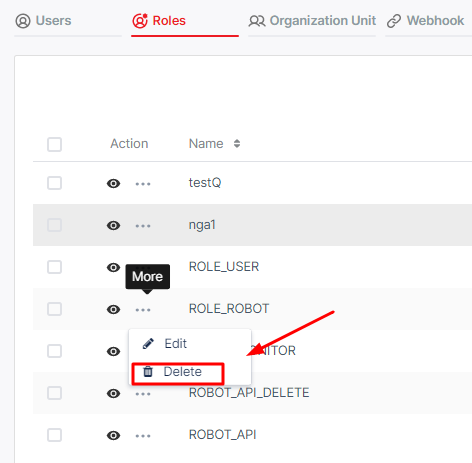
A confirming pop-up will display. Hit Delete to complete the operation.