Use case 1: View/ Create/ Edit an OU
S1: To access the Organization Unit page, click on the Administration tab in the left menu, then click Organization Unit tab

S2: In order to view all the details of an OU, you can click the eye button

Then you will see the detail page

| Column/ Label | Description |
| Name | The name of the OU |
| User | The list of all the Users assigned in this OU. This list included: Username |
S3: To create/ edit OU
Click "Create New” button. If you want to edit an OU, select the edit option from Action next to the corresponding OU Name

S4: After clicking, a pop-up form shows up for you to fill in the information
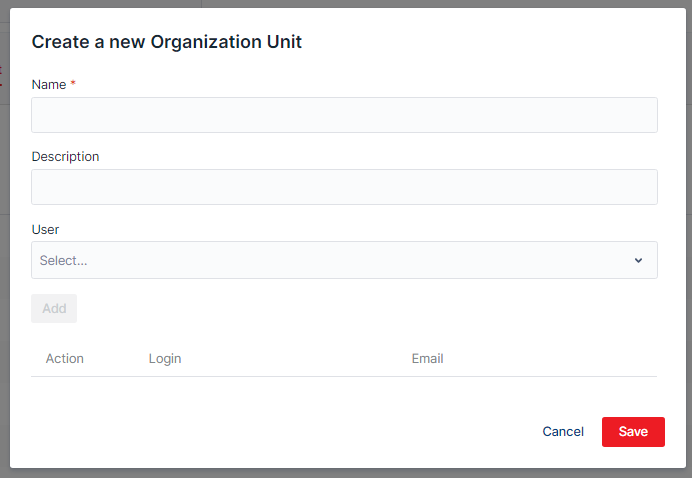
| Column/ Label | Description |
| Name | Enter the custom name of the OU you want to create/edit |
| Description | Enter the description of the OU you want to create/edit |
| User | Select user you want to add into the OU that you are creating/editing Note: You can add many users, but you can only add one by one |
Use case 2: Create/ edit a new Role
Roles are sets of permission, which means that the permissions required to access and control specific Center resources are assigned to roles
S1: In the menu, choose Administration, then choose Role Management tab to see the decentralization of each role.

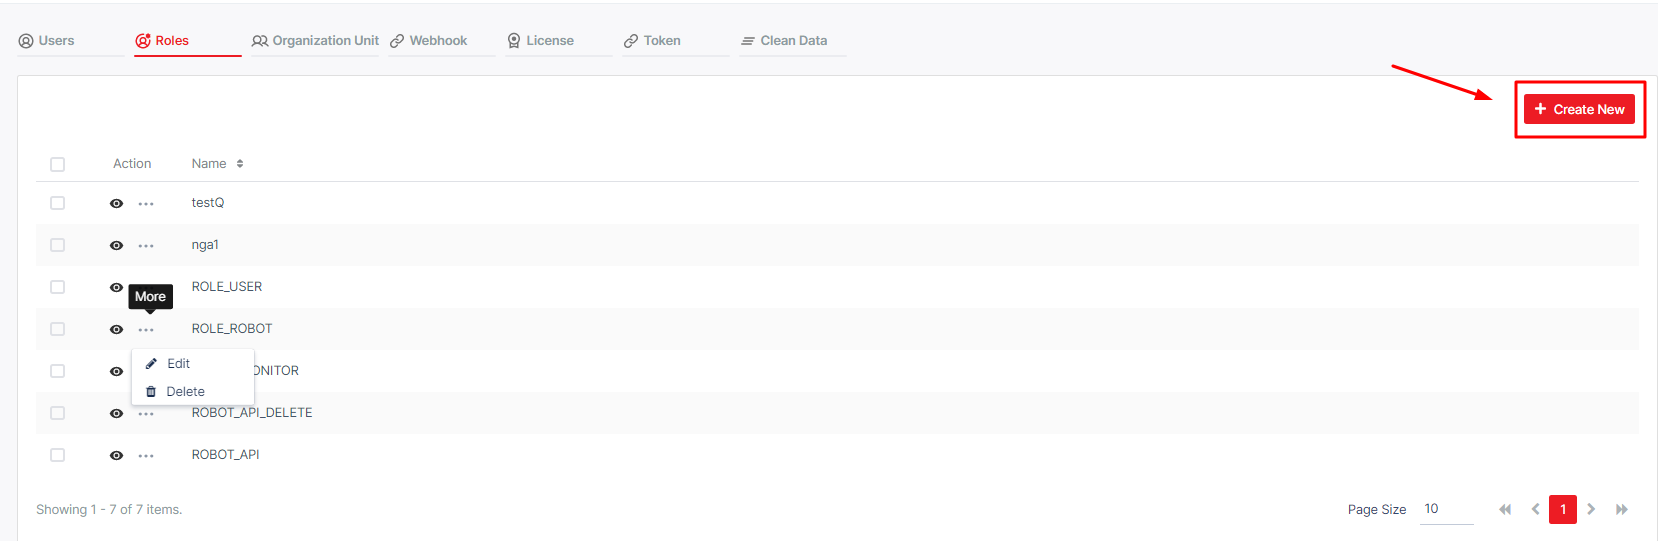
S2: Click the Create New button at the top of the page to create new role
S3: Then a pop-up form will show up for you to fill in

S4: Tick in the box to give permission for your new role > then click Save
| Permissions | Category |
| None | Users won’t see the resource in the Center in interface |
| View | Users can see the resources but can’t interact with it |
| Edit | Users can see and edit the resources |
| Create | Users can see and create new resources |
| Delete | Users can delete the resources |
S5: To edit an existing Role, click the Edit button corresponding to the Role in the Action column.

Use case 3: View/ create/ edit a new account
S1: Click Administration in the left menu > Choose Users tab, then you will see detail page as below:

S2: To view a user, click eye button

Then, screen will demonstrate as below:

| Column | Description |
| Status | The status of the user. Can be Activated or Deactivated |
| Profiles | The role(s) assigned to the user. There are 3 default roles: ROLE_ADMIN ROLE_USER * ROLE_ROBOT A user can have more than one role. Details about permission for each role will be explained in the Role Management section |
S3: To create/edit account, click Create New on the right

When you click on Create New/ Edit button, the system will show a form for you to fill in. Details in the table below:

After filling the form, click the Save button to save it, and the User is created. You can also cancel the creation of the queue by clicking the Cancel button
Use case 4: Delete account
To delete a User, you click the Delete button of the corresponding User.

A confirming pop-up will display. Hit Delete to complete the operation.
Use case 5: View/ search/ upload a Package
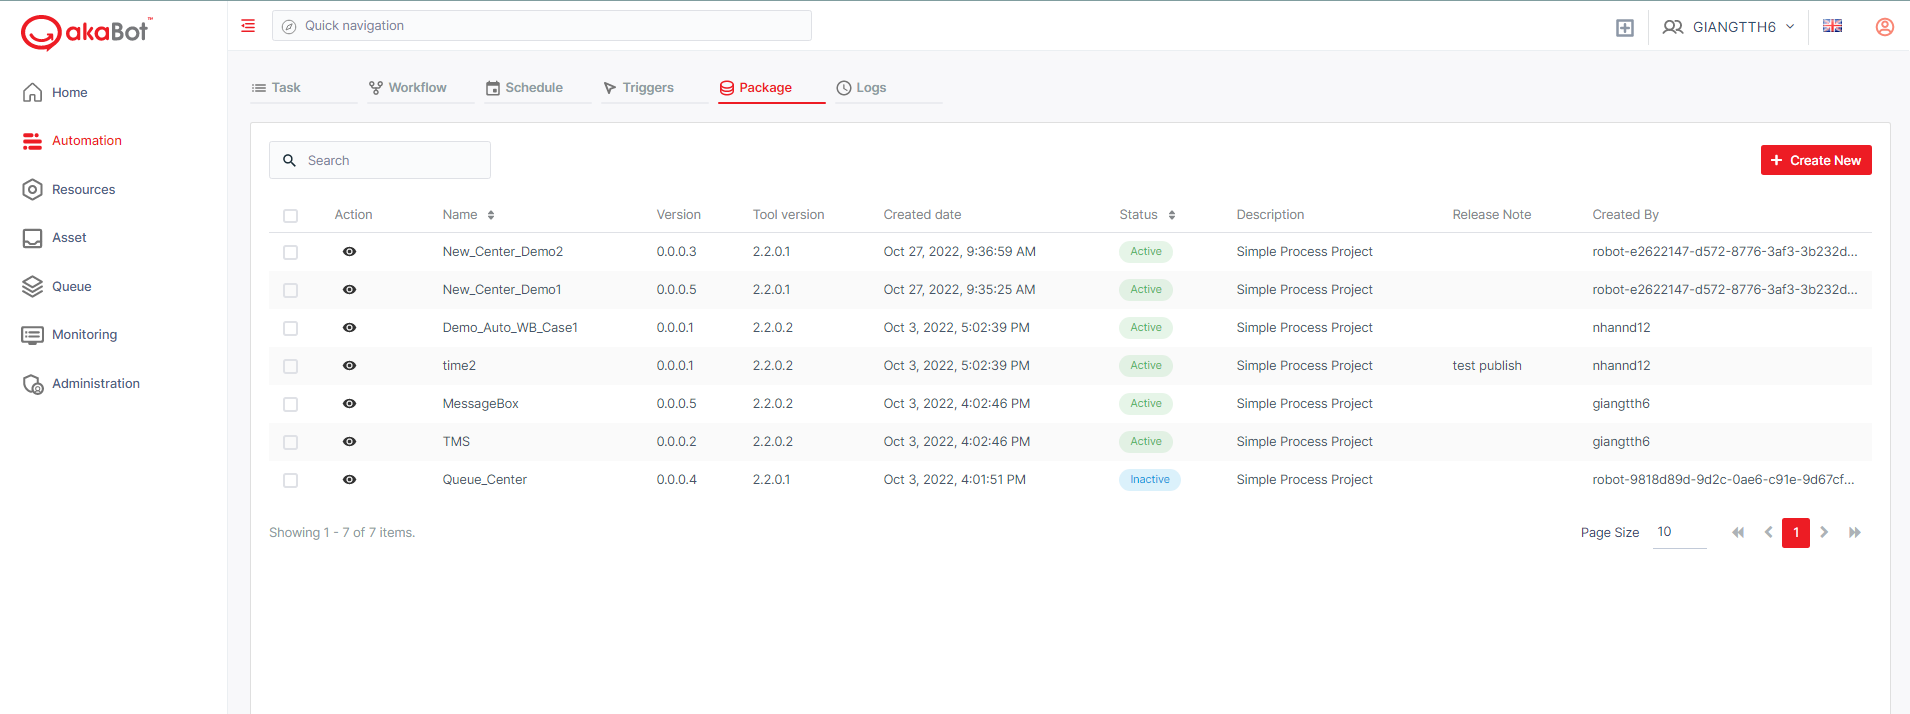
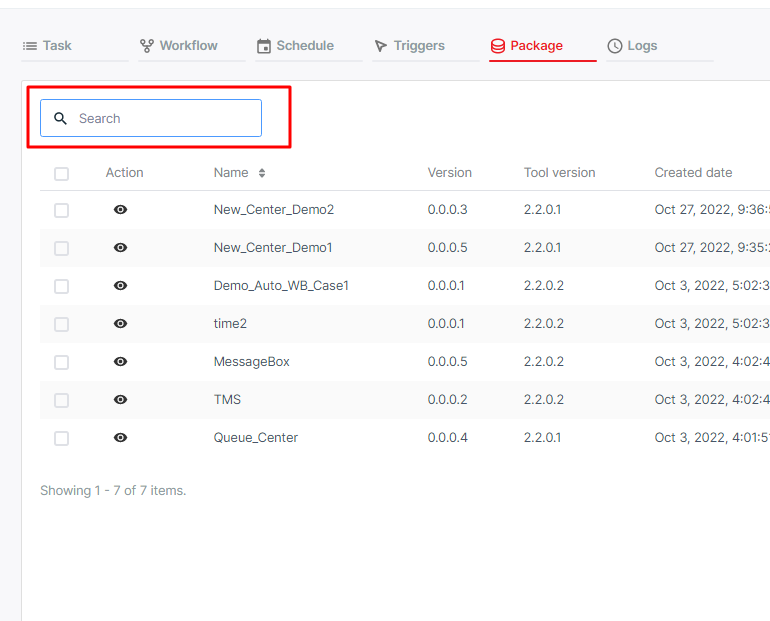
S1: To access the Package page, you click the Package tab in the left menu. After clicking, the system opens the Package Listing page that includes all Packages we have published to the Center.
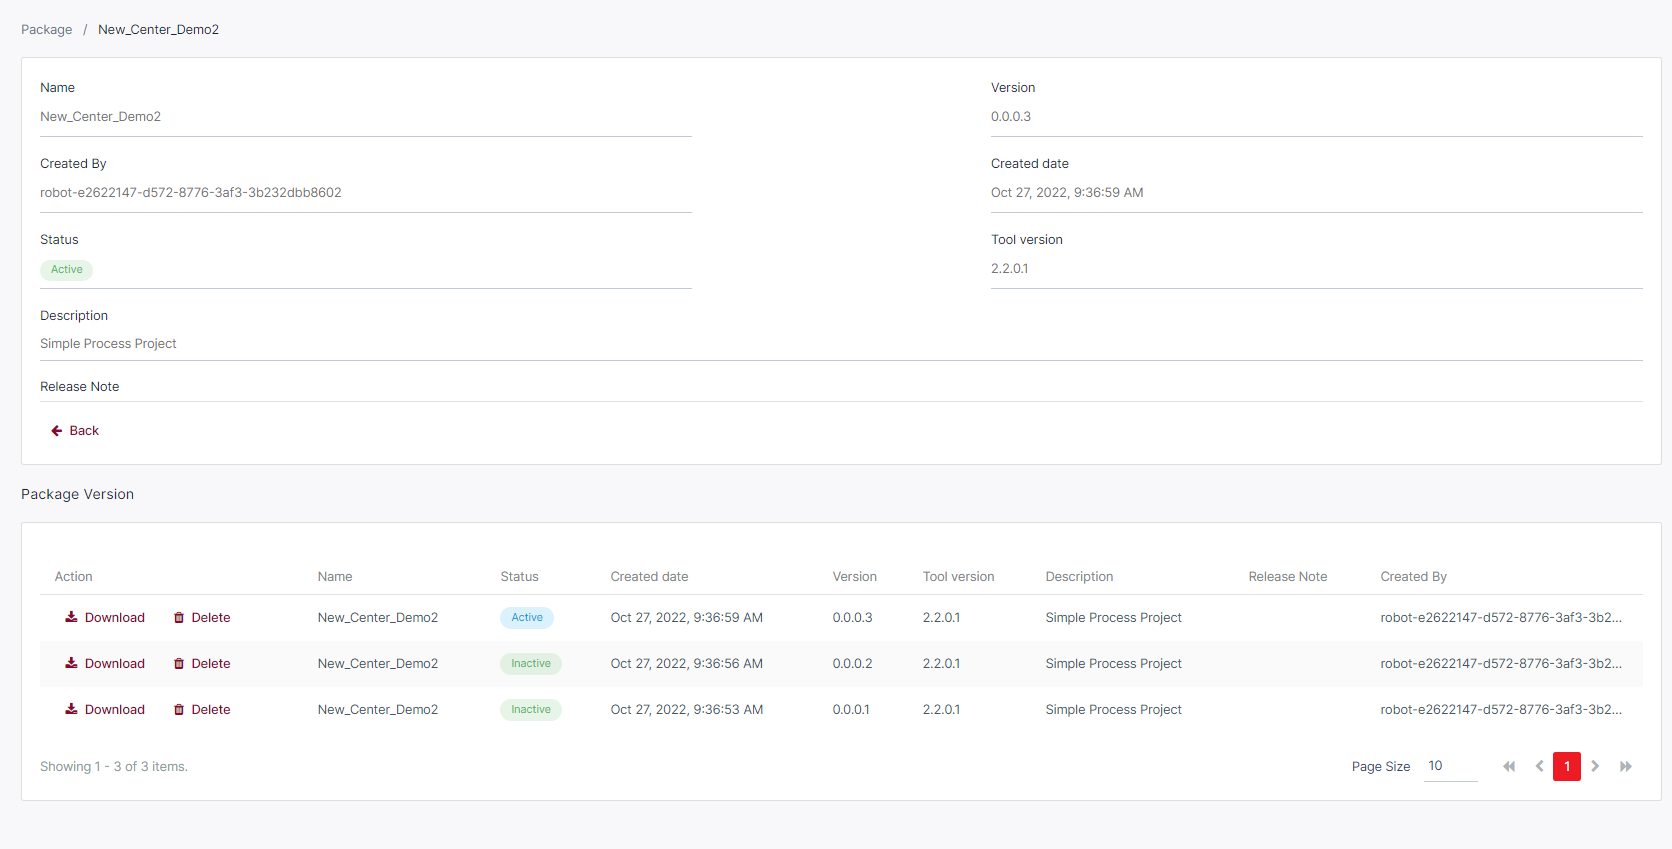
S2: To view package, the user can click the Eye button. On the detail page, you will see a list containing all versions of the selected package which were uploaded/published to the Center.
S3: To search package, entering package name here
S4: Upload package
when you publish a workflow to the Center, a package will be uploaded to the Center automatically. However, you can also Manually upload a package to Center using the Create New button located at the top right of the Listing page

The system will display the window for you to upload the Packages.

Use case 6: Delete Package
S1: On the Packages Repository page, click on the Name of the package. The Package information and a list of all versions will be displayed

S2: Select Delete action corresponding with the version of the package you want to delete. A confirming popup will display. Hit Delete to complete the operation.

Use case 7: Create / Edit Agent Group
Option 1:
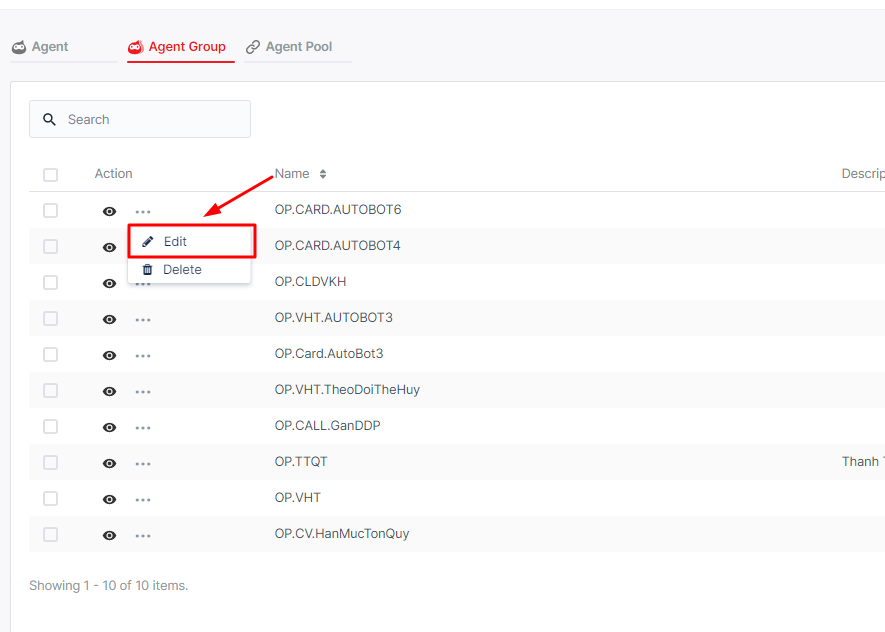
S1: Choose Resource in the left menu > click Agent Group tab then screen will show as below

S2: Click “Create New” button on the right corner of the screen

Option 2: In case, you just want to edit Agent Group information, click Edit in Action column
S3: When you click on Create New/ Edit button, the system will show a form for you to fill in. Details are in the table below.

| Column | Description |
| Name | Enter the name of the agent group you want to create/edit |
| Description | Enter the description of the agent group you want to create/edit |
| Agent | Select the agent you want to add to the agent group that you are creating/editing. You can click the bin icon next to the Agent to remove it if needed. |
Use case 8: View/ Create / Edit Agent
S1: To view Agent, You can view the details of the Agent by clicking the eye button.

S2: You can see a list of all agent’s tasks at the bottom of the Details page,

S3: To view the Agent’s logs from the Agent Details page, click the Log tab next to the Task tab to switch the view.

You can also Export Log for further investigation by clicking the Export Log option next to the Filter button. You can export all Logs or specific filtered Log Items.

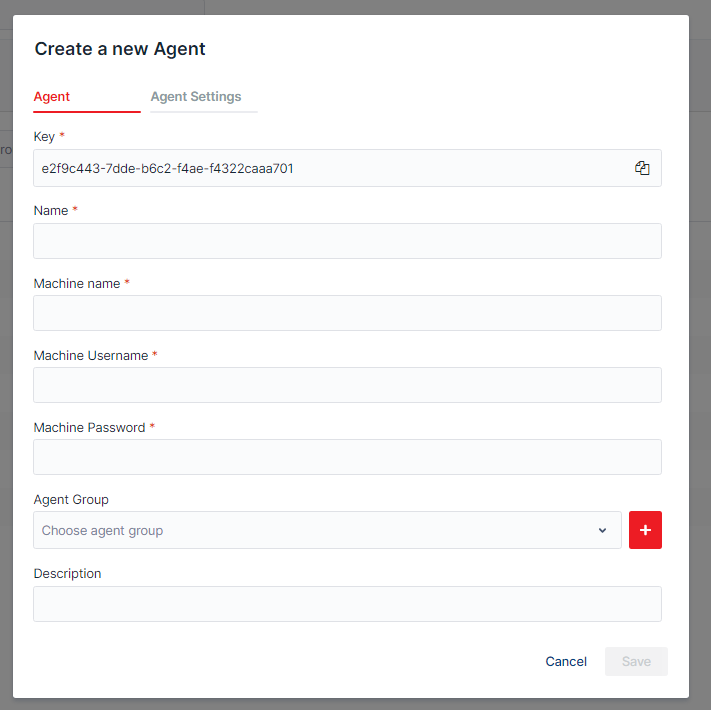
S4: To create/ edit an Agent, click Create New button on the right corner

Or you could choose edit button of one Agent in the list. Alternatively, you can click the Edit button on the Detail Page of the Agent.

S5: After clicking, the system shows a popup allowing you to fill properties to create/edit a new Agent. You need to fill in all the necessary info in the form below.
Use case 9: View/ Create/ Edit a workflow
S1: Choose Automation in the left menu > click Workflow tab

S2: To view workflow, you can click the eye button

You can search the Task list by Time, Name, State, Agent of the tasks.

S3: To create a workflow, you click the “Create New” button at the top of the page.

S4: After clicking, the system shows a form allowing you to create the workflow.

| Permissions | Category |
| Package Name | Select the package you want for the workflow you are creating |
| Package Version | Depends on the package that you chose above. Select the version of the package you chose |
| Agent Group | Depends on the package version that you chose Select the agent group that you want to attach the workflow that you are creating to |
| Description | Enter the description of the workflow you are creating/ editing |
S5: Once filled in all the General information, you can add further Parameters and Machine Environment variables to the Workflow. You can add multiple variables, but you can only add one by one.

S6: To edit a workflow, you click the Three dots button, then click Edit.

S7: After clicking, the system shows a form allowing you to edit the info of the workflow > then Save

Use case 10: Create / Edit an Asset
S1:
Optionn 1: In Asset tab, choose Create New to create a new asset

Option 2: you can access the Details page of said Asset and select the Edit button.

S2: Fill in the form

| Permissions | Category |
| Name | Enter the name of the asset you want to create/edit |
| Type | Select the type of the asset you want to create/edit |
| Common Value | This means every agent can access the asset you are creating/editing |
| Value | Depending on the type you chose Enter/select the value of the asset |
Use case 11: Change agent’s password
Option 1:
S1: From Agent in the left menu, choose agent name that you want to change password, then click Edit

S2: When the pop-up form appears > fill new password in Machine password > click Save (for more information, click here)

Option 2:
S1: In Asset tab, choose Name of agent you want to change passwork, then click Edit button

S2: Fill in the tab:
Type: choose CREDENTIAL
- Click OK

Use case 12: Run / Stop Bot
1. Run Bot Manually (create new task, Clone)
Option 1:
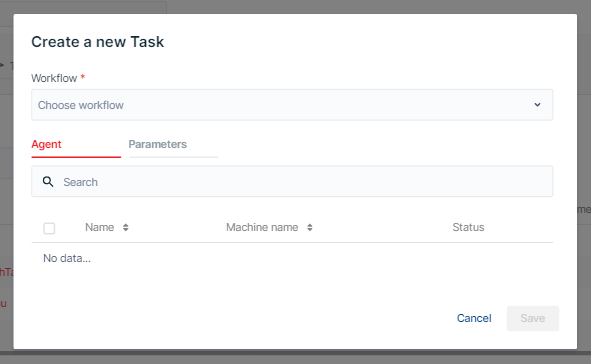
S1: Click Automation in the left menu > Click Task tab

S2: Choose workflow that needs to run manually, then save
Option 2: Alternatively, you can click Action in Action column next to the task > Then a dropdown list is shown up > choose Clone > Click Save

2. Run Bot Schedule (set up schedule, disable schedule)
2.1. Create / Edit Schedule:
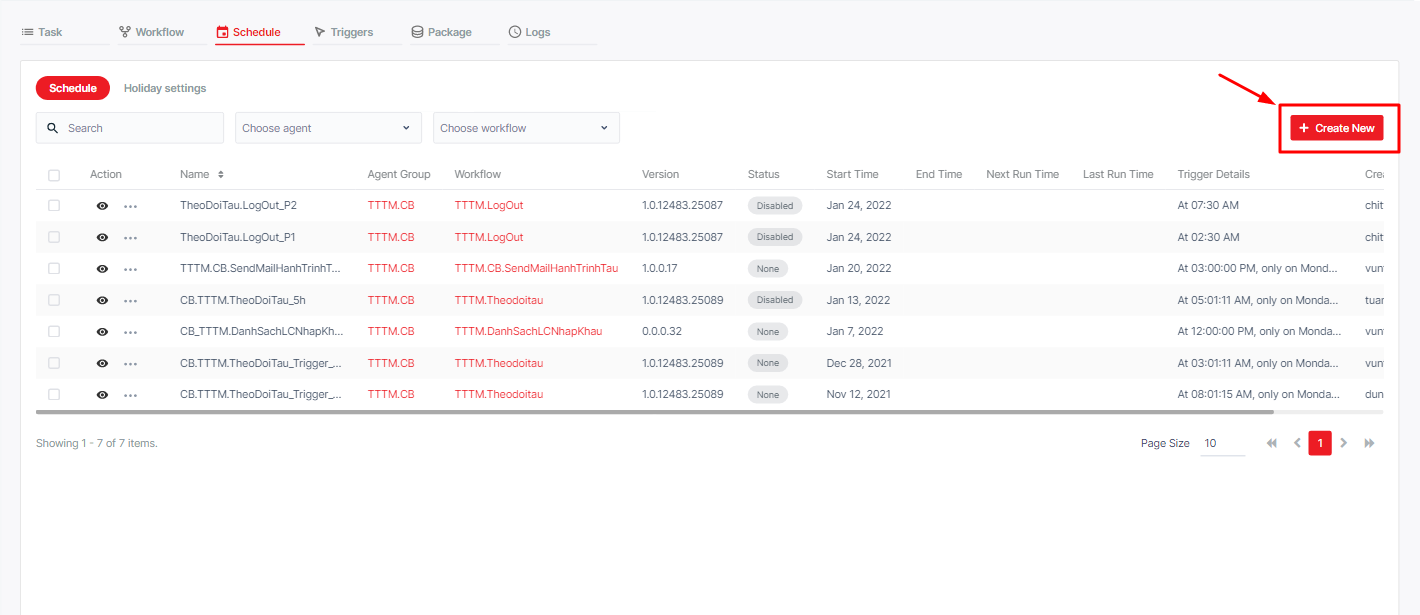
S1: In menu choose Automation then click Schedule tab > Click Create New
S2: Fill in the pop-up form
Trigger tab:
Execution Target tab: depends on the workflow you chose, tick the suitable agent Parameters tab: Holiday settings tab: single choice
Note: (*) is required
|  |
If you choose Once
| Column label | Description |
| Start Date | Select the date at which the schedule will start |
| At | Select the specified time at which the schedule will start |
If you choose Minutes
| Column label | Description |
| Start Date | Select the date at which the schedule will start |
| End Date | Select the date at which the schedule will end |
| Every | Select the exact cycle for the schedule by minutes |
If you choose Hourly
| Column label | Description |
| Start Date | Select the date at which the schedule will start |
| End Date | Select the date at which the schedule will end |
| Every … Hours | Select the exact cycle for the schedule by hours |
If you choose Daily
| Column label | Description |
| Start Date | Select the date at which the schedule will start |
| End Date | Select the date at which the schedule will end |
| At | Select the specified time at which the schedule will start |
If you choose Weekly
| Column label | Description |
| Start Date | Select the date at which the schedule will start |
| End Date | Select the date at which the schedule will End |
| Everyday At | Select the specified time at which the schedule will start |
| Monday Tuesday Wednesday Thursday Friday Saturday Sunday | Select the exact cycle for the schedule by hours, minutes and days. |
If you choose Monthly
| Column label | Description |
| Start Date | Select the date at which the schedule will start |
| End Date | Select the date at which the schedule will end |
| At | Select the specified time at which the schedule will start |
| On | Select exact day in a month |
| Of | Choose exact month in a year |
If you chose Advance
| Column label | Description |
| Cron Expression | A string comprised of 6 or 7 fields separated by white space allows users to create a CronTrigger to trigger a schedule that recurs based on calendar. |
2.2. Start / Stop a schedule:
S1: To Force Start/ Stop a Schedule, you can click the Action button and select the Start Now button or Stop button if the Schedule is running

2.3. Disable / Enable a schedule
S1: To disable a schedule, click corresponding Action button and then select Disable.

S2: After clicking, the system will ask for your confirmation to switch status:

When the schedule is disabled, the status of said schedule changes to Disable.
S3: to enable a schedule, click the corresponding Action button and then select Enable.

2.4. Delete a schedule
S1: To delete, you need to click The Action button of the corresponding Schedule and select the Delete button.

2. Stop Bot
S1: To stop a running Bot, in Task tab > click Action in Action column next to the task > Then a dropdown list is shown up > choose Stop

S2: The System will show a message to get your confirmation. Hit Confirm to remove the task.
