A Workflow represents the association between a Package and an Agent Group. Each time a package is linked to an Agent Group, it is automatically distributed to all the Agent machines that belong to that Agent Group.
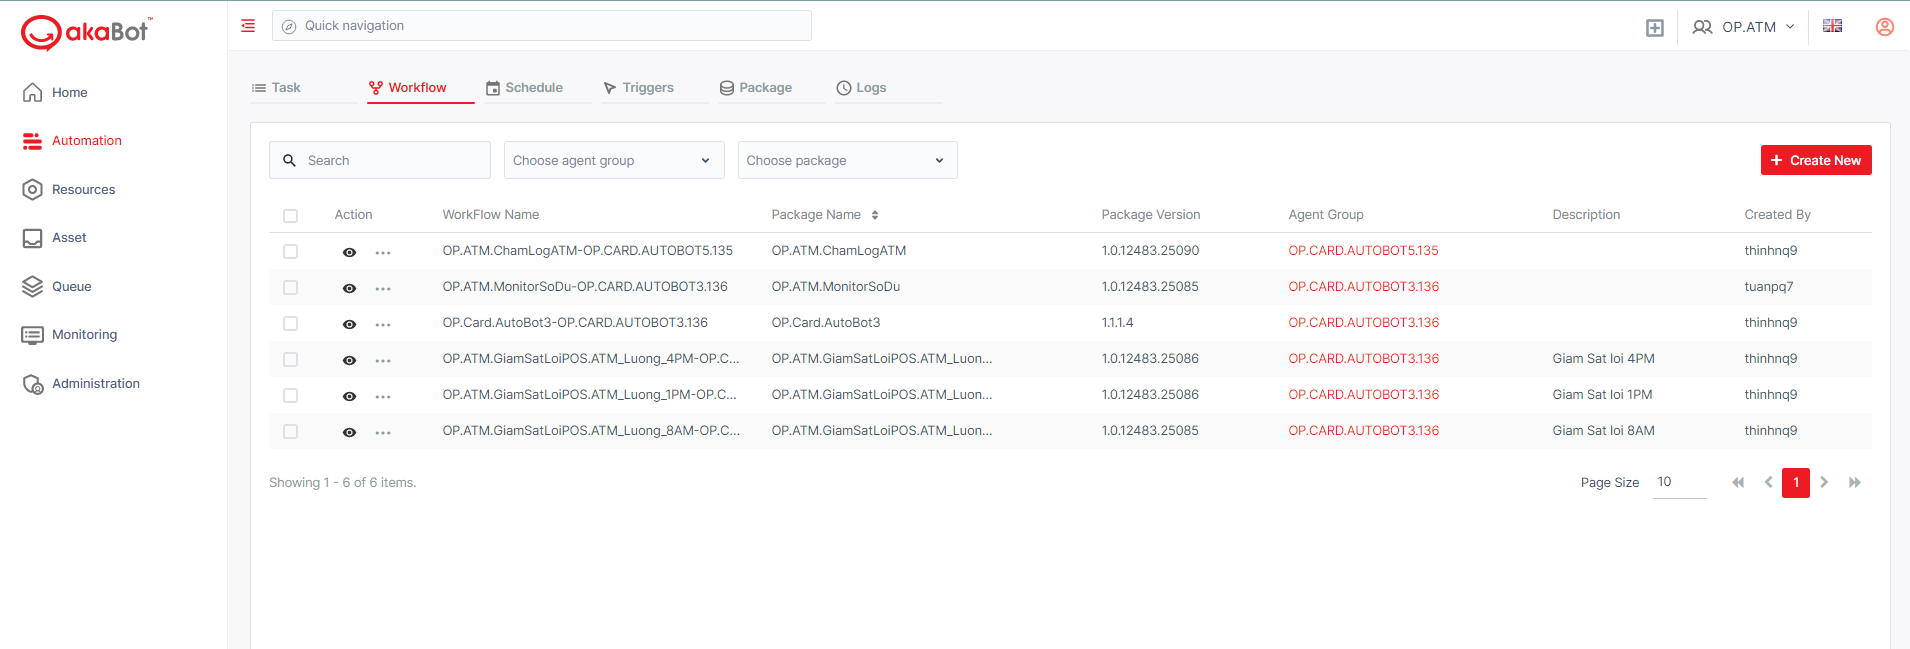
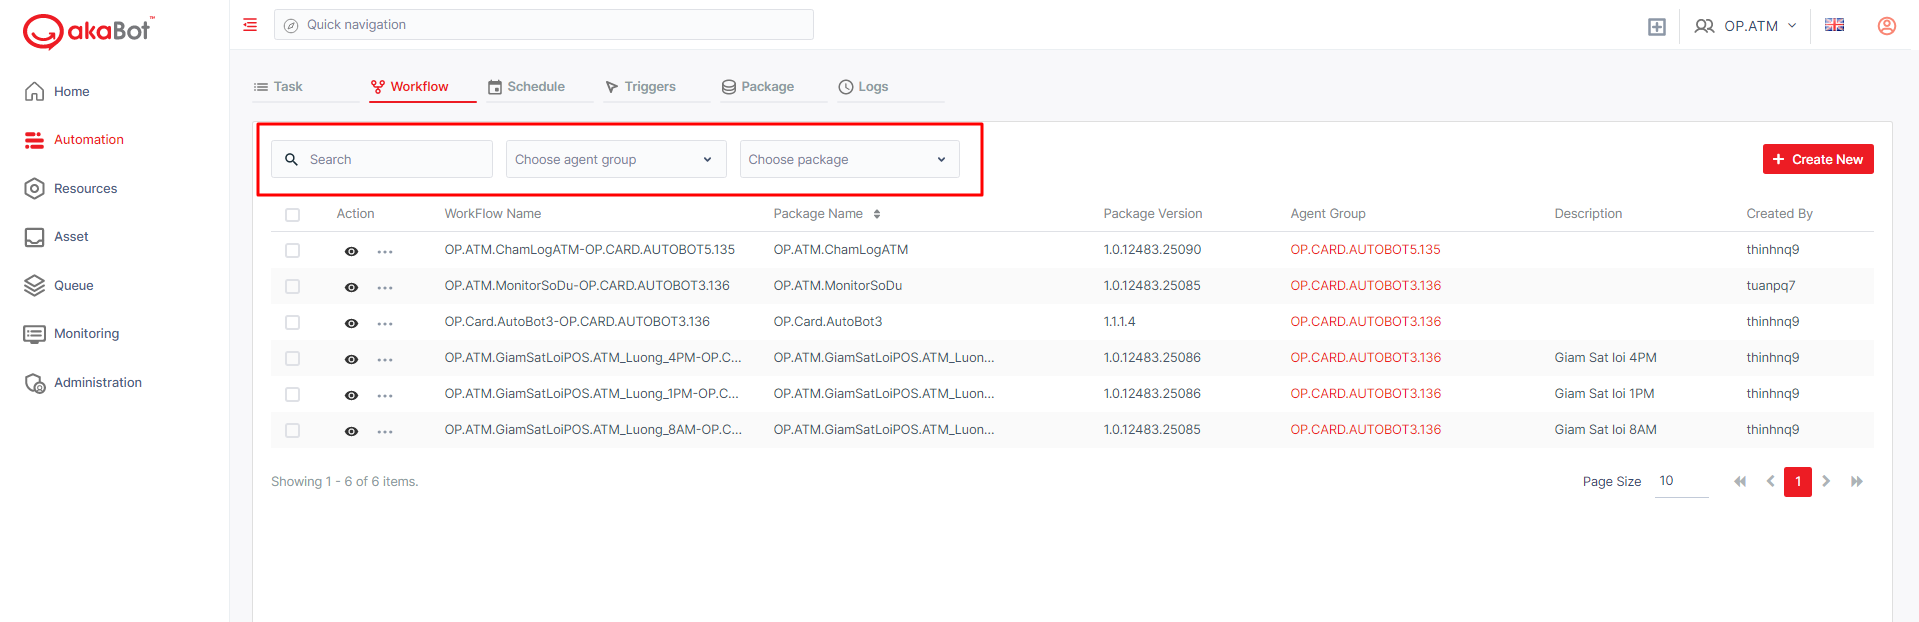
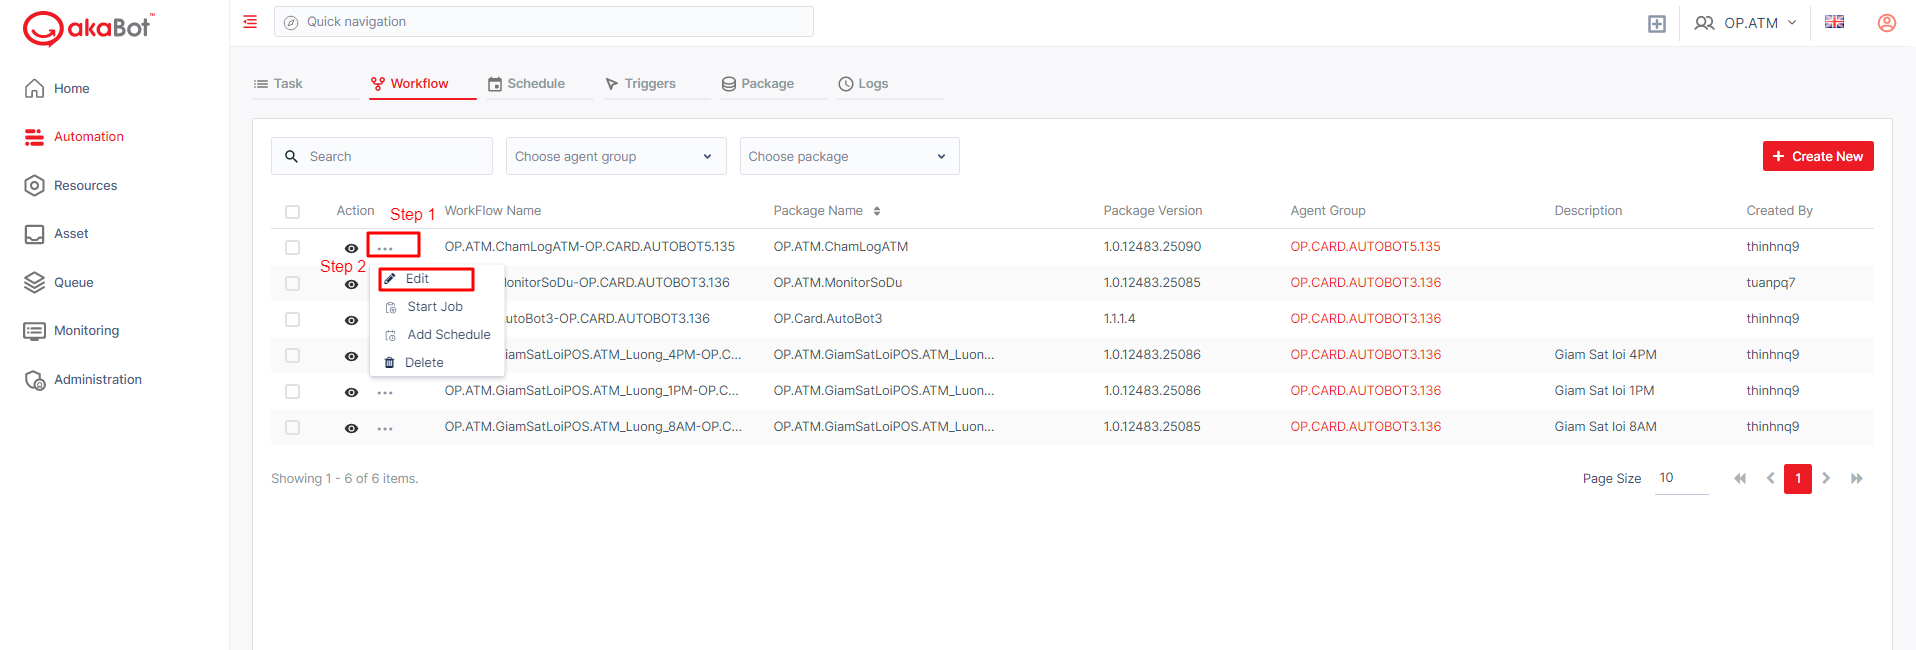
The Workflows page enables you to deploy an uploaded package to Agent Groups, manage previously created associations and keep all your workflows up to date. This helps you distribute packages on the Agent machines and execute works faster from the Tasks page. To access the Workflows page, you click the Workflow tab at the left menu. After clicking, the system shows the Workflow page listing all existed Workflow as below:
| No | Column/Label | Description |
|---|---|---|
| 1 | Action | Available actions to manage the Log of said Workflow. Includes: *START JOB: Quickly create a new Task related to this workflow. *ADD SCHEDULE: Quickly add a schedule related to this workflow |
| 2 | Workflow Name | The name of the Workflow. For organization purposes, it is best to create Workflow Name with the format: Package Name_Agent Group Name. |
| 3 | Package Name | The name of the Package that was published to akaBot Center |
| 4 | Package Version | The version of the package that was published to akaBot Center. The package version will be decided when you choose the publish option in akaBot Studio. |
| 5 | Agent Group | Agent Group which the workflows will be deployed in |
| 6 | Description | The current version of Package’s published description |
| 7 | Created by | The user who creates this Workflow. |
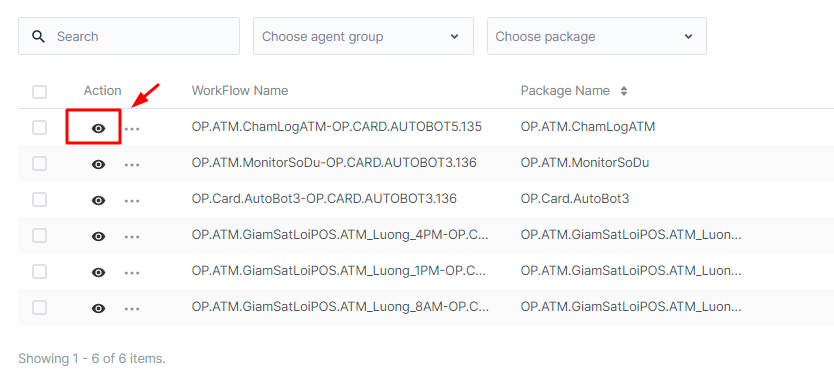
a. View a Workflow
To view a workflow, you can click the eye button.
Besides all the general information displayed on the Workflow Listing page, the Workflow Details page also included Parameters and Machine Environment information generated when creating/editing the Workflow.
Furthermore, you can see the update history as well as a list of Tasks executed by said Workflow. Details regarding Tasks shall be explained in the Tasks section.
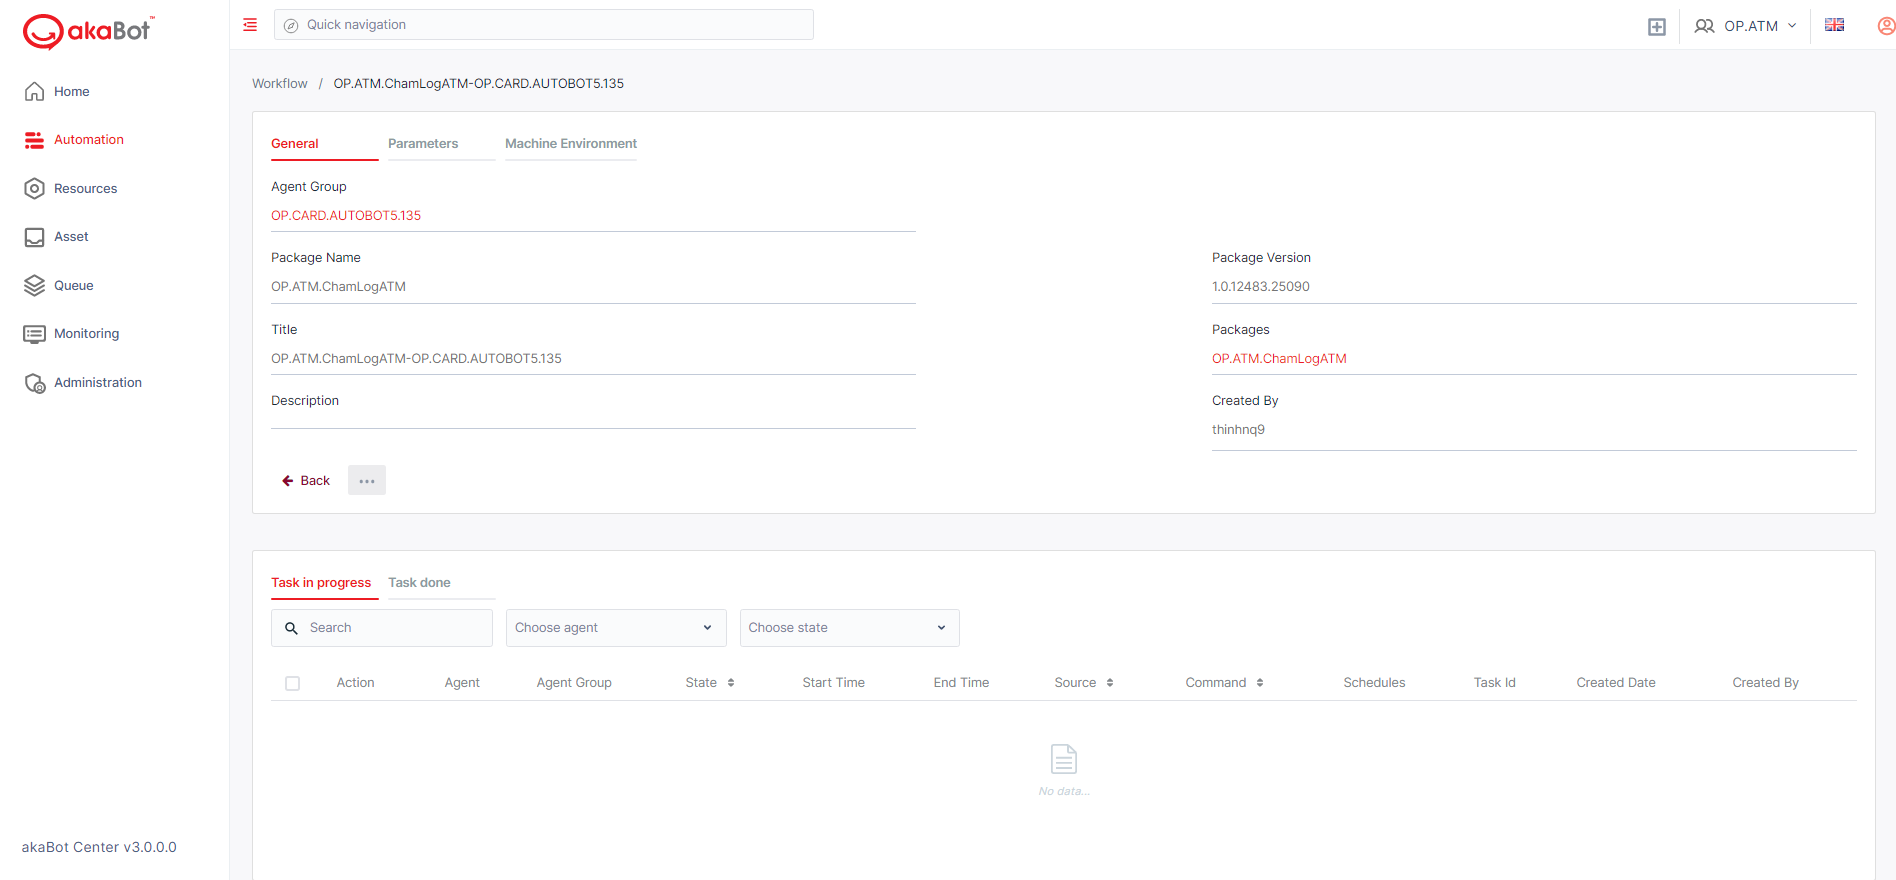
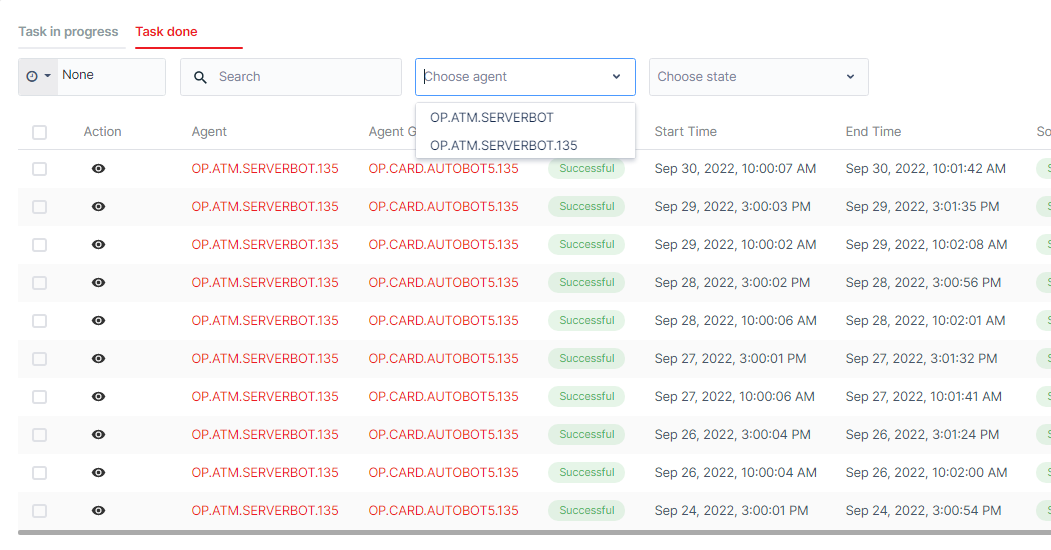
Here, you can search the Task list by Time, Name, State, Agent of the tasks.
Users can also delete executed instances of this Workflow by selecting the Checkbox at the beginning of each Task. The Delete button will show up.

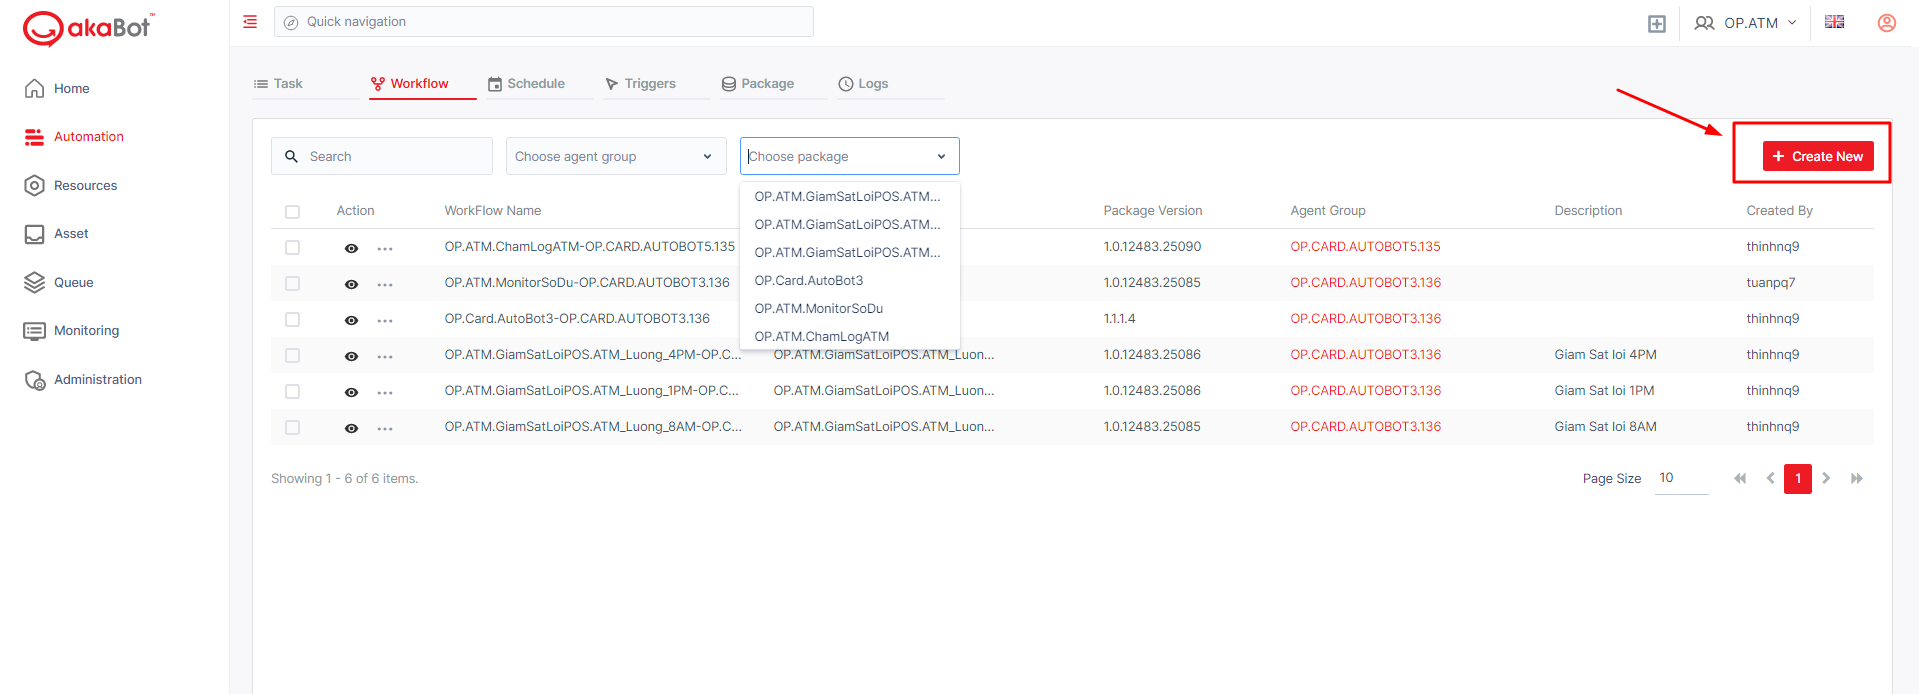
b. Search a Workflow
| No | Column /Label | Description | Type | Maximum | Input Requirement |
|---|---|---|---|---|---|
| 1 | Search box | Enter the name of the workflow you want to search | String | No limit | |
| 2 | Agent Group | Select the agent group that the workflow you want to search is attached to | Input searching | No limit | |
| 3 | Package | Select the package that the workflow you want to search is attached to | Input searching | No limit |
c. Create a Workflow
To create a workflow, you click the “Create New” button at the top of the page.
After clicking, the system shows a form allowing you to create the workflow.

| No | Column /Label | Description | Type | Maximum | Is Mandatory? | Input Requirement |
|---|---|---|---|---|---|---|
| 1 | Package Name | Select the package you want for the workflow you are creating | Input searching | No limit | Yes | |
| 2 | Package Version | Depends on the package that you chose above Select the version of the package you chose | Dropdown list | Yes | ||
| 3 | Agent Group | Depends on the package version that you chose Select the agent group that you want to attach the workflow that you are creating to | Input searching | No limit | Yes | |
| 4 | Description | Enter the description of the workflow you are creating/editing | String | 255 char | No |
Once filled in all the General information, you can add further Parameters and Machine Environment variables to the Workflow. You can add multiple variables, but you can only add one by one.
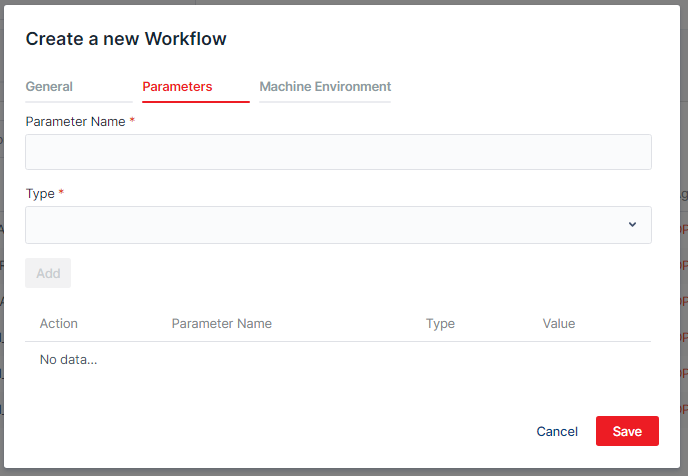
| No | Column /Label | Description | Type | Maximum | Is Mandatory ? | Input Requirement |
|---|---|---|---|---|---|---|
| Parameter Name | Enter the name of the parameter | String | 255 char | Yes | ||
| Type | Select the type of the parameter | Drop down list | Yes | |||
| Value | Depends on the type that you chose Enter/select the value of the parameter | |||||
| If you chose string | String | 500 char | Yes | |||
| If you chose bool | Boolean, SingleChoice | Yes | ||||
| If you chose integer | Int32 | 500 char | Yes |
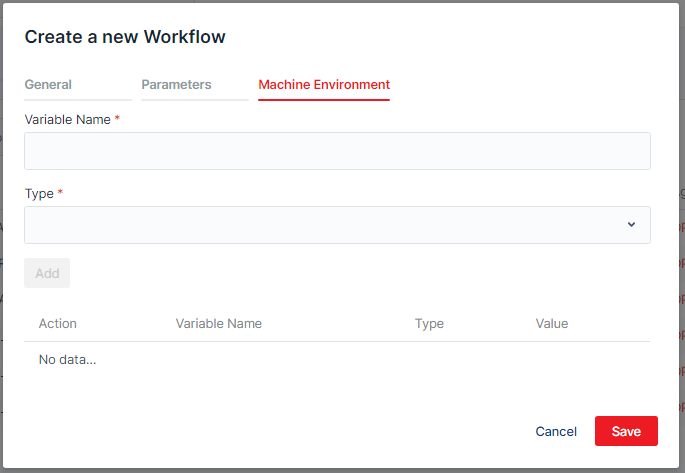
| No | Column /Label | Description | Type | Maximum | Is Mandatory? | Input Requirement |
|---|---|---|---|---|---|---|
| 1 | Variable Name | Enter the name of the variable | String | 255 char | Yes | |
| 2 | Type | Select the type of the variable | Dropdown list | Yes | ||
| 3 | Value | Depends on type that you chose Enter/select the value of the variable | Yes | |||
| If you chose string | String | 500 char | Yes | |||
| If you chose bool | Boolean, SingleChoice | Yes | ||||
| If you chose integer | Int32 | 500 char | Yes |
d. Edit a Workflow
To edit a workflow, you click the Three dots button, then click Edit.
After clicking, the system shows a form allowing you to edit the info of the workflow.
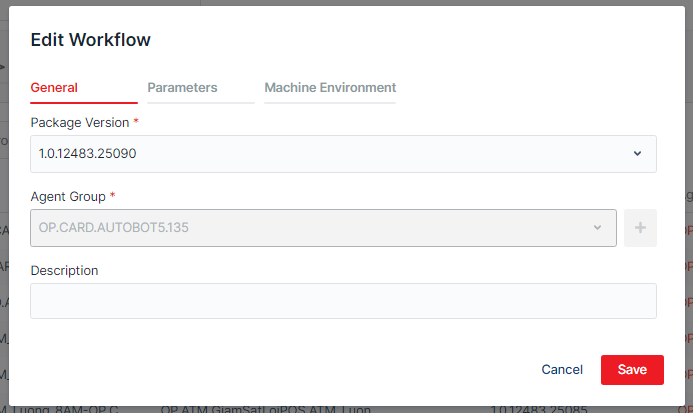
| No | Column /Label | Description | Type | Maximum | Is Mandatory? | Input Requirement |
|---|---|---|---|---|---|---|
| 1 | Package Version | Depends on the package that you chose above Select the version of the package you chose | Dropdown list | Yes | ||
| 2 | Agent Group | Depends on the package version that you chose Select the agent group that you want to attach the workflow that you are creating to | Can not edit | |||
| 3 | Description | Enter the description of the workflow you are creating/editing | Can not edit |
Once edit package version, you can edit further Parameters and Machine Environment variables to the Workflow. You can add multiple variables, but you can only add one by one (same as above).
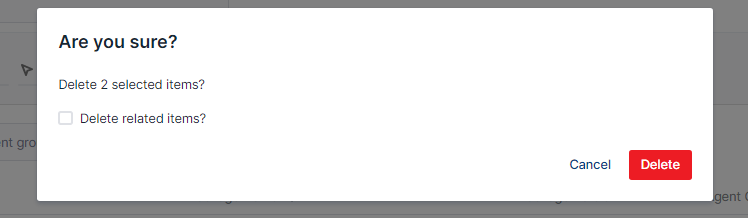
e. Delete a Workflow
To delete, you click the Three dots button, then click Delete.
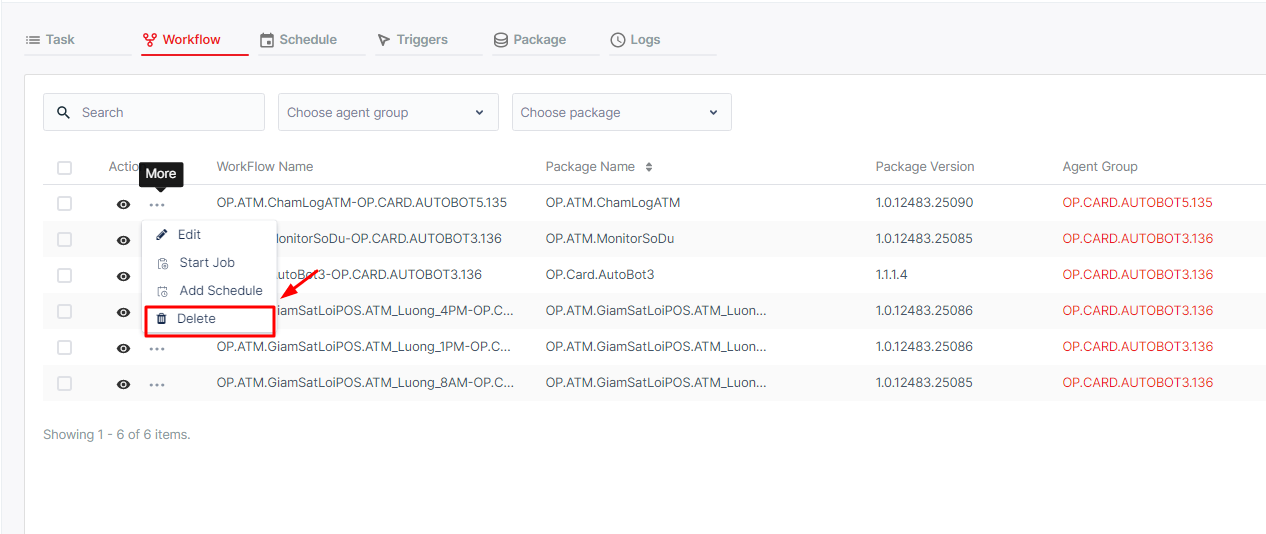
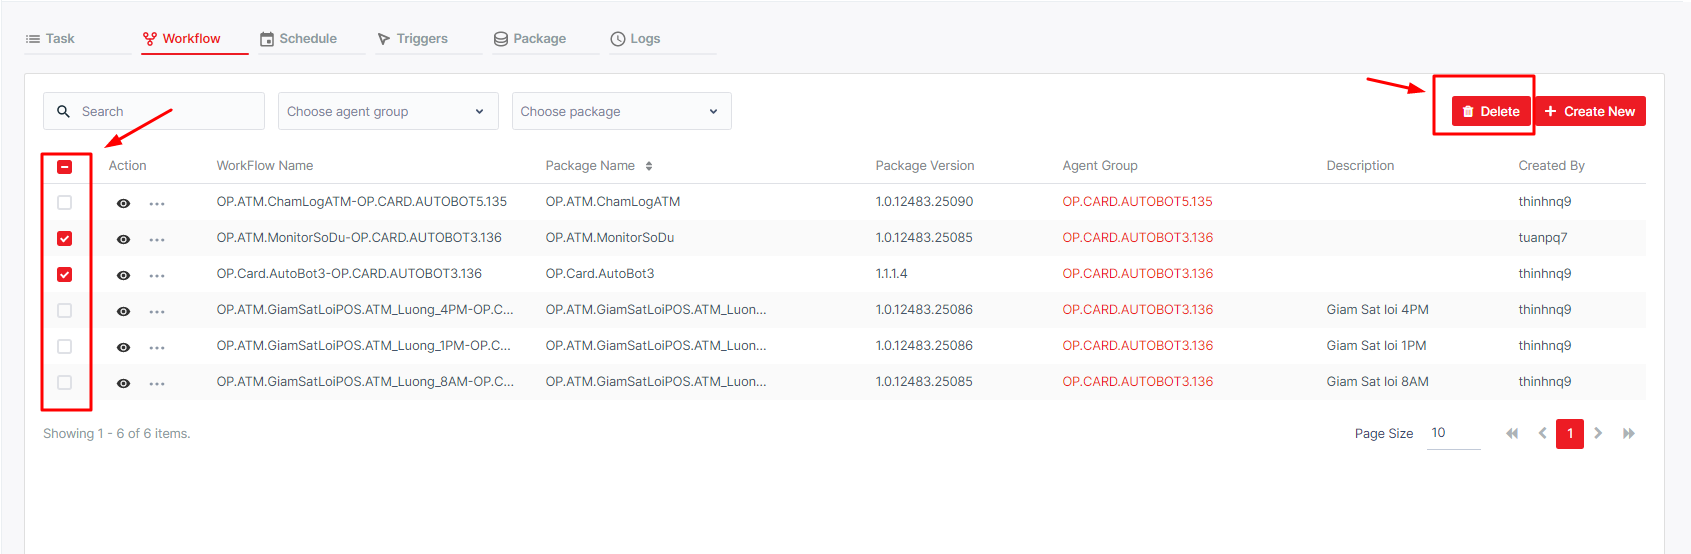
Alternatively, you can select the checkbox before each Workflow and the Delete button will show up next to the Filter button. Tick the Checkbox next to Action will allow the user to select all displayed Agent for bulk delete.
After clicking, a system will show a confirmation message for you to confirm.