An Agent is an execution host that runs processes that are built in akaBot Studio.
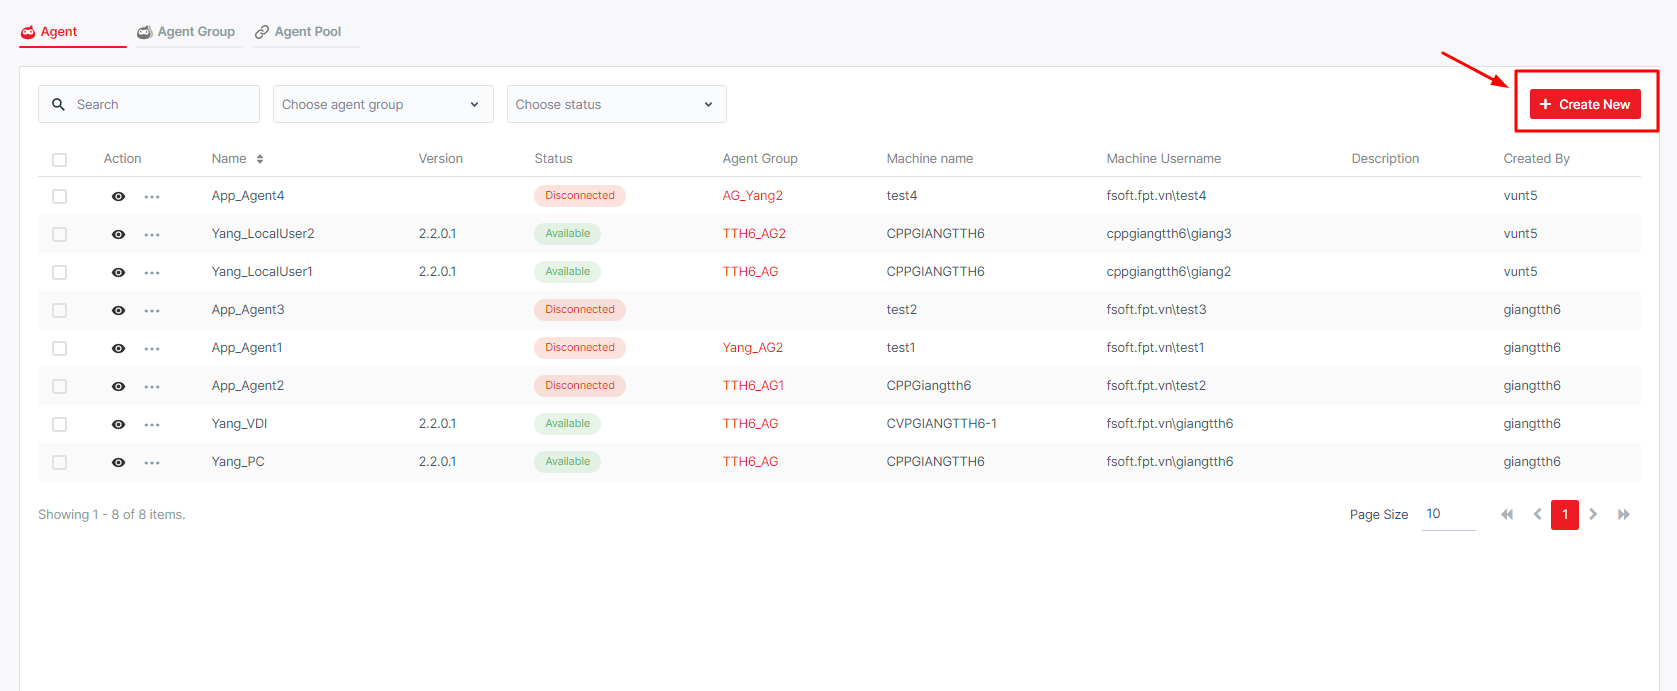
The Agents page allows you to add Agents, edit them, and examine their status as well as the change runtime settings and the Agent Group to which they are assigned.
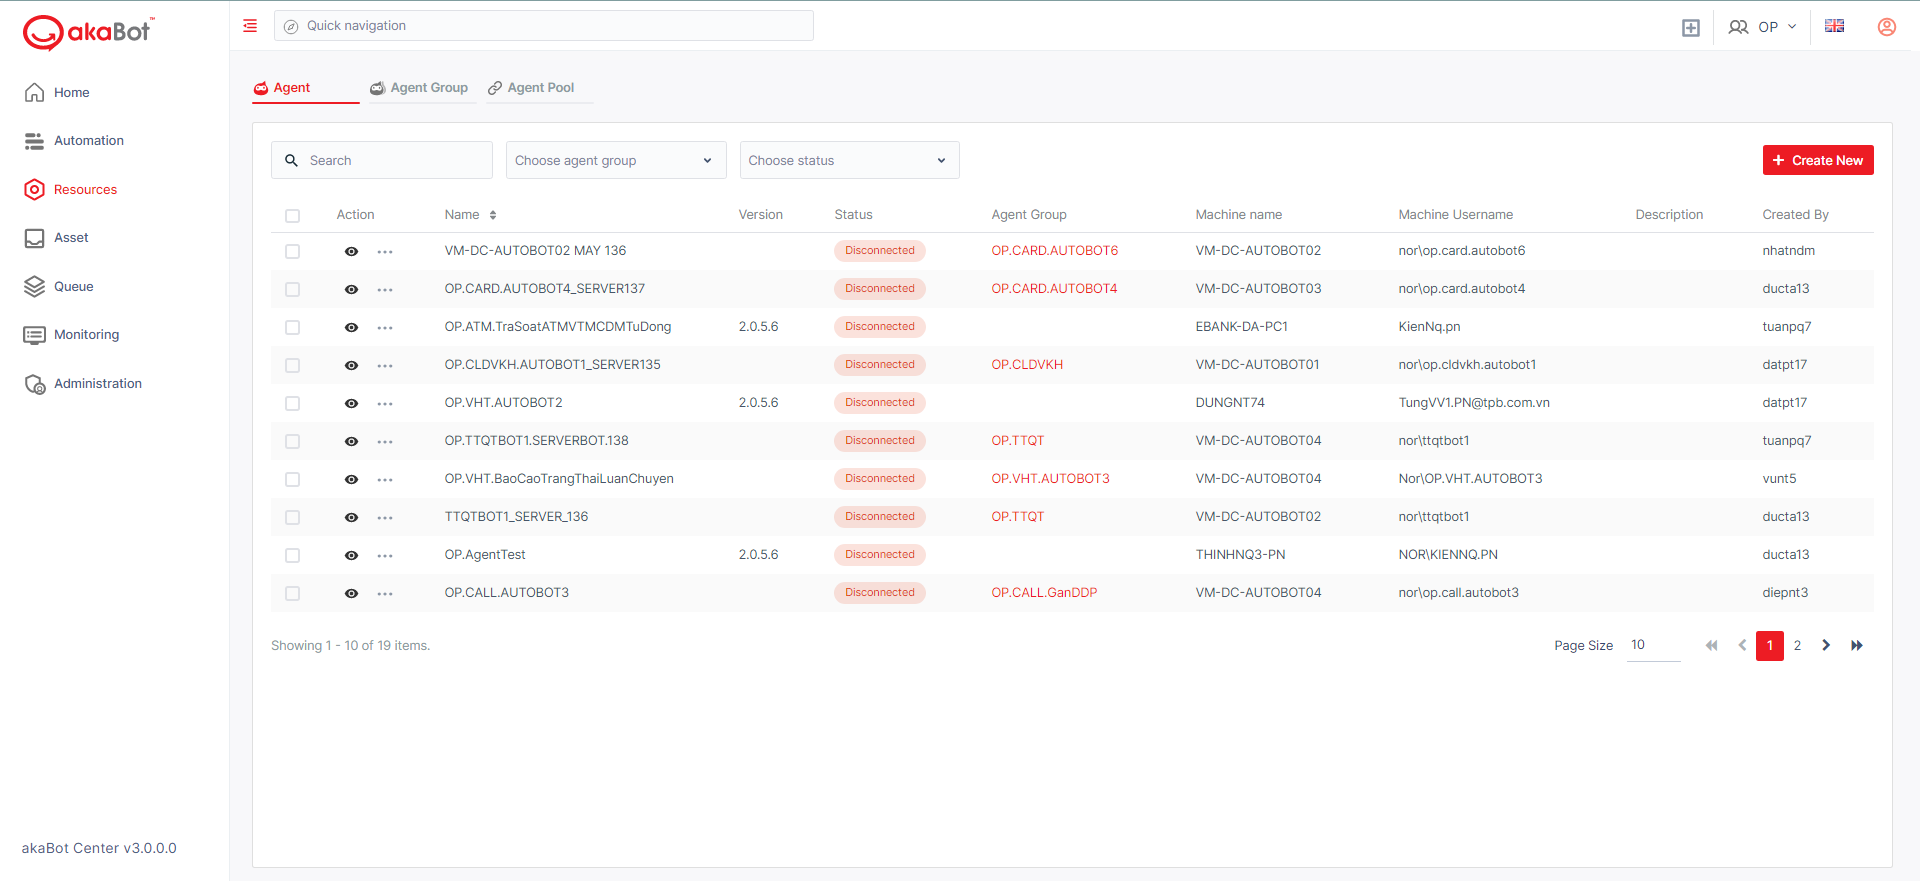
Note: When the status of an Agent is busy (executing a process), you cannot edit the Username, Machine, or Type. To access the Agent page, click “Agent” tab in the left menu. After clicking, the system shows the Agent page listing all existed Agents as below.
| No | Column/Label | Description |
|---|---|---|
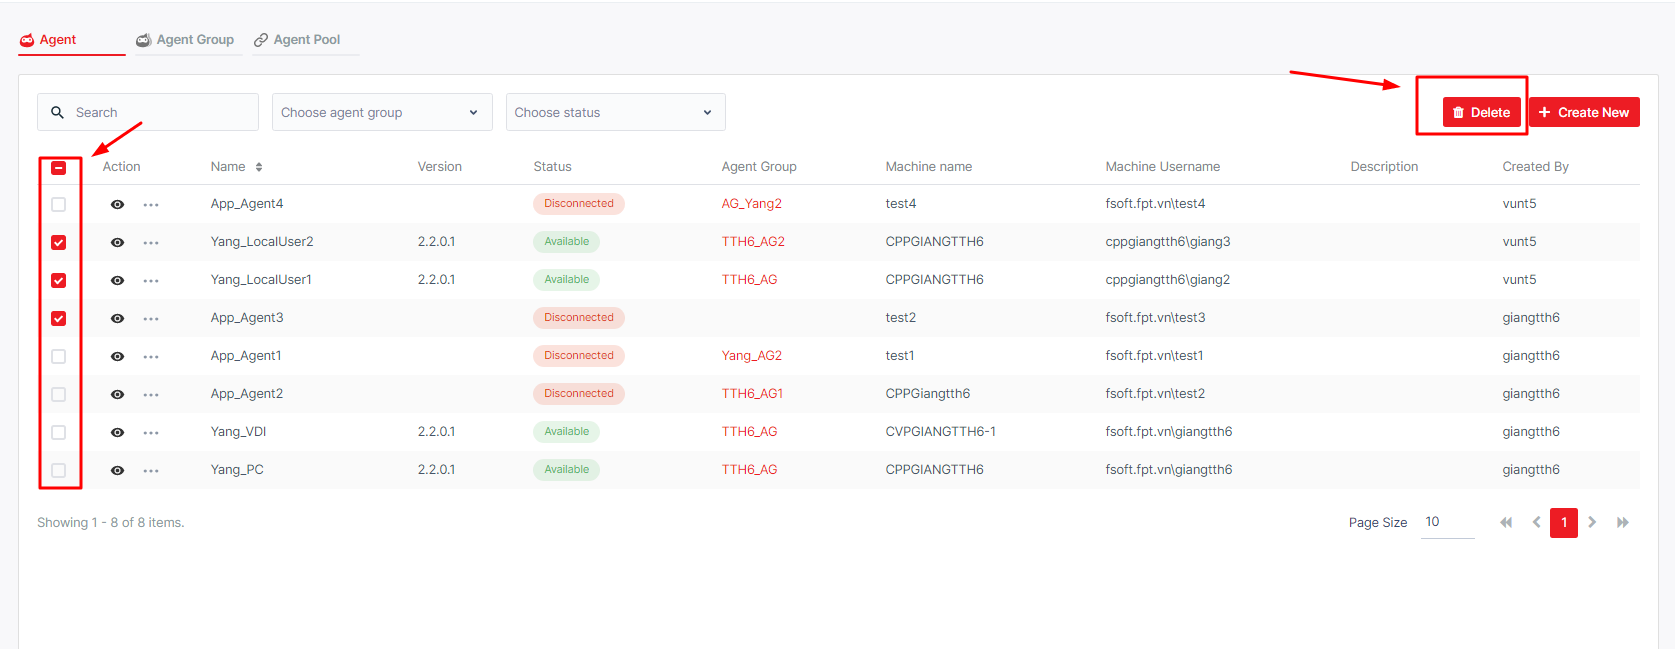
| 1 | Action | Available actions to manage the Agent. Includes: Edit: allows you to edit the details of each Agent Delete: allows you to remove selected Agent from the Center By selecting the Checkbox on each Agent, the delete option will appear beside the Filter option and allow you to delete the Agent from the Center ! Selecting the Checkbox next to Action will select all Agents in display and allow you to bulk delete selected them. |
| 2 | Name | The name of the Agent. You can click the name of the Agent the view its details. |
| Version | The installed version of the akaBot Agent tool in the local machine | |
| Status | The current status of the Agent. AVAILABLE - the Agent is connected to the Center, not running any process and is free to be used BUSY - the Agent is running a process. DISCONNECTED- the Agent and Center have not communicated in the last 10 seconds. | |
| Agent Group | The Agent Group to which the Agent belongs. | |
| Machine name | The name of the machine the Agent is registered on. | |
| Machine Username | The username used to log in to the Agent machine | |
| Description | Description of the Agent | |
| Created by | The user who created the Agent |
a. View an Agent
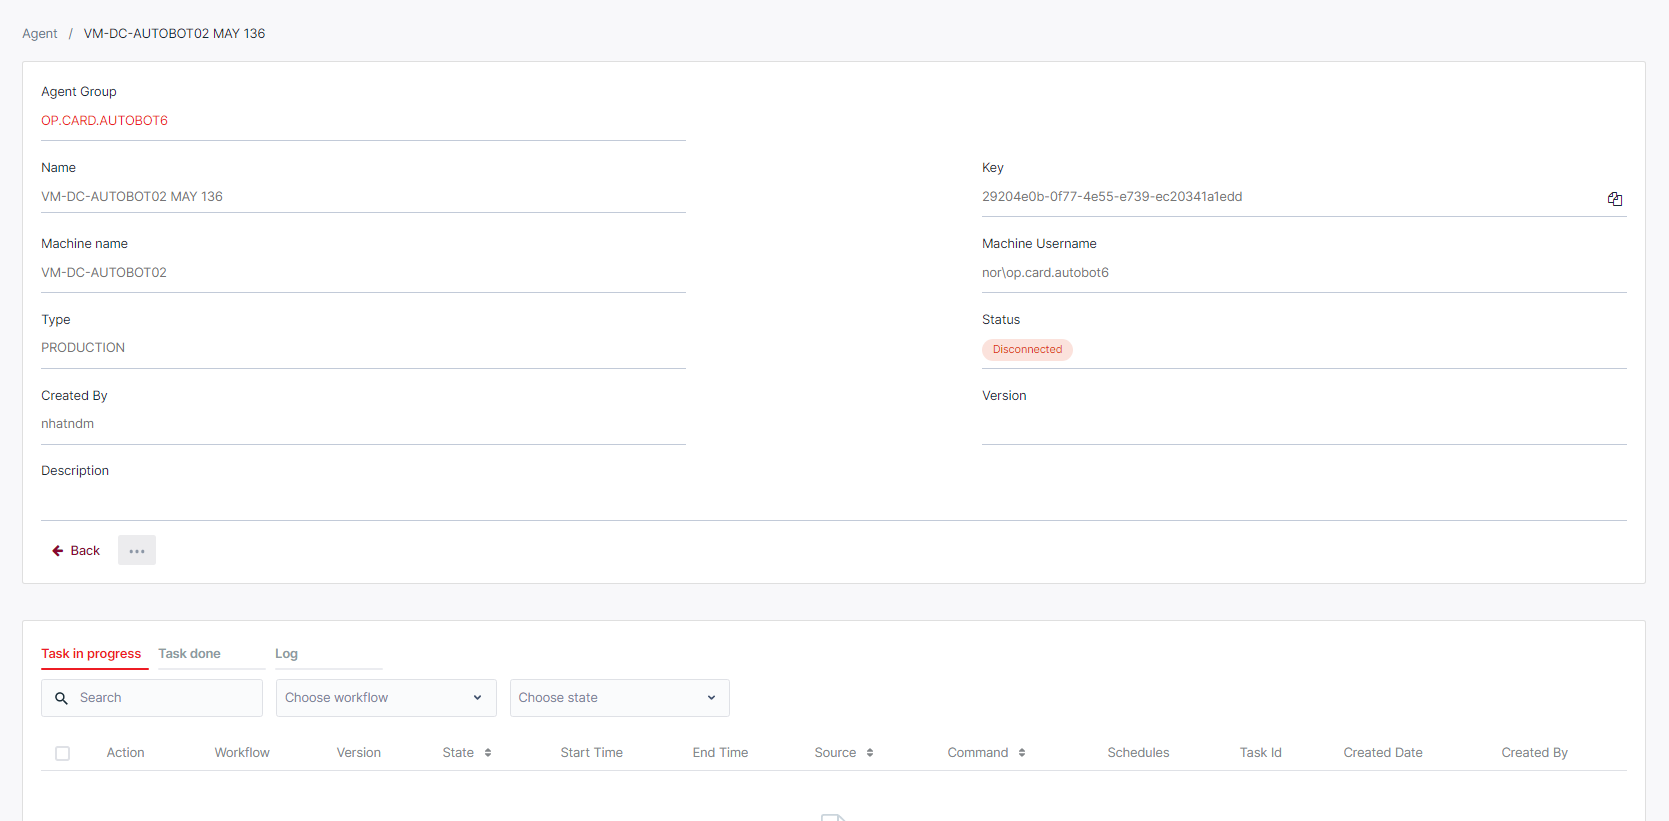
You can view the details of the Agent by clicking the eye button.
| No | Column/Label | Description |
|---|---|---|
| 1 | Agent Group | The Agent Group to which the Agent belongs. |
| 2 | Name | The name of the Agent. You can click the name of the Agent the view its details. |
| 3 | Machine name | The name of the machine the Agent is registered on. |
| 4 | Machine Username | The username used to log in to the Agent machine |
| 5 | Type | The type of Agent. This can be only Development, Assistant, Staging, Production. It is possible to filter the page according to the Agent type. |
| 6 | Status | The current status of the Agent. AVAILABLE - the Agent is connected to Center, not running any process and is free to be used BUSY - the Agent is running a process. DISCONNECTED - the Agent and Center have not communicated in the last 10 seconds. |
| 7 | Description | Description of the Agent |
| 8 | Version | The installed version of the akaBot Agent tool in the local machine |
| 9 | Created by | The user which created the Agent. |
Besides details regarding the Agent, all the tasks, logs, and connection verification status of the Agent can also be found here.
b. View an Agent's tasks
At the bottom of the Details page, you can see a list of all the tasks that are executed by this specific Agent.
Details regarding Tasks shall be explained in the Task sections.
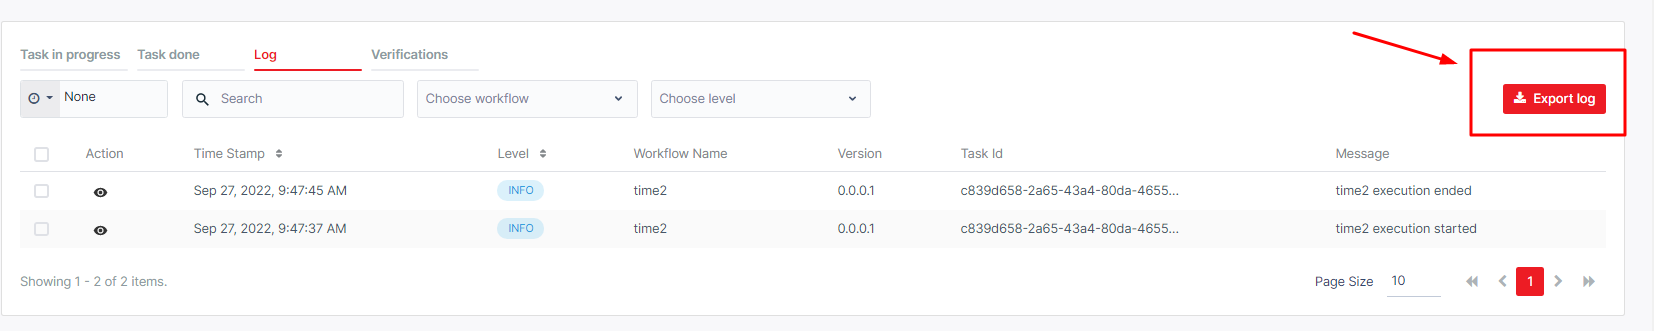
c. View an Agent's log
To view the Agent’s logs from the Agent Details page, click the Log tab next to the Task tab to switch the view.
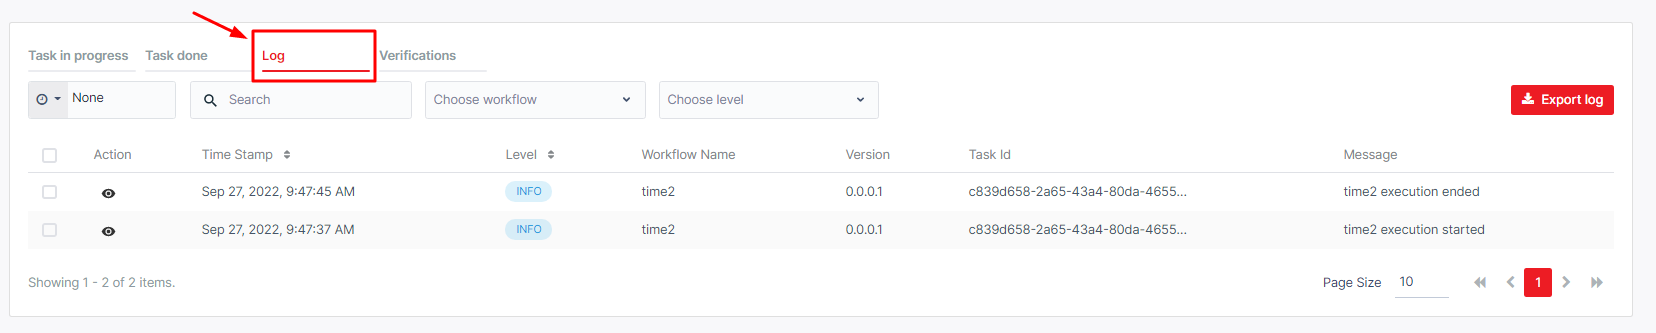
You can also Export Log for further investigation by clicking the Export Log option next to the Filter button. You can export all Logs or specific filtered Log Items.
- Verify the Agent Connection
To make sure the Center and Agent are correctly connected with a valid username and password, you can click on the Verify button.
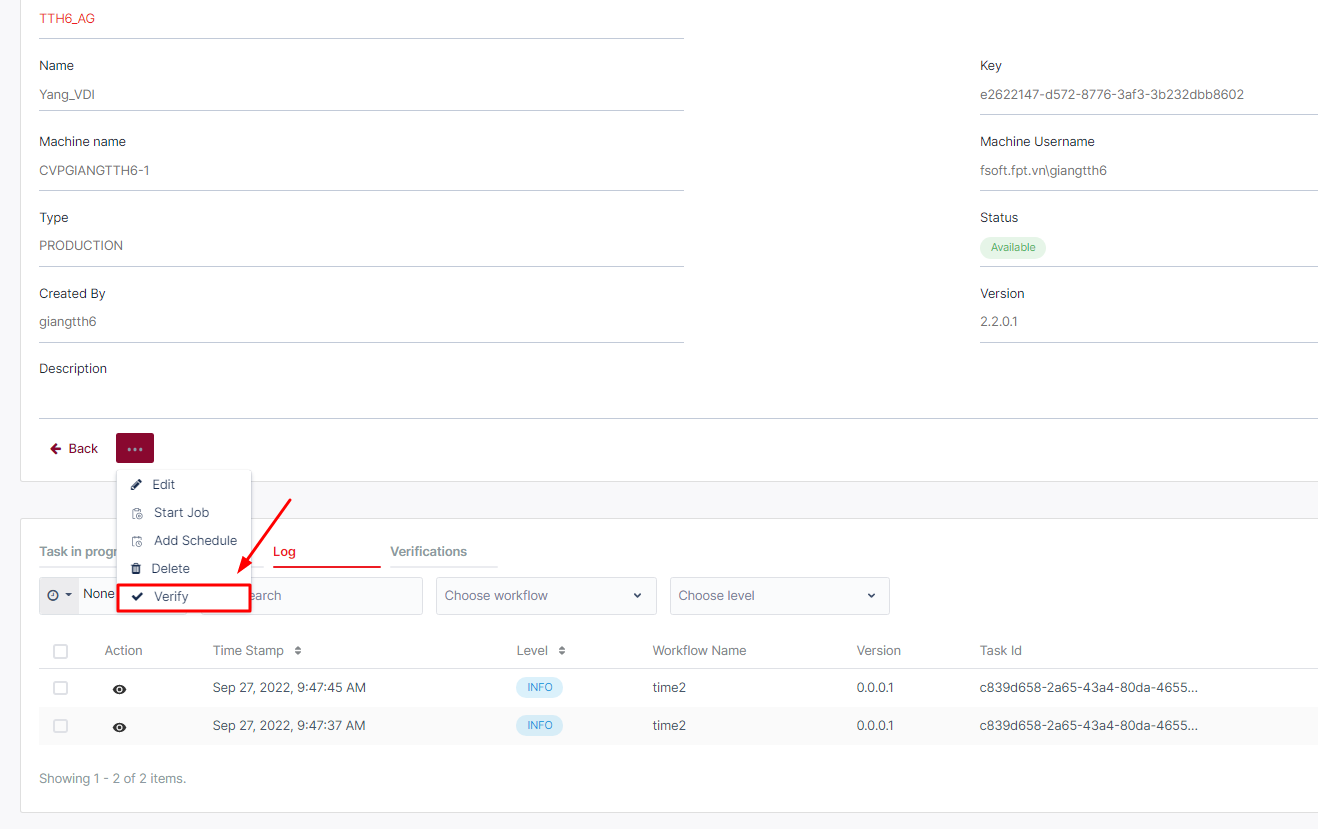
If the user clicks this button when the Agent is connected, an ID/Password authentication check will be performed to determine if the ID/Password is correct and can be logged in.
There are three possible verification task states:
- PENDING: the verification task was created and waiting for verification from the agent
- SUCCESSFUL: the agent was verified and the username password was correct
- FAULTED: the agent was verified and the username password was incorrect
Verification tasks and verify button will be updated in real-time. When there is a pending verification task on the verification tab, verify button will be disabled.
When the user clicks on verify button, the verification tab will be opened automatically and there is also a "Verifying..." notification shown in the top right corner.
To view all the Verification requests created, go to the Agent tab > View agent detail > Select Verification tab.

d. Create/Update an Agent
The first step of connecting an Agent to the Center is to create an Agent in the Center.
Notes: You are unable to edit an Agent with status = BUSY (executing a task). To create a new Agent, you should click the “Create New” button on the top right corner of the screen
To edit an Agent, you should click the Edit button of one Agent in the list. Alternatively, you can click the Edit button on the Detail Page of the Agent.

After clicking, the system shows a popup allowing you to fill properties to create/edit a new Agent. You need to fill in all the necessary info in the form below.
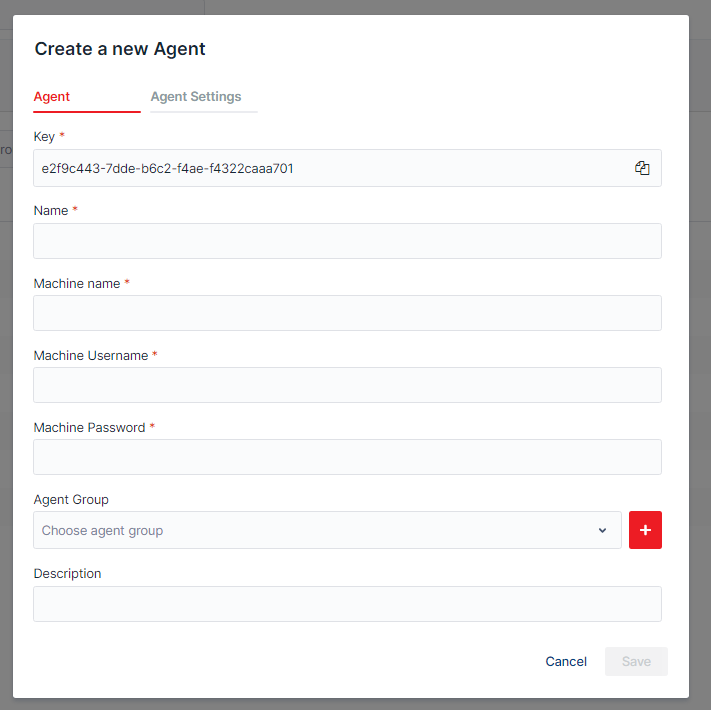
Agent tab
| No | Column /Label | Description | Type | Maximum | Is Mandatory? | Input Requirement |
|---|---|---|---|---|---|---|
| 1 | Key | This is the identification of one agent. You will input this key into the Agent Key field in your local Agent. | String | 50 char | Yes | This field is auto-generated by the system |
| 2 | Name | Enter the name of the agent you want to create/edit | String | 50 char | Yes | |
| 3 | Machine Name | Enter the name of the computer on which the Agent is deployed | String | 50 char | Yes | |
| 4 | Machine Username | Enter the username used to log in to the computer which is mentioned above | String | 50 char | No | |
| 5 | Machine Password | Enter the password used to log in to the computer which is mentioned above | String | 255 char | No | |
| 6 | Type | Select the type of the agent you want to create/edit. There are 4 different types you can choose: DEVELOPMENT, ASSISTANT, STAGING and PRODUCTION. | Dropdown list, SingleChoice | Yes | ||
| 7 | Description | Enter the description of the agent you want to create/edit | String | 500 char | No |
Agent Settings Tab
| No | Column /Label | Description | Type | Maximum | Is Mandatory? | Input Requirement |
|---|---|---|---|---|---|---|
| 1 | Console / RDP | akaBot executes workflow in an interactive Windows session. There are two types of Windows sessions the Robot can start: Console Session RDP Session | SingleChoice | Yes | ||
| 2 | Login To Console | This option allows the Agent connects to a Console session Only available if you chose RDP | Checkbox | No | ||
| 3 | Font Smoothing | This option enhances text recognition. Only available if you chose RDP | Checkbox | No limit | Optional | |
| 4 | Resolution Width / Height / Depth | This option allows users to set a custom resolution if the automation process is required. Only available if you chose rdp | Int32 (Number) | Optional | Greater than 0 | |
| 5 | Others | Other specific parameter for this Agent | String | No limit | Optional |
After filling the form, you click the Save button to record the Agent to the system.
Follow the instruction to connect the Agent to the Center using the Agent Key to complete the connection.
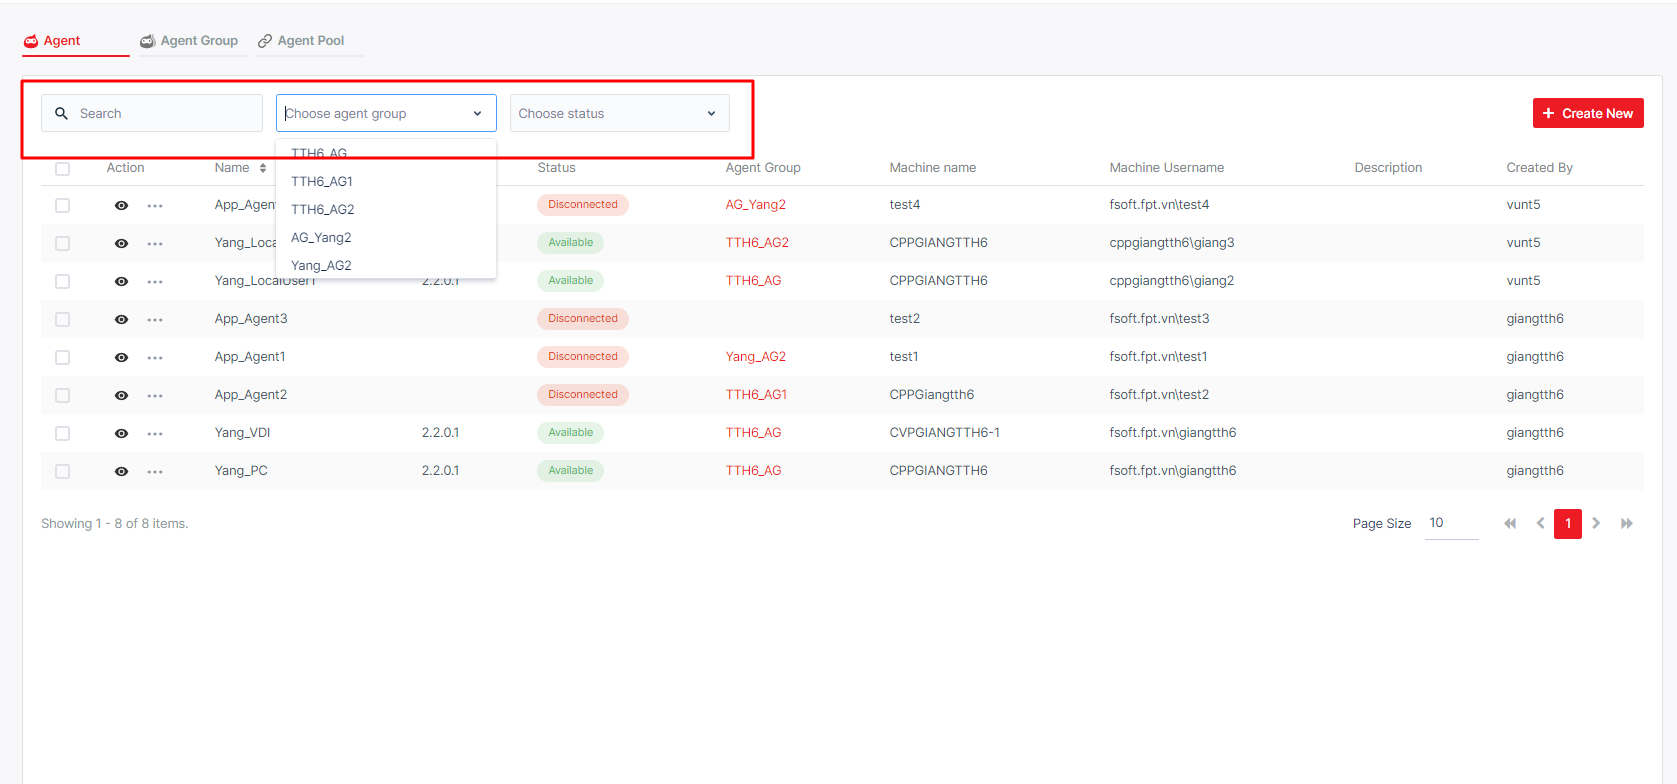
- Search for Agent
To search for the Agents you need, insert Agent name to search box of select Agent group, Status to find:
e. Delete an Agent
To delete, you need to click the Delete button.
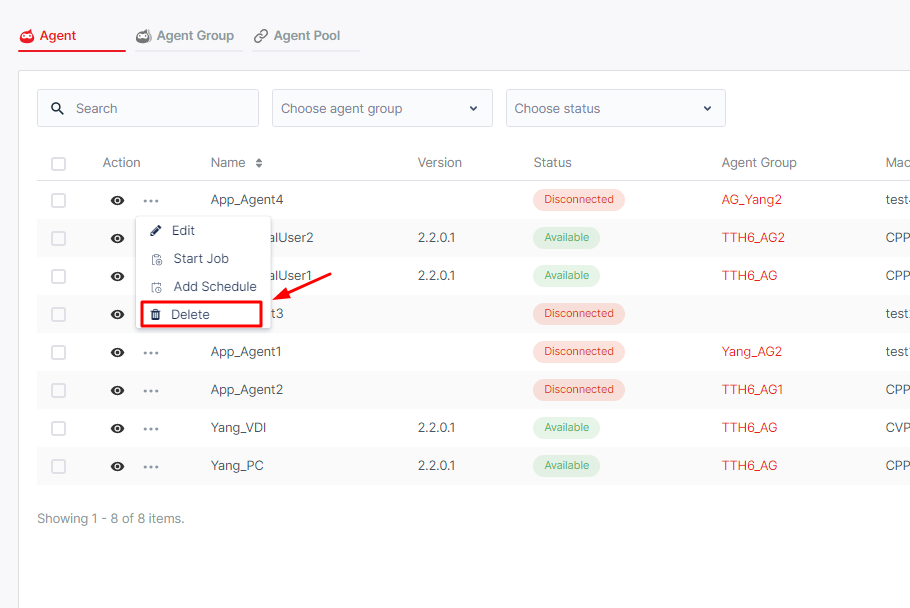
Alternatively, you can select the checkbox before each Agent and the Delete button will show up next to the Create Newr button. Tick the Checkbox next to Action will allow users to select all displayed Agent for bulk delete.