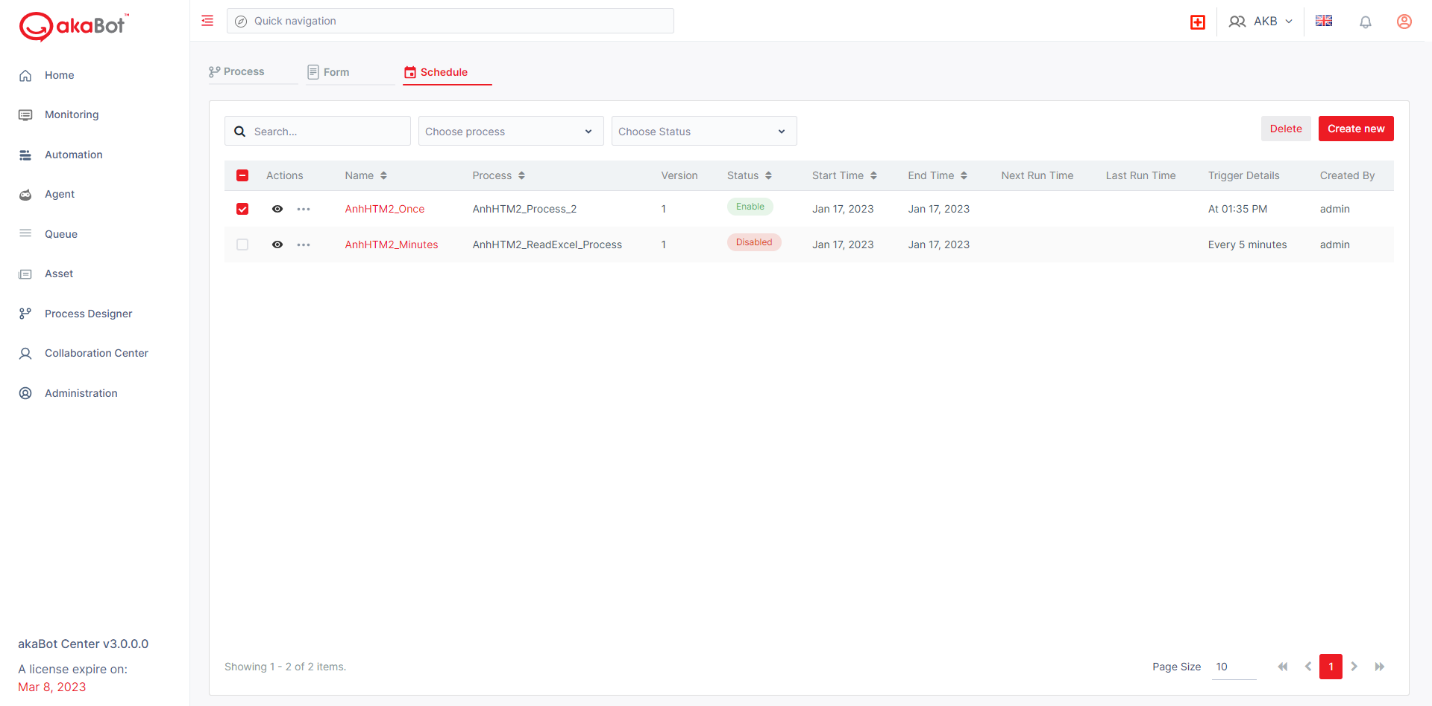
Schedule function allows users to run planned processes. The purpose of Schedule is to manage schedule lists and create new schedules. To access the Schedule section, select Process Designer, and then select the Schedule item.

1. Create a new Schedule
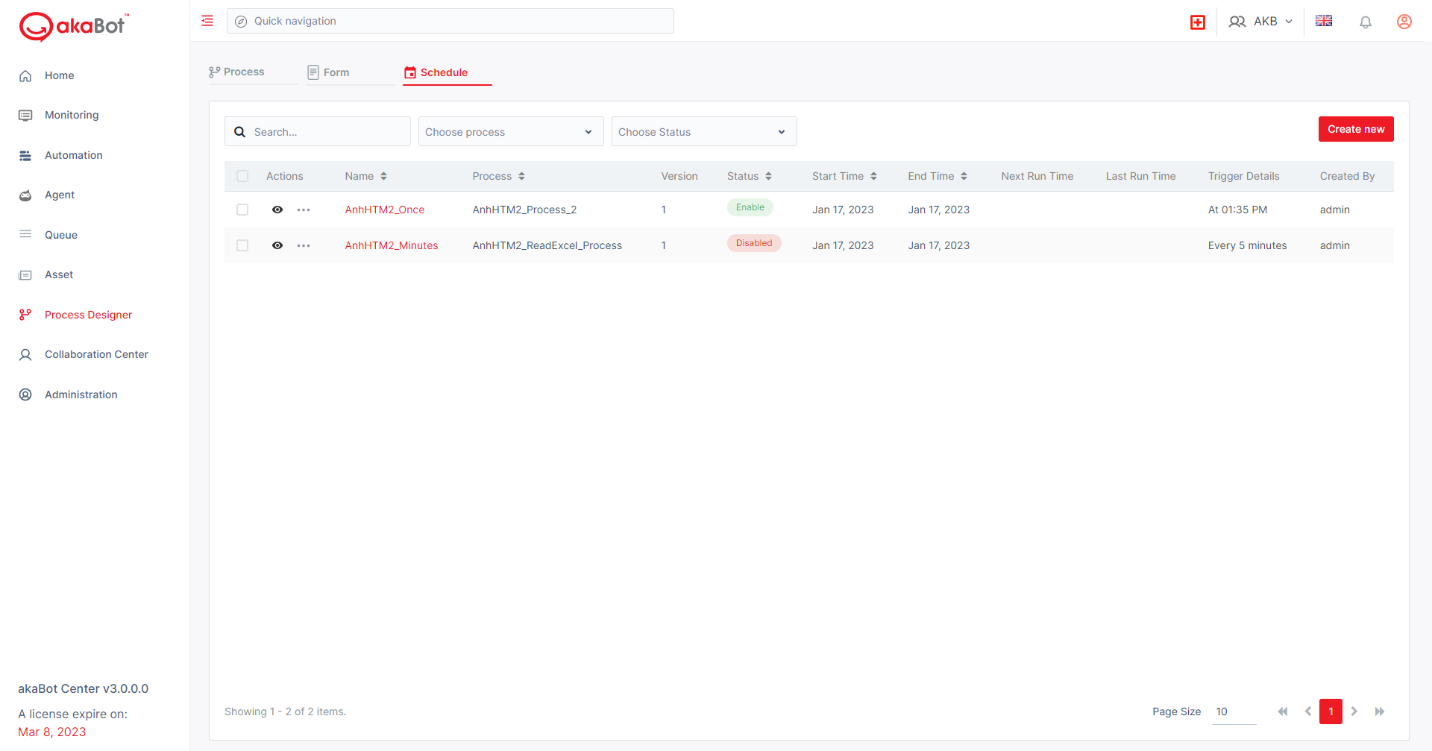
To create a new schedule, click Create New button.
Then fill in the pop-up window, and select Save.
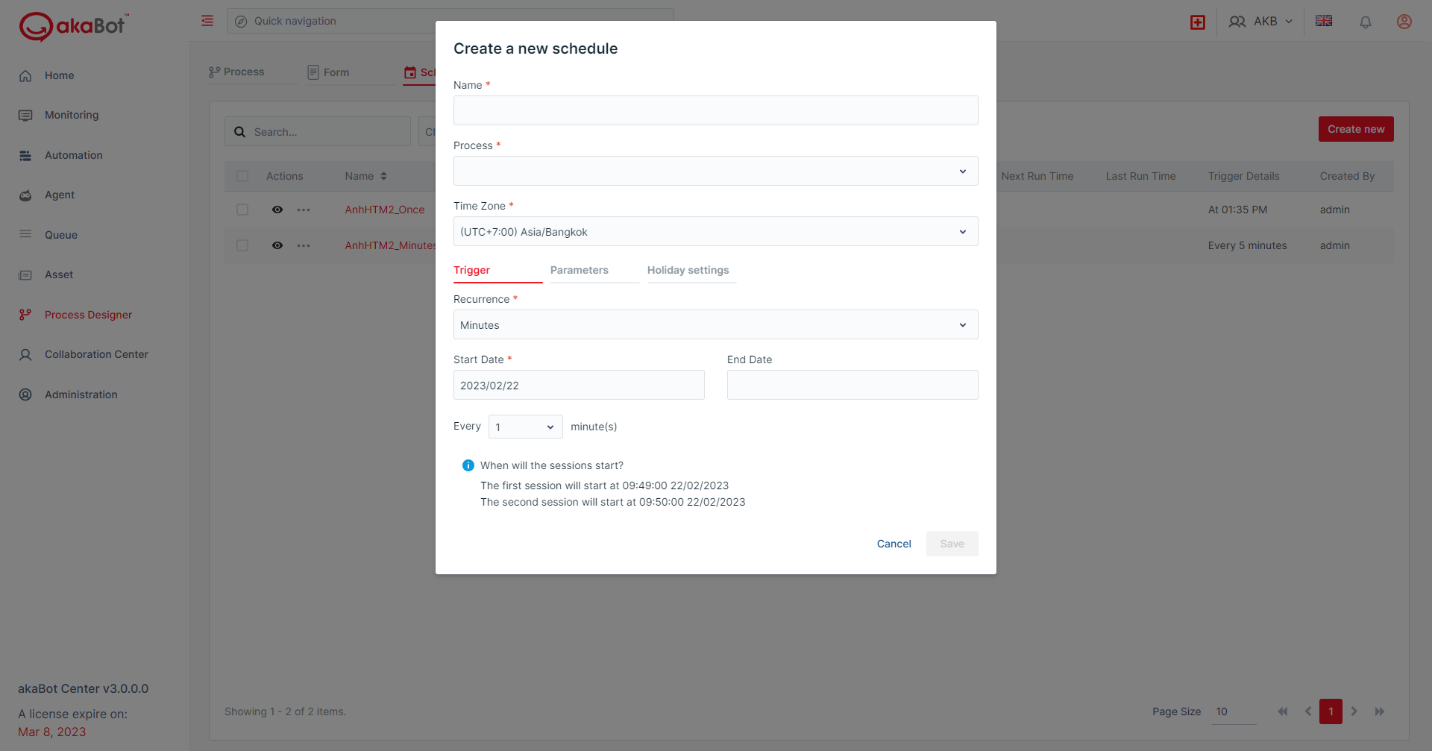
Description of Agent schedule configuration fields is displayed in below table:
| Field | Description | Type | Required? | Note |
| Name | Name of schedule | String | Yes | |
| Process | Choose the process what you want to set schedule | Combo box | Yes | |
| Time Zone | Choose time zone | Dropdown list | Yes | |
| Trigger* | ||||
| Recurrence | Select the cycle for the schedule by: Minute/ Hourly/ Daily/ Weekly/ Monthly/ Advanced | Dropdown list | Yes | The configuration options below will be displayed according to the respective schedule cycle. |
| Once | ||||
| Start Date | Choose run date | Date | Yes | |
| At | Choose run time | Time | Yes | |
| Minutes | ||||
| Start Date | Choose start date | Date | Yes | |
| End Date | Choose end date | Date | No | |
| Every | Choose cycle in minute | Dropdown list | Yes | |
| Hourly | ||||
| Start Date | Choose start date | Date | Yes | |
| End Date | Choose end date | Date | No | |
| Every | Choose cycle in hour | Dropdown list | Yes | |
| Daily | ||||
| Start Date | Choose start date | Date | Yes | |
| End Date | Choose end date | Date | No | |
| At | Choose the time of day | Time | Yes | |
| Weekly | ||||
| Start Date | Choose start date | Date | Yes | |
| End Date | Choose end date | Date | No | |
| Every day at | Choose the time of day | Time | Yes | |
| Every week on | Choose the day of week | Checkbox | No | |
| Monthly | ||||
| Start Date | Choose start date | Date | Yes | |
| End Date | Choose end date | Date | No | |
| Every day at | Choose the time of day | Time | Yes | |
| On | Choose the day of month | Radio buttons & Dropdown list | Yes | There are 2 options:
|
| Of | Choose the month of year | Checkbox | No | |
| Advanced | ||||
| Start Date | Choose start date | Date | Yes | |
| End Date | Choose end date | Date | No | |
| Cron Expression | A string consisting of 6 or 7 space-separated fields that allows users to create a CronTrigger to re-trigger a schedule | Textbox | No | |
| Parameters | No | |||
| Holiday Settings | Holiday schedule | Radio buttons | Yes | There are 3 options:
|
2. Manage Schedule list
a. Search on schedule list

To search for a specific schedule in the list, enter the name of the schedule you want to search in the Search box.
To filter out the running schedules for a specific process in the list, enter a name and/or select the process drop-down in the Choose Process box.
To filter out running or shutting down schedules in the list, enter a status name and/or select the status drop-down in the Choose Status box.
b. Manage Schedule List
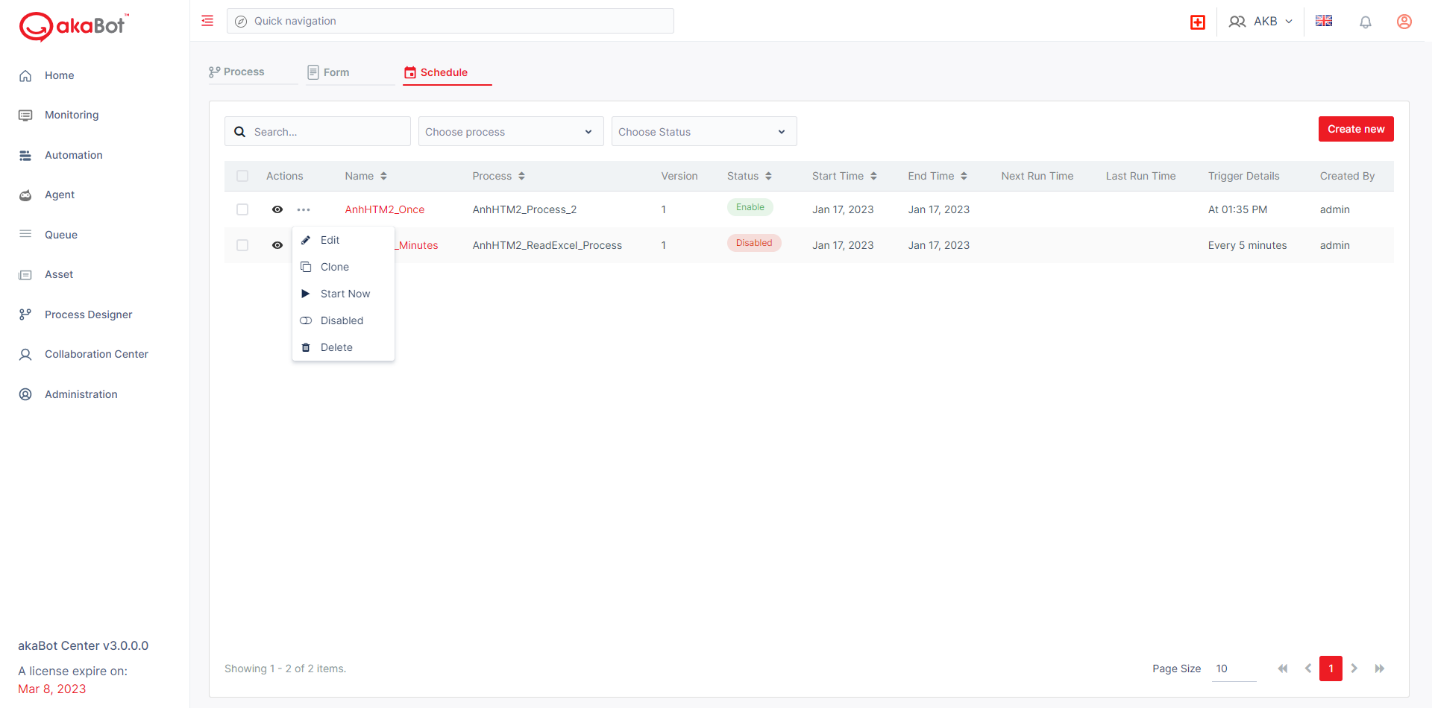
To review the configuration of a particular schedule in the list, select  , select Cancel to close the configuration window and return to the main screen.
To edit the profile of a particular schedule in the list, select  , select Edit, change the desired profile, and then select Save.
To copy a specific schedule in the list, select  , select Clone, change the schedule name with the Name (required) and End Date fields in the Trigger field, and then select Save.
To start running a specific schedule in the list, select  , select Start Now, and then select OK in the confirmation window.
To disable a specific schedule in the list, select  , select Disabled, and then select OK in the confirmation window.
To delete a specific item in the list, select  , select Delete, and then select Delete in the confirmation window.
To delete multiple schedules in the list at the same time, check tickbox  at the top of all schedules, select Delete, and then select Confirm in the confirmation window.